Introduction
If you have just bought your skateboard deck, strip the plastic from it and remove any stickers that are on the top of the deck where the grip tape will be applied. Be sure to have all of your tools and materials close by to make the installation process faster and more efficient.
Ce dont vous avez besoin
-
-
-
Peel off the paper backing from the sheet of grip tape.
 Demander à FixBot
-
-
-
Center the sheet of grip tape evenly over the top of the skateboard deck.
-
-
-
Starting from the very middle and moving outward, firmly press down on the grip tape while smoothing out any air bubbles that start to form.
-
-
-
-
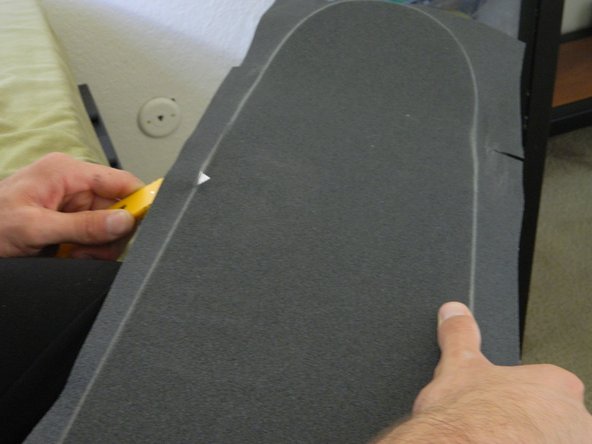
Use a screwdriver to scrape along the edges of the skateboard. This will remove some of the grip around the edges making the trimming process easier on you and your equipment.
-
You can use the utility knife to cut a perpendicular line in the excess grip tape if it is resisting the screwdriver too much.
-
-
-
Use a utility knife to begin cutting around the edge of your skateboard to remove excess grip tape.
-
-
-
Once you have removed all of the excess grip tape, you can use the scraps to sand the edges of your cut to smooth out any small inconsistencies.
-
-
-
If air bubbles persist, gently use a utility knife to poke a small hole in the grip tape at the center of the bubble and press out the air.
-
-
-
After you have finished applying your grip tape, you can use a small screwdriver to poke holes where your truck hardware will be installed.
-
-






The next logical step in the assembly of a skateboard is to install skateboard trucks, please reference the Truck Installation guide.
Annulation : je n'ai pas terminé ce tutoriel.
4 autres ont terminé cette réparation.

Équipe

Cal Poly, Team 6-32, Regan Fall 2012 Membre de l'équipe Cal Poly, Team 6-32, Regan Fall 2012
CPSU-REGAN-F12S6G32
5 membres
6 tutoriels rédigés
