Aller au contenu principal
Pour réparer ensemble - Je crée un compte

HMD Barbie Keypad Replacement

Ce dont vous avez besoin

  1. HMD Barbie Keypad Replacement, Battery: étape 1, image 1 de 3 HMD Barbie Keypad Replacement, Battery: étape 1, image 2 de 3 HMD Barbie Keypad Replacement, Battery: étape 1, image 3 de 3
    • Fully power off the phone.

    • Remove the backplate by gripping it around the edges and pulling away from the phone.

    Demander à FixBot

    Ajouter un commentaire

  2. HMD Barbie Keypad Replacement: étape 2, image 1 de 3 HMD Barbie Keypad Replacement: étape 2, image 2 de 3 HMD Barbie Keypad Replacement: étape 2, image 3 de 3
    • Grip the battery from the top and pull away from the phone.

    • Ensure there is no swelling or damage to the battery. A swollen or damaged battery can be a fire hazard.

    Demander à FixBot

    Ajouter un commentaire

  3. HMD Barbie Keypad Replacement, Inner Backplate: étape 3, image 1 de 1
    • Remove the six 5mm screws using the T5 Torx screwdriver.

    Demander à FixBot

    Ajouter un commentaire

  4. HMD Barbie Keypad Replacement: étape 4, image 1 de 2 HMD Barbie Keypad Replacement: étape 4, image 2 de 2
    • Remove the backplate using an opening tool.

    • Find an opening on the phone that makes it easiest to remove the backplate. Any side of the phone will work.

    Demander à FixBot

    Ajouter un commentaire

  5. HMD Barbie Keypad Replacement, Motherboard: étape 5, image 1 de 3 HMD Barbie Keypad Replacement, Motherboard: étape 5, image 2 de 3 HMD Barbie Keypad Replacement, Motherboard: étape 5, image 3 de 3
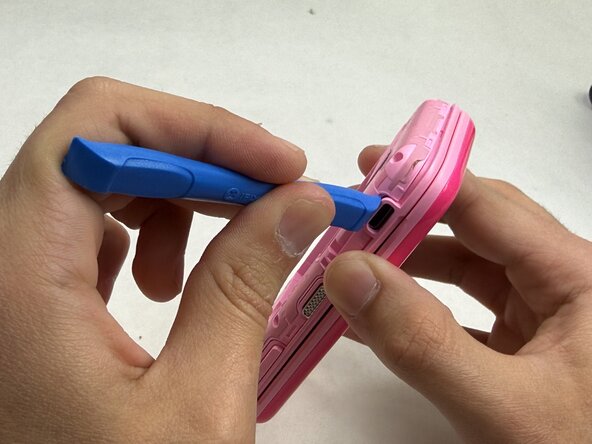
    • Use the opening tool to remove the clear plastic clip near the hinge of the phone securing the motherboard.

    Demander à FixBot

    Ajouter un commentaire

  6. HMD Barbie Keypad Replacement: étape 6, image 1 de 3 HMD Barbie Keypad Replacement: étape 6, image 2 de 3 HMD Barbie Keypad Replacement: étape 6, image 3 de 3
    • The video ribbon is connected to the motherboard with a flat-topped, low profile connector. It is also secured with a piece of tape.

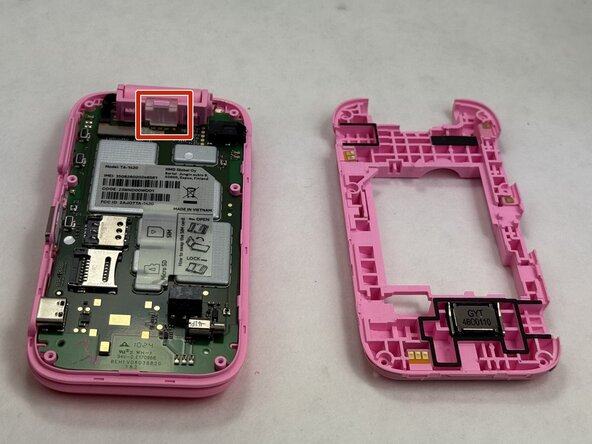
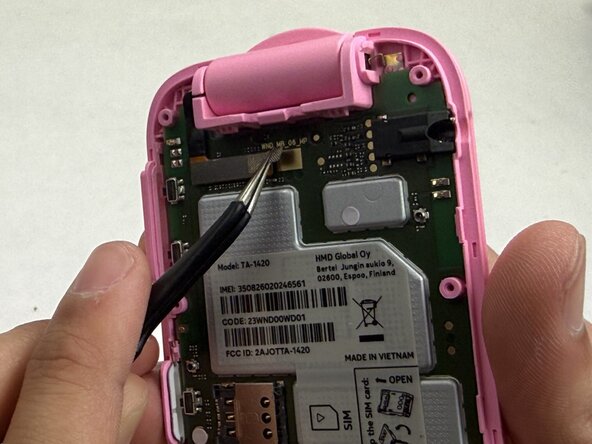
    • Use the tweezers to gently unstick the tape from the motherboard, leaving it stuck to the connector.

    • Use the tweezers to gently pull up on the connector until it disconnects from the motherboard.

    • Be gentle as you apply pressure on the tape and connector. These parts shouldn't take too much force to remove.

    Demander à FixBot

    Ajouter un commentaire

  7. HMD Barbie Keypad Replacement: étape 7, image 1 de 3 HMD Barbie Keypad Replacement: étape 7, image 2 de 3 HMD Barbie Keypad Replacement: étape 7, image 3 de 3
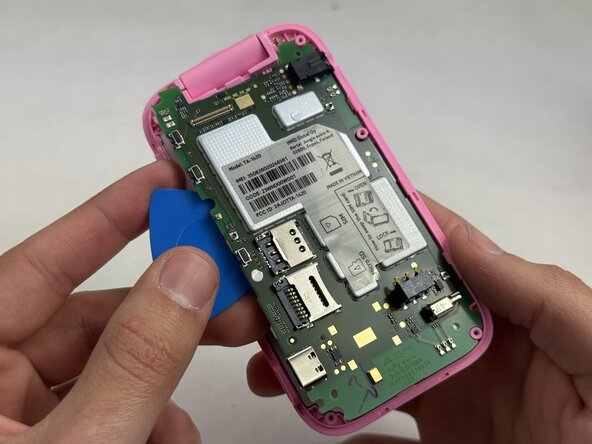
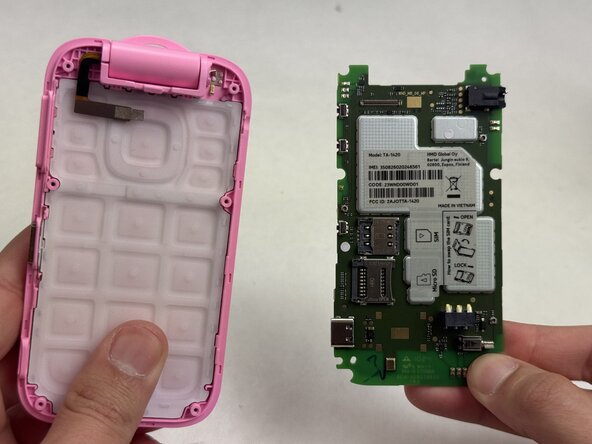
    • Beginning at the corner near where the video ribbon is located, insert an opening pick between the green motherboard and the pink housing.

    • Slowly work your way around the motherboard until it loosens enough that you can use your fingers to remove it.

    Demander à FixBot

    Ajouter un commentaire

  8. HMD Barbie Keypad Replacement, Keypad: étape 8, image 1 de 3 HMD Barbie Keypad Replacement, Keypad: étape 8, image 2 de 3 HMD Barbie Keypad Replacement, Keypad: étape 8, image 3 de 3
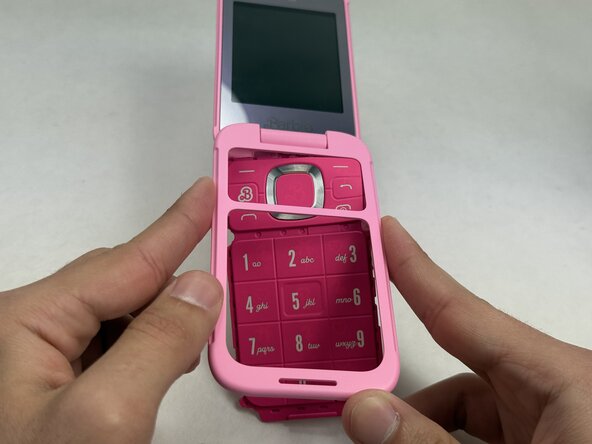
    • Push the keypad out of the outer casing from the front of the phone, outward.

    • You may now replace the keypad with a new one, inserting it where the old keypad was. Make sure to not obstruct any of the holes for screws with the keypad.

    Demander à FixBot

    Ajouter un commentaire

Conclusion

To reassemble your device, follow these instructions in reverse order.

Annulation : je n'ai pas terminé ce tutoriel.

Hannah Carvalho

Membre depuis le 03/09/26

571 Réputation

5 tutoriels rédigés

Équipe

UMass Dartmouth, Team 6-2, Botvin Spring 2026 Membre de l'équipe UMass Dartmouth, Team 6-2, Botvin Spring 2026

UMASSD-BOTVIN-S26S6G2

3 membres

5 tutoriels rédigés

0 commentaires de tutoriel

Ajouter un commentaire

Nombre de vues :

Dernières 24 heures : 1

7 derniers jours : 11

30 derniers jours : 35

Total : 69