Introduction
Use this guide to replace the LCD screen of your HP Stream 14-cf2112wm. If you are replacing the screen because you are having graphics issues, take a look at this troubleshooting guide first.
When replacing your screen, place your laptop on a soft cloth or towel to protect it from scratches.
Before you begin this repair, be sure to power off your laptop and unplug it from the charger.
Ce dont vous avez besoin
-
-
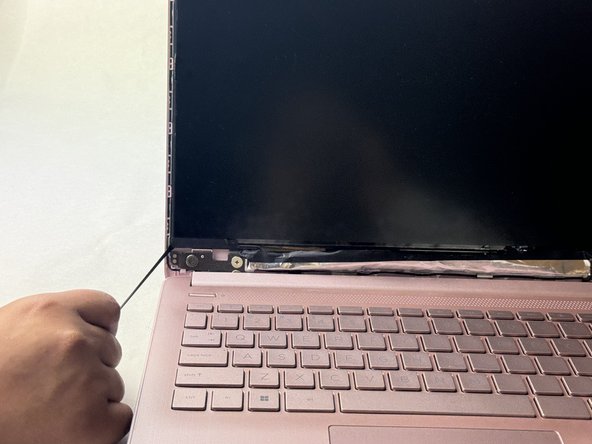
Use an opening pick to release the tabs and glue securing the bezel.
-
Gently work your way around the bezel with the pick and remove it from the screen.
-
Use the plastic pick to pry off the hinge cover and remove it.
-
Using both hands, gently pull the bezel away from the screen, unsnapping the tabs underneath as you go.
-
-
-
-
Peel off the clear tape from the connector.
-
Gently push the tip of a spudger under the metal buckle to unclip it, then swing it over the socket.
-
Hold the buckle and cable together and gently pull the connector straight out of its socket.
-
Grip the cable and buckle together and insert the connector fully into its socket.
-
Flip the buckle over the socket and use a spudger to press the buckle down until it clicks into place. Replace the tape to secure the connector.
-


To reassemble your device, follow these instructions in reverse order. Take your e-waste to an R2 or e-Stewards certified recycler.
To reassemble your device, follow these instructions in reverse order. Take your e-waste to an R2 or e-Stewards certified recycler.
Annulation : je n'ai pas terminé ce tutoriel.
Une autre personne a terminé cette réparation.

Équipe

UMass Dartmouth, Team 1-2, Konn Spring 2024 Membre de l'équipe UMass Dartmouth, Team 1-2, Konn Spring 2024
UMASSD-KONN-S24S1G2
4 membres
5 tutoriels rédigés