Aller au contenu principal

HP 14-cf2112wm Speakers Replacement

Ce dont vous avez besoin

  1. HP 14-cf2112wm Speakers Replacement, Back Cover: étape 1, image 1 de 1
    • Before you begin, shut down your laptop and disconnect all cables.

    • Turn the laptop over so the bottom case is facing up.

  2. HP 14-cf2112wm Speakers Replacement: étape 2, image 1 de 2 HP 14-cf2112wm Speakers Replacement: étape 2, image 2 de 2
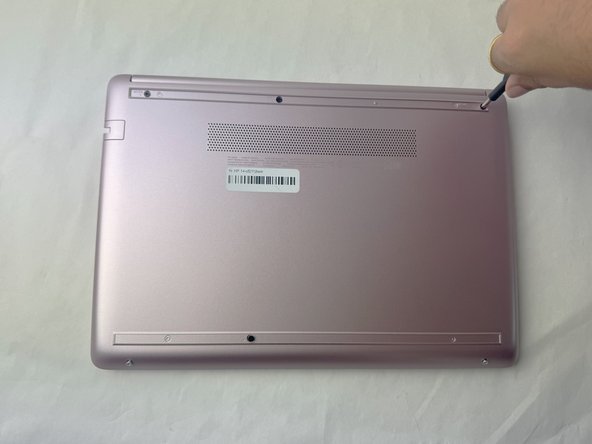
    • Use a spudger to pry under the end of the screw cover.

    • When the edge is lifted up, use your fingers to pull the rest of the strip off.

    • Try to keep the strip intact so you can replace it at reassembly.

  3. HP 14-cf2112wm Speakers Replacement: étape 3, image 1 de 2 HP 14-cf2112wm Speakers Replacement: étape 3, image 2 de 2
    • Use a Phillips #1 screwdriver to remove six 6 mm screws from the back case.

  4. HP 14-cf2112wm Speakers Replacement: étape 4, image 1 de 3 HP 14-cf2112wm Speakers Replacement: étape 4, image 2 de 3 HP 14-cf2112wm Speakers Replacement: étape 4, image 3 de 3
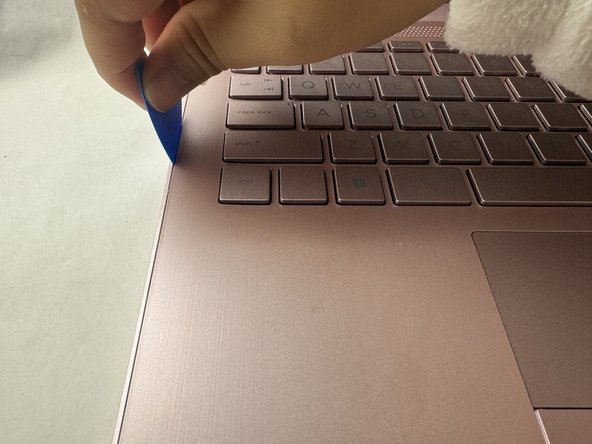
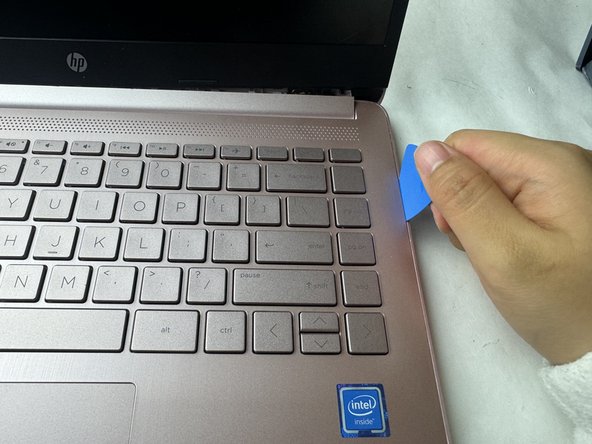
    • Use a pick or opening tool to pry along the edges of the back cover from the keyboard side of the laptop.

    • Be careful as the case edges are sharp.

  5. HP 14-cf2112wm Speakers Replacement: étape 5, image 1 de 1
    • Lift the back cover off the laptop.

  6. HP 14-cf2112wm Speakers Replacement, Battery: étape 6, image 1 de 3 HP 14-cf2112wm Speakers Replacement, Battery: étape 6, image 2 de 3 HP 14-cf2112wm Speakers Replacement, Battery: étape 6, image 3 de 3
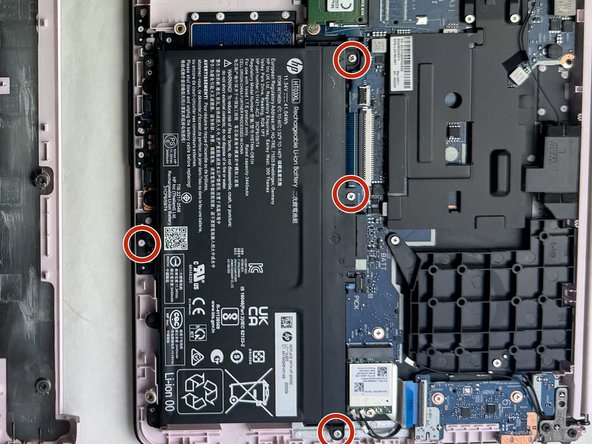
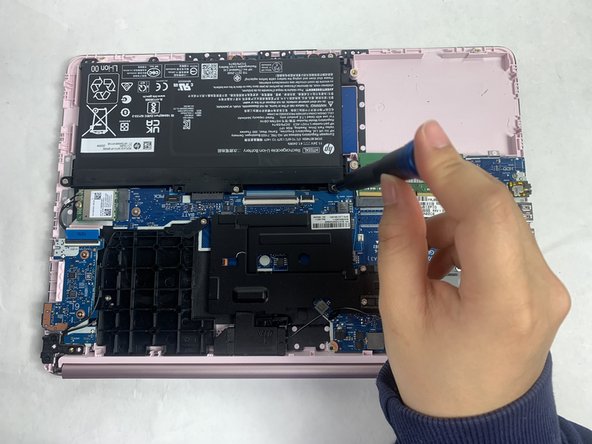
    • Place your opened laptop on a flat surface.

    • Use a Phillips #1 screwdriver to remove the four Phillips 3.0 mm screws securing the battery.

  7. HP 14-cf2112wm Speakers Replacement: étape 7, image 1 de 2 HP 14-cf2112wm Speakers Replacement: étape 7, image 2 de 2
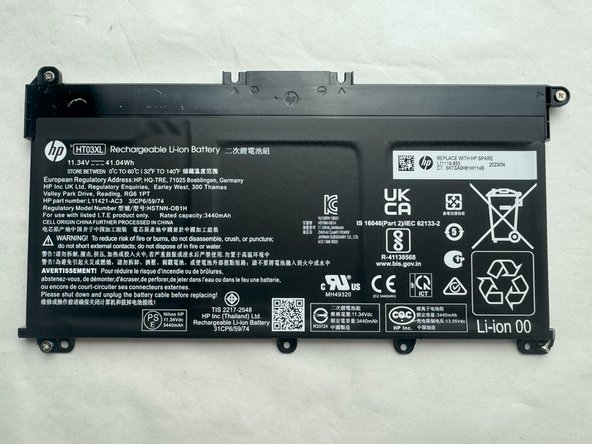
    • Slide the battery out from the connector on the motherboard.

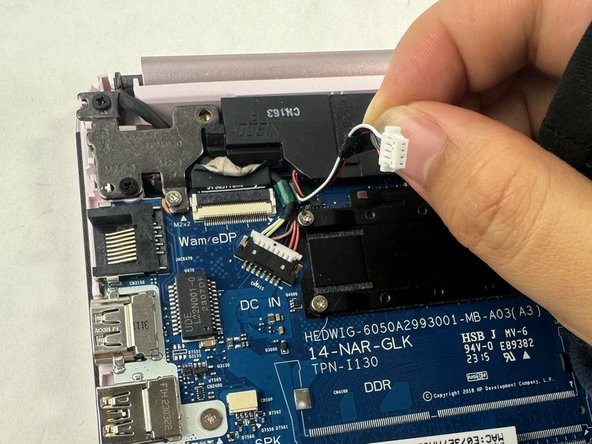
  8. HP 14-cf2112wm Speakers Replacement, Speakers: étape 8, image 1 de 3 HP 14-cf2112wm Speakers Replacement, Speakers: étape 8, image 2 de 3 HP 14-cf2112wm Speakers Replacement, Speakers: étape 8, image 3 de 3
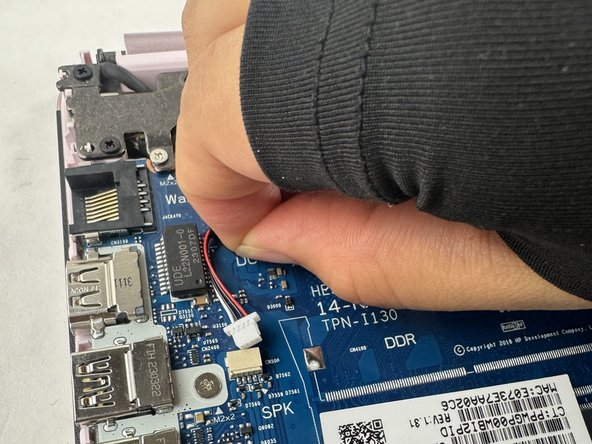
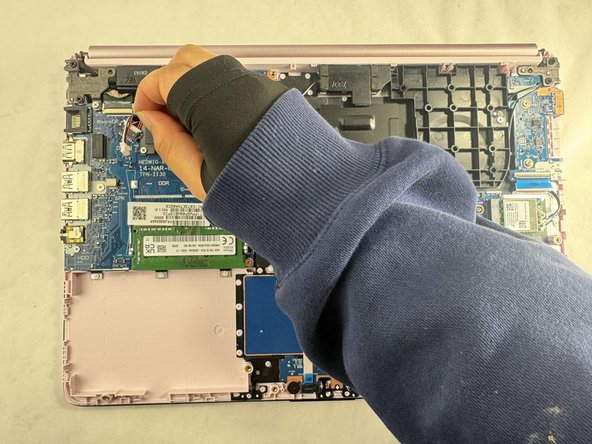
    • Use your fingers or tweezers to pull out the speaker cable from the slide connector socket on the motherboard.

    • Don't pull on the wires as it may damage the connector or cable.

    • If that doesn't work, use the point of a spudger to push on alternating sides of the connector to "walk" it out of its socket.

    • It may take a lot of alternating before the connector comes out.

    • To reconnect the cable, align the connector and use a spudger or clean fingernail to push it fully into the socket.

    • Don't push on the cables themselves, or you may damage the connector.

  9. HP 14-cf2112wm Speakers Replacement: étape 9, image 1 de 2 HP 14-cf2112wm Speakers Replacement: étape 9, image 2 de 2
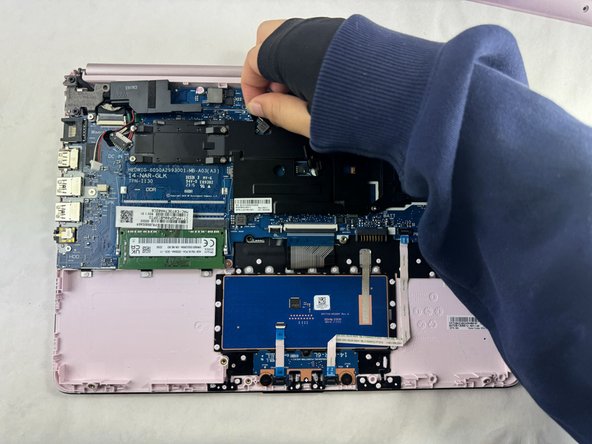
    • Remove the tape holding the cables to the motherboard.

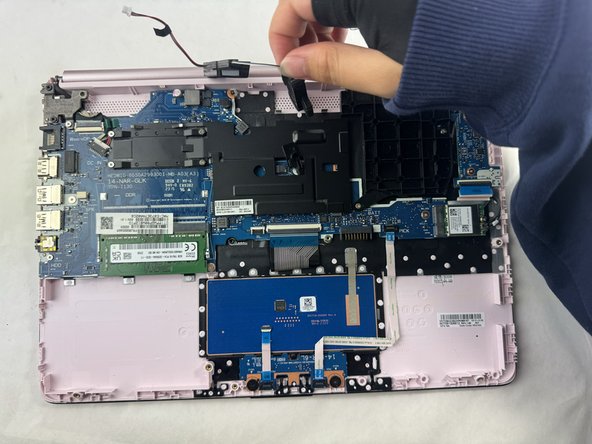
  10. HP 14-cf2112wm Speakers Replacement: étape 10, image 1 de 3 HP 14-cf2112wm Speakers Replacement: étape 10, image 2 de 3 HP 14-cf2112wm Speakers Replacement: étape 10, image 3 de 3
    • Remove the speakers.

    • A loose plastic piece may or may not fall out during this step, but you can press it back in place between the speaker and the motherboard.

Conclusion

To reassemble your device, follow these instructions in reverse order. Take your e-waste to an R2 or e-Stewards certified recycler.

Une autre personne a terminé cette réparation.

Shishi Hu

Membre depuis le 03/18/24

763 Réputation

5 tutoriels rédigés

Équipe

UMass Dartmouth, Team 1-2, Konn Spring 2024 Membre de l'équipe UMass Dartmouth, Team 1-2, Konn Spring 2024

UMASSD-KONN-S24S1G2

4 membres

5 tutoriels rédigés

0 commentaires

Ajouter un commentaire

Nombre de vues :

Dernières 24 heures : 0

7 derniers jours : 8

30 derniers jours : 8

Total : 81