Aller au contenu principal
Pour réparer ensemble - Je crée un compte

HTC Droid DNA Front-Facing Camera Replacement

Ce dont vous avez besoin

  1. HTC Droid DNA Front-Facing Camera Replacement, Remove the SIM Card Tray: étape 1, image 1 de 1
    • Poke a paperclip into the hole to the right of the SIM Card Tray. The SIM Card Tray will automatically pop out.

    Demander à FixBot
  2. HTC Droid DNA Front-Facing Camera Replacement, Removing the SIM Card Tray: étape 2, image 1 de 2 HTC Droid DNA Front-Facing Camera Replacement, Removing the SIM Card Tray: étape 2, image 2 de 2
    • Pull out the SIM Card Tray with your fingers.

    Demander à FixBot
  3. HTC Droid DNA Front-Facing Camera Replacement, Loosen the Phone Casing: étape 3, image 1 de 2 HTC Droid DNA Front-Facing Camera Replacement, Loosen the Phone Casing: étape 3, image 2 de 2
    • Make sure the USB cover on the bottom of the phone is removed first.

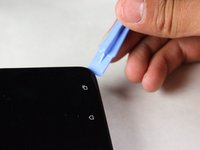
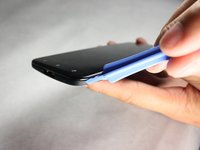
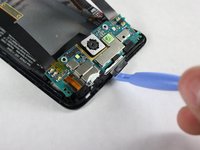
    • Starting at a corner, slowly work your way around the edge of the sides with your prying tool to loosen the front panel.

    • Take your time. A lot of force is necessary to loosen the front panel.

    Demander à FixBot
  4. HTC Droid DNA Front-Facing Camera Replacement, Pull the Casing Apart: étape 4, image 1 de 1
    • Slowly pull the panel apart from the back of the phone.

    • Apply a moderate force to pry the panel from the back of the phone.

    Demander à FixBot
  5. HTC Droid DNA Front-Facing Camera Replacement, Remove the Black Tape: étape 5, image 1 de 1
    • Set the device down so that the bottom of the phone is facing to the right.

    • Gently take off the piece of black tape surrounding the motherboard.

    • Be careful not to rip the tape.

    Demander à FixBot
  6. HTC Droid DNA Front-Facing Camera Replacement, Remove the Yellow Tape: étape 6, image 1 de 1
    Outil utilisé dans cette étape :
    Tweezers
    $4.99
    • Use your tweezers to take off the yellow tape on the bottom left corner of the phone.

    Demander à FixBot
  7. HTC Droid DNA Front-Facing Camera Replacement: étape 7, image 1 de 1
    • Rotate your phone 90 degrees clockwise so the bottom of the phone is facing you.

    • Use the T5 Torx screwdriver to remove the two 4mm screws located at the bottom of the phone.

    Demander à FixBot
  8. HTC Droid DNA Front-Facing Camera Replacement, Remove the Void Screw: étape 8, image 1 de 1
    • Use the Phillips #000 screwdriver to remove the single 2.7mm void screw on the bottom right.

    Demander à FixBot
  9. HTC Droid DNA Front-Facing Camera Replacement, Remove the Screw Retaining Bracket: étape 9, image 1 de 1
    • Rotate your phone back 90 Degrees counter-clockwise.

    • Use your tweezers to take off the small metal retaining bracket on the bottom right of the phone.

    Demander à FixBot
  10. HTC Droid DNA Front-Facing Camera Replacement, Remove the Connector Screws: étape 10, image 1 de 1
    • Remove the following Phillips #000 screws from the motherboard:

    • Four 1.6 mm screws

    • Two 1.5 mm screws

    Demander à FixBot
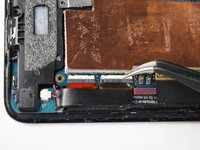
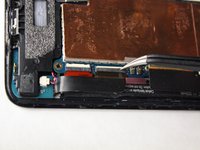
  11. HTC Droid DNA Front-Facing Camera Replacement, Unfasten the Connectors: étape 11, image 1 de 2 HTC Droid DNA Front-Facing Camera Replacement, Unfasten the Connectors: étape 11, image 2 de 2
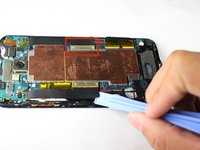
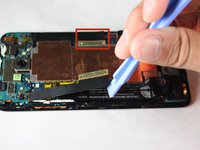
    • Use your pry tool to unfasten the connectors on both sides of the motherboard.

    • The connectors will still be attached to the green camera board at the top so DO NOT try to pull them off or bend them severely.

    Demander à FixBot
  12. HTC Droid DNA Front-Facing Camera Replacement, Remove the Yellow Tape: étape 12, image 1 de 1
    • Use your tweezers to remove the two pieces of yellow tape shown.

    Demander à FixBot
  13. HTC Droid DNA Front-Facing Camera Replacement, Flipping up the White Board: étape 13, image 1 de 2 HTC Droid DNA Front-Facing Camera Replacement, Flipping up the White Board: étape 13, image 2 de 2
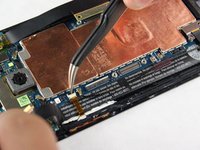
    • Use your tweezers to gently snap up the white board on the bottom right of the motherboard.

    Demander à FixBot
  14. HTC Droid DNA Front-Facing Camera Replacement, Disconnect the Connector: étape 14, image 1 de 1
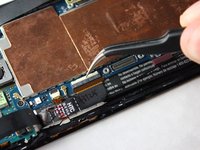
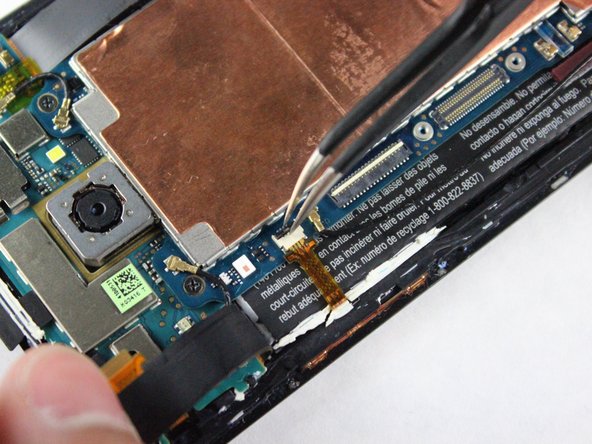
    • Use your tweezers to disconnect the black connector on the bottom right of the motherboard.

    • Be careful not to bend the Flex Cable of the Connector.

    Demander à FixBot
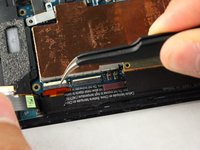
  15. HTC Droid DNA Front-Facing Camera Replacement, Flipping up the White Board: étape 15, image 1 de 2 HTC Droid DNA Front-Facing Camera Replacement, Flipping up the White Board: étape 15, image 2 de 2
    • Use your tweezers to gently snap the other white board on the bottom right of the motherboard up.

    Demander à FixBot
  16. HTC Droid DNA Front-Facing Camera Replacement, Disconnect the Connector: étape 16, image 1 de 1
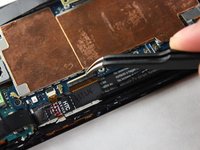
    • Use your tweezers to disconnect the other small connector on the bottom right of the motherboard.

    • Be careful not to bend the Flex Cables for the Connector.

    Demander à FixBot
  17. HTC Droid DNA Front-Facing Camera Replacement, Flipping up the White Board: étape 17, image 1 de 2 HTC Droid DNA Front-Facing Camera Replacement, Flipping up the White Board: étape 17, image 2 de 2
    • Rotate the phone 180 degrees.

    • Use your tweezers to gently snap up the white board on the top left of the motherboard.

    Demander à FixBot
  18. HTC Droid DNA Front-Facing Camera Replacement, Disconnect the Connector: étape 18, image 1 de 1
    • Use your tweezers to disconnect the cable on the top left of the motherboard.

    • Be careful not to bend the Flex Cable of the Connector.

    Demander à FixBot
  19. HTC Droid DNA Front-Facing Camera Replacement, Flipping up the Black Board: étape 19, image 1 de 2 HTC Droid DNA Front-Facing Camera Replacement, Flipping up the Black Board: étape 19, image 2 de 2
    • Use your tweezers to gently snap up the black board on the top left of the motherboard.

    Demander à FixBot
  20. HTC Droid DNA Front-Facing Camera Replacement, Disconnect the Small Ribbon Connector: étape 20, image 1 de 1
    • Use your tweezers to gently remove the yellow connector on the top left of the phone.

    Demander à FixBot
  21. HTC Droid DNA Front-Facing Camera Replacement, Remove the Black Wire: étape 21, image 1 de 1
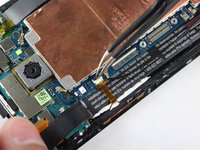
    • Remove the long black wire on the left of the motherboard.

    Demander à FixBot
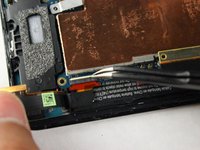
  22. HTC Droid DNA Front-Facing Camera Replacement, Remove the Two Black Wires: étape 22, image 1 de 1
    • Reorient the phone so that the green camera board is farthest from you.

    • Use your tweezers to remove the two wires located at the top of the board. The wires snap off very easily so not much force is needed.

    Demander à FixBot
  23. HTC Droid DNA Front-Facing Camera Replacement, Remove the Screws: étape 23, image 1 de 1
    • Use a Phillips #000 screwdriver to remove the two 3.9mm screws on top of motherboard.

    Demander à FixBot
  24. HTC Droid DNA Front-Facing Camera Replacement, Remove the Motherboard: étape 24, image 1 de 2 HTC Droid DNA Front-Facing Camera Replacement, Remove the Motherboard: étape 24, image 2 de 2
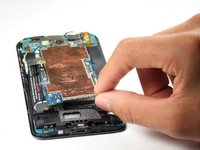
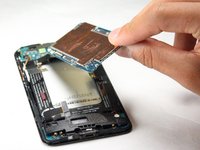
    • Now, use your fingers to slowly pull up the motherboard and remove it from the phone.

    Demander à FixBot
  25. HTC Droid DNA Front-Facing Camera Replacement, Remove Screws: étape 25, image 1 de 1
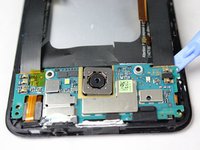
    • Use a Phillips #000 screwdriver to remove the two 2.1mm screws on the top of the camera board.

    Demander à FixBot
  26. HTC Droid DNA Front-Facing Camera Replacement, Loosen the Adhesive: étape 26, image 1 de 2 HTC Droid DNA Front-Facing Camera Replacement, Loosen the Adhesive: étape 26, image 2 de 2
    • Use the pry tool along the bottom and sides of the camera board to loosen the adhesive.

    • The power button and headphone jack need to be carefully removed with the camera board or they could snap off of the camera board.

    Demander à FixBot
  27. HTC Droid DNA Front-Facing Camera Replacement, Remove Camera Board: étape 27, image 1 de 1
    • Slowly lift the camera board up and work on removing the remaining adhesive. You can then take the camera board off of the phone.

    Demander à FixBot
  28. HTC Droid DNA Front-Facing Camera Replacement, Remove Yellow Tape: étape 28, image 1 de 1
    Outil utilisé dans cette étape :
    Tweezers
    $4.99
    • Use your tweezers to gently remove the yellow tape on the far left side of the camera board.

    Demander à FixBot
  29. HTC Droid DNA Front-Facing Camera Replacement, Release the White Connector Clip: étape 29, image 1 de 2 HTC Droid DNA Front-Facing Camera Replacement, Release the White Connector Clip: étape 29, image 2 de 2
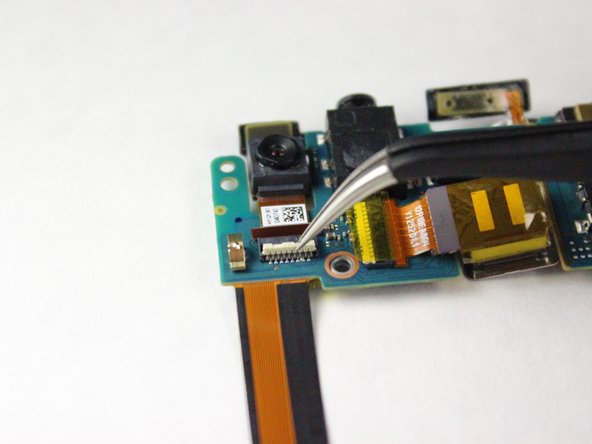
    • Use your tweezers to gently flip the white connector clip into the upright position.

    Demander à FixBot
  30. HTC Droid DNA Front-Facing Camera Replacement, Remove Front-Facing Camera: étape 30, image 1 de 1
    • Use your tweezers to gently pull the front facing camera off the camera board.

    Demander à FixBot
Conclusion

To reassemble your device, follow these instructions in reverse order.

4 autres ont terminé cette réparation.

Adrian Williams

Membre depuis le 10/14/14

585 Réputation

3 tutoriels rédigés

Équipe

Cal Poly, Team 4-43, Amido Fall 2014 Membre de l'équipe Cal Poly, Team 4-43, Amido Fall 2014

CPSU-AMIDO-F14S4G43

4 membres

10 tutoriels rédigés

0 commentaires de tutoriel

Ajouter un commentaire

Nombre de vues :

Dernières 24 heures : 2

7 derniers jours : 8

30 derniers jours : 42

Total : 1,368