Introduction
The screws on the brakes are tight, but it's best to use hand tools so the screws don't get stripped.
Ce dont vous avez besoin
-
-
-
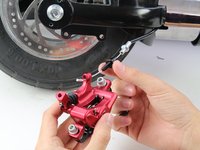
Remove the two, 23 mm Hex #5 screws holding the brake to the bike.
-
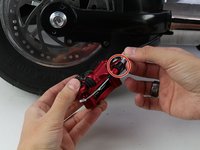
Slide the brake mechanism off and turn it upside down to reveal the screw holding the brake wire.
 Demander à FixBot
-
-
-
-
Remove the one, 14 mm Hex #4 screw pushing down the brake wire to the brake mechanism on the bottom.
-
-
-
Remove the side screw holding the brake wire and mechanism together with your hands.
-
Slide the brake mechanism off from the brake wire.
-
-


To reassemble your device, follow these instructions in reverse order.
Annulation : je n'ai pas terminé ce tutoriel.
Une autre personne a terminé cette réparation.

Équipe

Cal Poly, Team S1-G2, White Winter 2019 Membre de l'équipe Cal Poly, Team S1-G2, White Winter 2019
CPSU-WHITE-W19S1G2
3 membres
13 tutoriels rédigés