Introduction
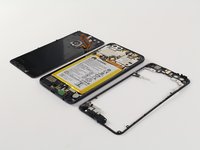
This guide will provide step-by-step instructions on replacing the LCD Display in a Huawei Honor 8.
Ce dont vous avez besoin
-
-
Using a heat gun or hairdryer, apply heat approximately three inches above the glass panel to warm up the adhesive around the outside edge of the phone.
-
-
-
Using a Phillips PH00 screwdriver, remove the eight silver Phillips 3.5 mm screws circled in red.
-
Using a Phillips PH00 screwdriver, remove the six black Phillips 4.0 mm screws circled in orange.
-
Using a Phillips PH00 screwdriver, remove the single silver 3.0 mm Phillips screw circled in yellow.
-
Using the Phillips PH00 screwdriver tip, gently scratch away the white stickers outlined in green circles to expose hidden screws.
-
Using a Phillips PH00 screwdriver, remove the two black Phillips 4.0 mm screws circled in green.
On my phone, the white sticker was in the bottom right corner, rather than the middle right side. However, the screw types were all the same as listed in the step above, so proceeding to remove the sticker and screws worked fine.
one of my green screws and orange screws were reversed from image, but all worked out fine, as well.
Lacking a useful magnetic pad, I made a pad of (sticky side up) masking tape to hold screws which I could mark up and it worked quite well.
-
-
-
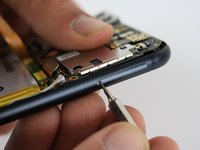
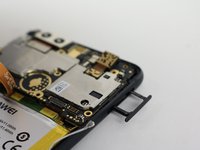
Holding the phone so that the cameras are at the top, locate the small hole on the top right edge of the device.
-
Using the 0.8 mm Sim Eject tool, push down on the small hole to release the Sim Card tray.
-
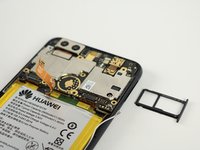
Gently pull out the Sim Card tray and set it aside.
complete the ejection with screen facing up
Wenn man tatsächlich nur die Hauptkamera tauschen will, sind die Schritte 6 - 13 meines Erachtens überflüssig. Sobald der innere Rahmen abgenommen ist, kann man die Kamera von der Hauptplatine lösen (= Schritt 14).
-
-
-
-
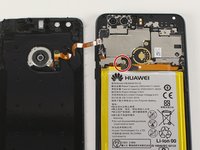
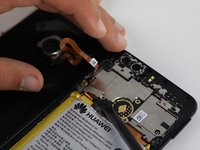
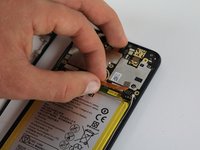
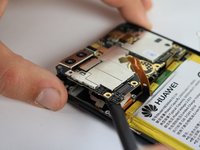
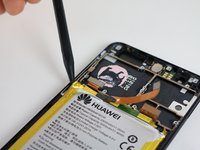
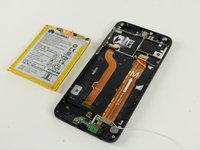
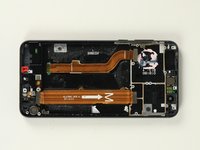
Use a spudger to gently pry off the small antenna cable on the right side of the motherboard.
Bei mir ist es so wie bei Ferdinand (Anschluss hat sich vom Board gelöst, dennoch scheint noch alles intakt zu sein. ). Ich würde behaupten, dass es extrem wahrscheinlich ist den Anschluss beim entfernen dieses Kabels abzureißen, deshalb würde ich empfehlen, den Schritt entweder auszulassen oder das Kabel am anderen Ende zu entfernen (dort sieht der Anschluss stabiler aus). Wenn man den Schritt überspringt, muss man natürlich noch vorsichtiger bei der Entfernung des Akkus sein.
-
-
-
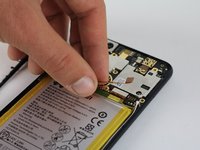
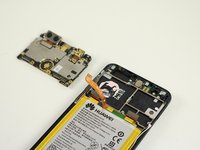
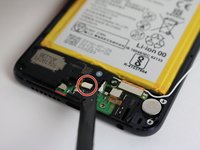
Using a spudger, pry off the small connection between the speaker and phone body located near the bottom of the device circled in red.
-
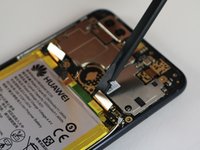
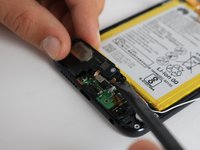
Gently pry up a corner of the speaker using a spudger.
-
Lift the speaker up and out of the phone body.
-
-
-
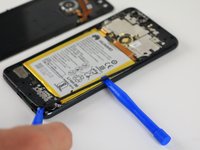
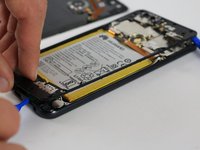
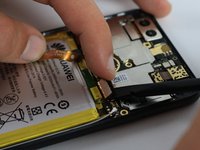
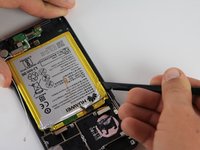
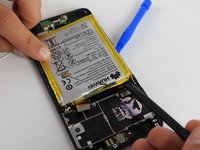
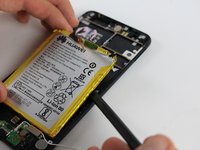
Once all the adhesive has been removed from the battery, use the spudger and plastic opening tools to gently pry the battery away from the frame.
This is not easy. You will deform the old battery - don’t worry. Use the iOpener and guitar picks, and microwave the iOpener at least a second time half way through. I am massaging the cramps out of my fingers, but I got it.
-
-
-
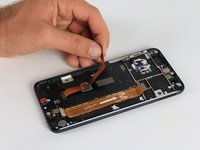
Gently pull the ribbon cable that connects the LCD screen away from the phone body.
-
-
-
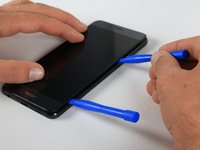
Using a plastic opening tool, gently pry up a corner of the LCD Display.
-
Slowly slide the plastic opening tool around the outside of the LCD Display to break through the adhesive.
-
Once all the adhesive has been removed, gently lift the LCD Display off.
Hi, my Honor Play screen was replaced few months back. Last week i want to replace the screen protector. When i peel the screen protector suddenly i saw the lcd screen lifted from its location. How can i fix it back? what type of adhesive need or i just use a heat gum to heat back the adhesive and press the lcd to make it firm again? Thank you.
-


To reassemble your device, follow these instructions in reverse order.
To reassemble your device, follow these instructions in reverse order.
Annulation : je n'ai pas terminé ce tutoriel.
9 autres ont terminé cette réparation.
Équipe

Cal Poly, Team S18-G2, Forte Fall 2017 Membre de l'équipe Cal Poly, Team S18-G2, Forte Fall 2017
CPSU-FORTE-F17S18G2
4 membres
24 tutoriels rédigés
5 commentaires
When removing the LCD I wrongly thought the line on the metal frame was where I should pry and damaged it. You should include a closeup in the guide to show the two and let people know which one to start sticking stuff into. It required a lot of force to get the screen off, the metal frame actually bent outwards from the pressure..
I have just finished replacing the battery and the screen one this smartphone and it took me forever !!! Unfortunately I forgot to put back the metal tab that holds the screen and fingerprint cable and I am wondering if that is going to be an issue for me in the future as I really don’t want to open the device again !!!
I accidentaly broke the charging cable under the battery while trying to remove the damm thing. The replacment cable is a bit longer. For me the metal tabs are necessary to hold the connectors in place. I supposse in your case everything should be fine.
When I reverse the order to close the back side, would it hold with the old adhesive? if not, how do I keep it from falling?
yaniv feinberg - Réponse