Introduction
If your JBL Go isn't producing quality sound, the woofer may be damaged. Use this guide to carefully remove and replace the faulty woofer.
Ce dont vous avez besoin
-
-
Use an opening tool to scrape around the outside of the front cover to remove the glue attaching it to the surrounding rubber layer.
 Demander à FixBot
-
-
-
Once you have scraped off all of the glue, use the opening tool to pry up the front cover.
-
-
-
-
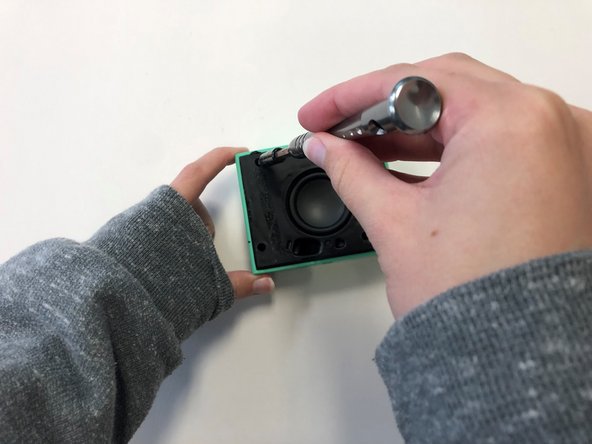
Once the front cover is removed, use a T6 screwdriver head to remove the four 9 mm screws on the black cover.
-
-
-
After removing the screws, use the plastic opening tool to carefully pry around the edges of the black cover to loosen and lift the cover off of the device.
-
-
-
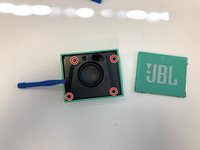
Once the black cover is fully detached from the speaker, unscrew the woofer from the back of the black cover using a T6 screwdriver head.
-


To reassemble your device, follow these instructions in reverse order.
Annulation : je n'ai pas terminé ce tutoriel.
4 autres ont terminé cette réparation.
Équipe

University of Alabama, Team 2-4, Bedsole Spring 2022 Membre de l'équipe University of Alabama, Team 2-4, Bedsole Spring 2022
UA-BEDSOLE-S22S2G4
3 membres
4 tutoriels rédigés