Aller au contenu principal

LG WM3050CW Main Board Replacement

Ce dont vous avez besoin

  1. LG WM3050CW Main Board Replacement, Safety Precautions: étape 1, image 1 de 2 LG WM3050CW Main Board Replacement, Safety Precautions: étape 1, image 2 de 2
    • Before you begin your repair, perform the following:

    • Turn off the main water supply

    • Unplug your washer

    • Disconnect all water connections at the rear of your washer

  2. LG WM3050CW Main Board Replacement, Unfasten the top panel: étape 2, image 1 de 3 LG WM3050CW Main Board Replacement, Unfasten the top panel: étape 2, image 2 de 3 LG WM3050CW Main Board Replacement, Unfasten the top panel: étape 2, image 3 de 3
    • Use a Phillips driver to remove the two bottom 16.5 mm-long screws securing the top panel brackets.

  3. LG WM3050CW Main Board Replacement, Remove the top panel: étape 3, image 1 de 2 LG WM3050CW Main Board Replacement, Remove the top panel: étape 3, image 2 de 2
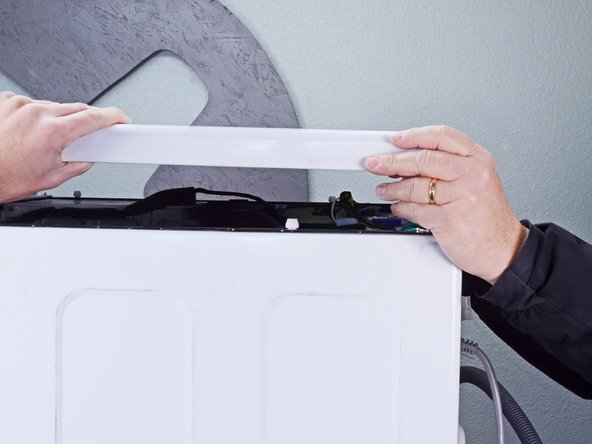
    • Slide the top panel 1-2 inches towards the rear of the device to disconnect its clips.

  4. LG WM3050CW Main Board Replacement: étape 4, image 1 de 2 LG WM3050CW Main Board Replacement: étape 4, image 2 de 2
    • Tilt the top panel upward to completely disconnect it from the chassis.

    • Remove the top panel.

  5. LG WM3050CW Main Board Replacement, Disconnect the pressure sensor: étape 5, image 1 de 2 LG WM3050CW Main Board Replacement, Disconnect the pressure sensor: étape 5, image 2 de 2
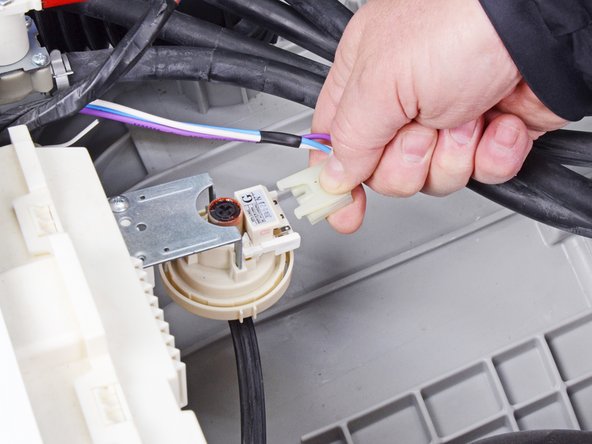
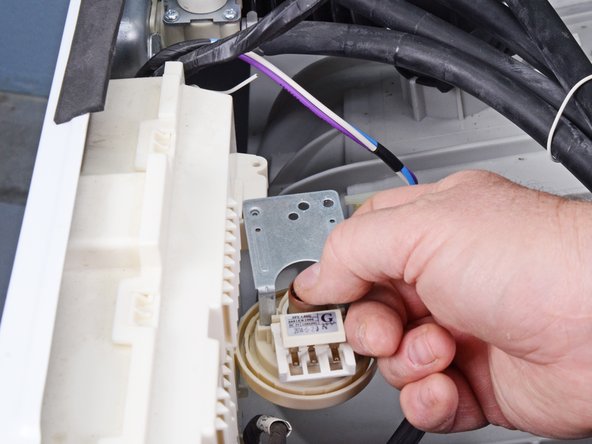
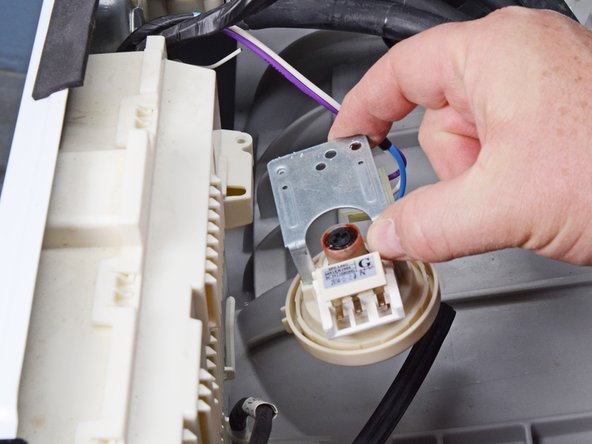
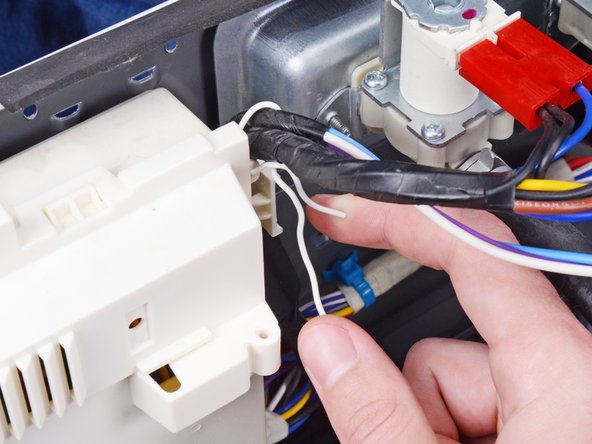
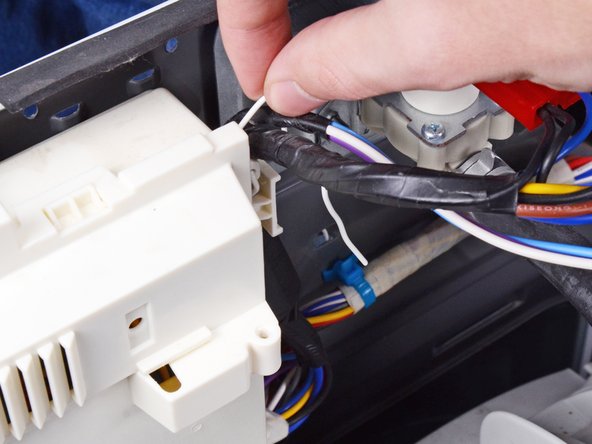
    • Disconnect the spade connector from the pressure sensor.

    • Always grip cables by their connectors and not the wires themselves.

  6. LG WM3050CW Main Board Replacement: étape 6, image 1 de 2 LG WM3050CW Main Board Replacement: étape 6, image 2 de 2
    • Disconnect the hose from the pressure sensor.

  7. LG WM3050CW Main Board Replacement, Unfasten the pressure sensor: étape 7, image 1 de 1
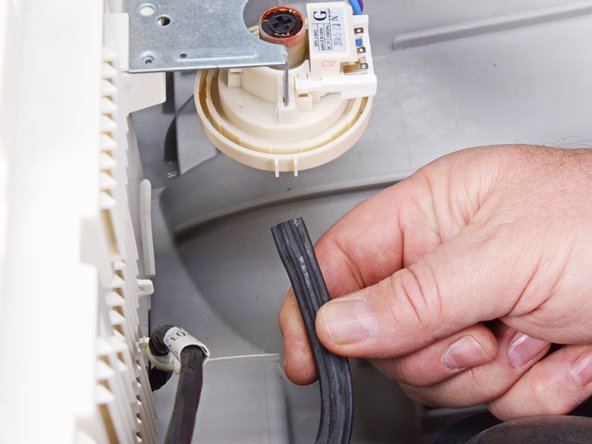
    • Use a Phillips driver to remove the 16.5 mm-long screw securing the pressure sensor.

  8. LG WM3050CW Main Board Replacement, Remove the pressure sensor: étape 8, image 1 de 3 LG WM3050CW Main Board Replacement, Remove the pressure sensor: étape 8, image 2 de 3 LG WM3050CW Main Board Replacement, Remove the pressure sensor: étape 8, image 3 de 3
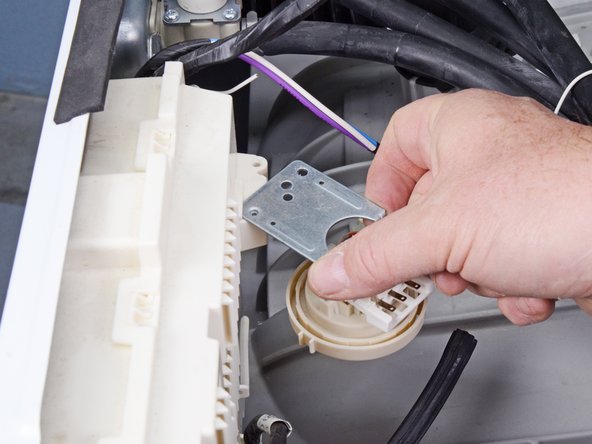
    • Rotate the pressure sensor toward the left edge of the washing machine to unclip it from the main board cover.

  9. LG WM3050CW Main Board Replacement: étape 9, image 1 de 2 LG WM3050CW Main Board Replacement: étape 9, image 2 de 2
    • Lift the pressure sensor away from its slot on the main board cover to remove it.

    • During reassembly, align the pressure sensor with the hole next to its slot before rotating it back into its original position.

  10. LG WM3050CW Main Board Replacement, Unclip the control panel cable: étape 10, image 1 de 3 LG WM3050CW Main Board Replacement, Unclip the control panel cable: étape 10, image 2 de 3 LG WM3050CW Main Board Replacement, Unclip the control panel cable: étape 10, image 3 de 3
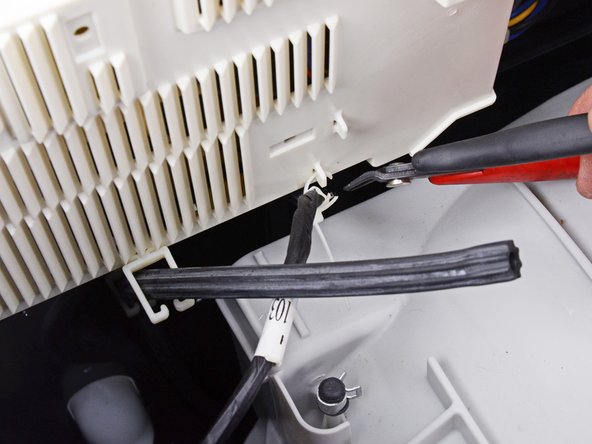
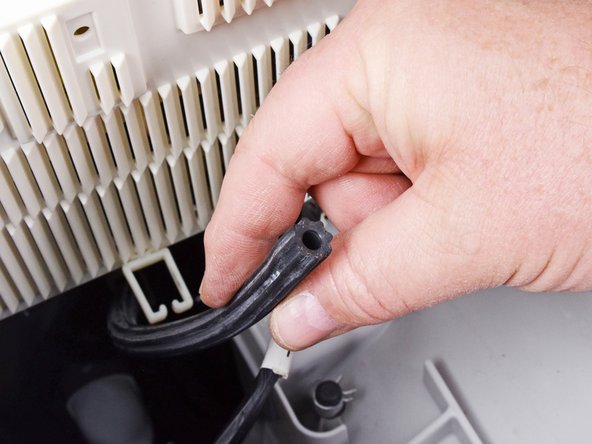
    • Insert a flathead screwdriver between the chassis and the plastic clip securing the control panel cable.

    • Compress the clip and slide it out of the chassis to remove it.

  11. LG WM3050CW Main Board Replacement: étape 11, image 1 de 3 LG WM3050CW Main Board Replacement: étape 11, image 2 de 3 LG WM3050CW Main Board Replacement: étape 11, image 3 de 3
    • Use diagonal cutters, or scissors, to cut the cable tie securing the control panel cable to the main board cover.

    • Remove the pressure sensor hose from its clip in the main board cover.

    • During reassembly, replace the cable tie.

  12. LG WM3050CW Main Board Replacement: étape 12, image 1 de 3 LG WM3050CW Main Board Replacement: étape 12, image 2 de 3 LG WM3050CW Main Board Replacement: étape 12, image 3 de 3
    • Remove the twist tie bundling the cables at the top right of the main board cover.

  13. LG WM3050CW Main Board Replacement, Remove the main board cover: étape 13, image 1 de 3 LG WM3050CW Main Board Replacement, Remove the main board cover: étape 13, image 2 de 3 LG WM3050CW Main Board Replacement, Remove the main board cover: étape 13, image 3 de 3
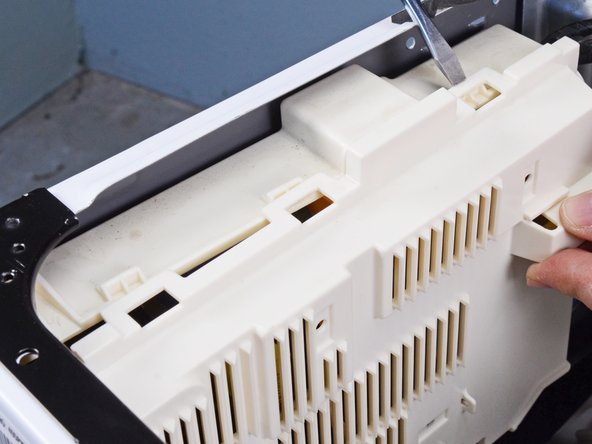
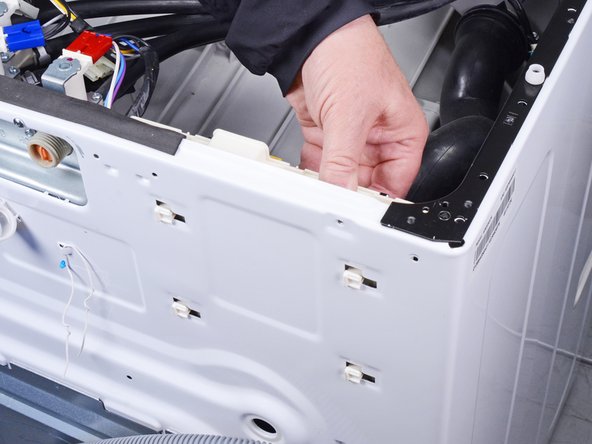
    • Use a flathead screwdriver to disconnect the three plastic clips securing the top of the main board cover.

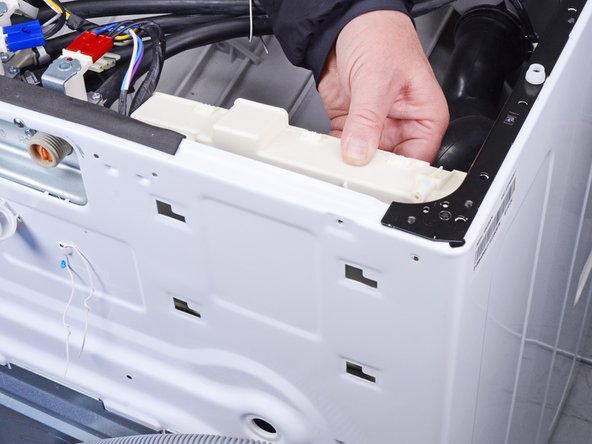
    • Pull the main board cover away from the chassis to disconnect the remaining clips on the side and bottom.

    • Remove the main board cover.

  14. LG WM3050CW Main Board Replacement, Unfasten the main board: étape 14, image 1 de 2 LG WM3050CW Main Board Replacement, Unfasten the main board: étape 14, image 2 de 2
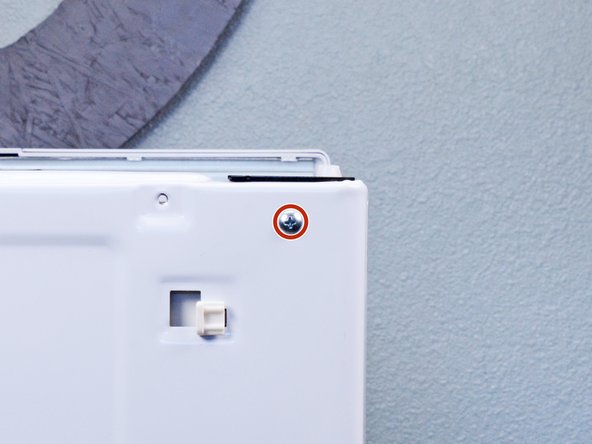
    • Use a Phillips driver to remove the 16.5 mm-long screw securing the main board to the back of the washer.

  15. LG WM3050CW Main Board Replacement, Separate the main board from the chassis: étape 15, image 1 de 3 LG WM3050CW Main Board Replacement, Separate the main board from the chassis: étape 15, image 2 de 3 LG WM3050CW Main Board Replacement, Separate the main board from the chassis: étape 15, image 3 de 3
    • Slide the main board toward the right edge of the device to disconnect the clips from their slots in the chassis.

    • Pull the main board toward the front of the device to completely separate the main board from the chassis.

  16. LG WM3050CW Main Board Replacement, Remove the main board: étape 16, image 1 de 3 LG WM3050CW Main Board Replacement, Remove the main board: étape 16, image 2 de 3 LG WM3050CW Main Board Replacement, Remove the main board: étape 16, image 3 de 3
    • Label each connector and its spot on the main board. During reassembly, reattach each connector to its proper spot.

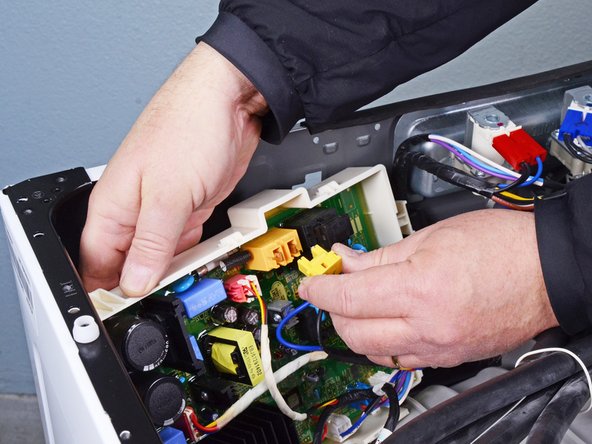
    • Lift the main board out of the chassis slightly to access each of the connectors.

    • Disconnect each connector from the main board (eleven total).

    • Remove the main board.

Conclusion

To reassemble your device, follow these instructions in reverse order.

Take your e-waste to an R2 or e-Stewards certified recycler.

Repair didn’t go as planned? Try some basic troubleshooting, or ask our Answers Community for help.

Bill Gilbert

Membre depuis le 06/30/22

29 911 Réputation

213 tutoriels rédigés

Équipe

iFixit Membre de l'équipe iFixit

Staff

135 membres

17 198 tutoriels rédigés

0 commentaires

Ajouter un commentaire

Nombre de vues :

Dernières 24 heures : 0

7 derniers jours : 0

30 derniers jours : 13

Total : 156