Aller au contenu principal

Lenovo IdeaPad 3-15IIL05 Heatsink Replacement

Ce dont vous avez besoin

  1. Lenovo IdeaPad 3-15IIL05 Heatsink Replacement, Prepare your laptop for disassembly: étape 1, image 1 de 2 Lenovo IdeaPad 3-15IIL05 Heatsink Replacement, Prepare your laptop for disassembly: étape 1, image 2 de 2
    • Allow your laptop's battery to drain below 25% before starting this repair—a charged battery may catch fire if damaged.

    • Unplug all cables and fully shut down your laptop.

  2. Lenovo IdeaPad 3-15IIL05 Heatsink Replacement, Unfasten the back cover: étape 2, image 1 de 2 Lenovo IdeaPad 3-15IIL05 Heatsink Replacement, Unfasten the back cover: étape 2, image 2 de 2
    • Use a Phillips screwdriver to remove the ten screws securing the back cover:

    • Six 7.6 mm-long screws

    • Four 4.7 mm-long screws

  3. Lenovo IdeaPad 3-15IIL05 Heatsink Replacement, Insert an opening pick: étape 3, image 1 de 3 Lenovo IdeaPad 3-15IIL05 Heatsink Replacement, Insert an opening pick: étape 3, image 2 de 3 Lenovo IdeaPad 3-15IIL05 Heatsink Replacement, Insert an opening pick: étape 3, image 3 de 3
    • Plastic clips secure the back cover to the frame. You'll hear and feel the clips release.

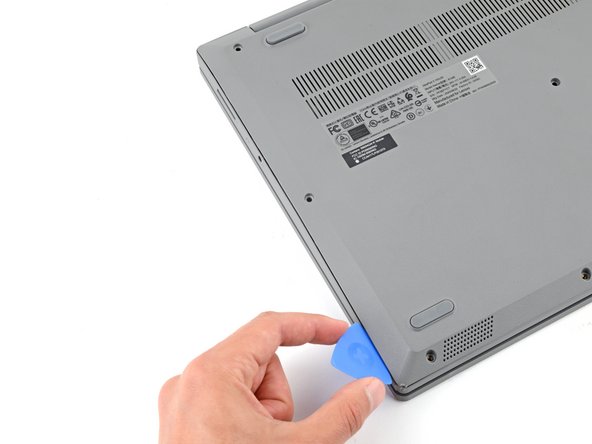
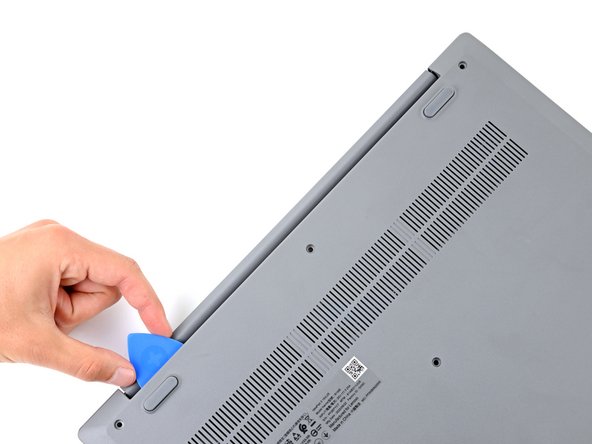
    • Insert the flat side of an opening pick between the top left corner of the back cover and frame.

    • Angle the pick down to about 45 degrees.

  4. Lenovo IdeaPad 3-15IIL05 Heatsink Replacement, Release the left clips: étape 4, image 1 de 3 Lenovo IdeaPad 3-15IIL05 Heatsink Replacement, Release the left clips: étape 4, image 2 de 3 Lenovo IdeaPad 3-15IIL05 Heatsink Replacement, Release the left clips: étape 4, image 3 de 3
    • Keep the opening pick angled down at about 45 degrees while sliding it along the front and side edges to help release the clips.

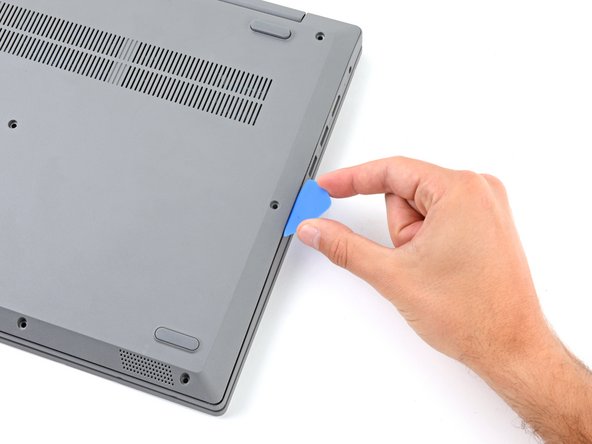
    • Slide the pick to the bottom left corner of the laptop to release the left clips.

  5. Lenovo IdeaPad 3-15IIL05 Heatsink Replacement, Release the bottom clips: étape 5, image 1 de 3 Lenovo IdeaPad 3-15IIL05 Heatsink Replacement, Release the bottom clips: étape 5, image 2 de 3 Lenovo IdeaPad 3-15IIL05 Heatsink Replacement, Release the bottom clips: étape 5, image 3 de 3
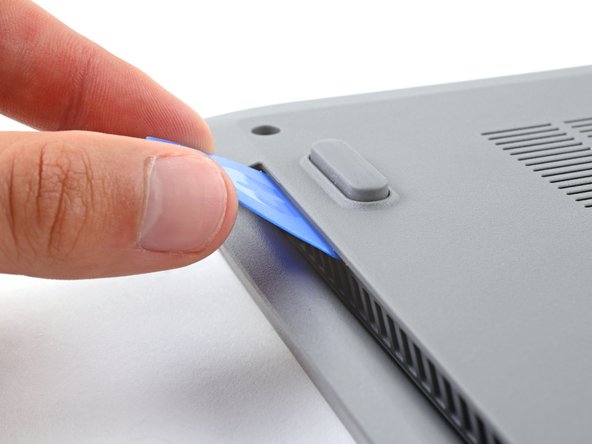
    • Slide the opening pick to the bottom right corner to release the bottom clips.

  6. Lenovo IdeaPad 3-15IIL05 Heatsink Replacement, Release the right clips: étape 6, image 1 de 3 Lenovo IdeaPad 3-15IIL05 Heatsink Replacement, Release the right clips: étape 6, image 2 de 3 Lenovo IdeaPad 3-15IIL05 Heatsink Replacement, Release the right clips: étape 6, image 3 de 3
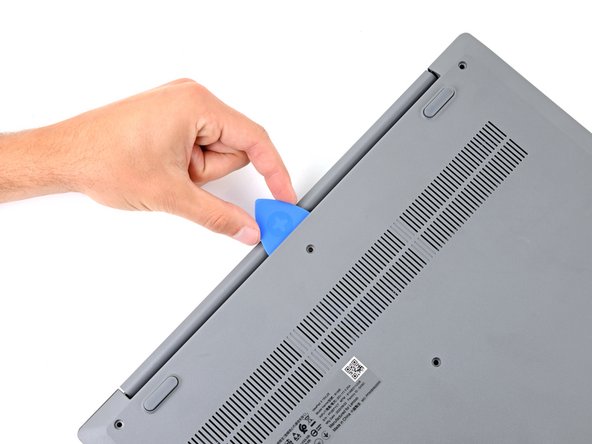
    • Slide the opening pick to the top right corner to release the right clips.

  7. Lenovo IdeaPad 3-15IIL05 Heatsink Replacement, Insert an opening pick: étape 7, image 1 de 2 Lenovo IdeaPad 3-15IIL05 Heatsink Replacement, Insert an opening pick: étape 7, image 2 de 2
    • Insert the flat end of an opening pick between the back cover and frame, to the left of the right hinge.

    • Pry the back cover up with the pick to release the top right clips.

    • Leave the pick inserted next to the right hinge.

  8. Lenovo IdeaPad 3-15IIL05 Heatsink Replacement, Release the top clips: étape 8, image 1 de 3 Lenovo IdeaPad 3-15IIL05 Heatsink Replacement, Release the top clips: étape 8, image 2 de 3 Lenovo IdeaPad 3-15IIL05 Heatsink Replacement, Release the top clips: étape 8, image 3 de 3
    • Angle the pick up to about 45 degrees.

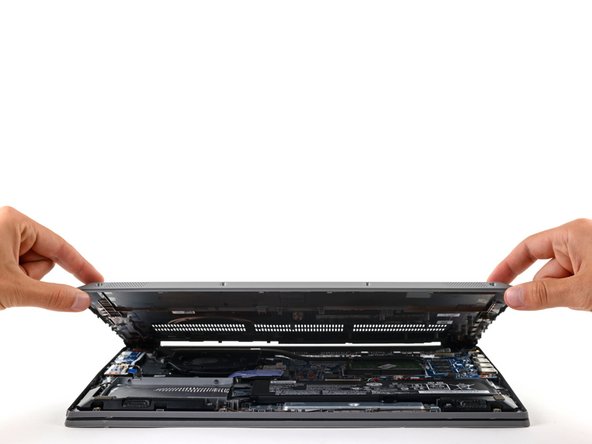
    • Slide the opening pick to the top left corner to release the remaining clips.

  9. Lenovo IdeaPad 3-15IIL05 Heatsink Replacement, Remove the back cover: étape 9, image 1 de 3 Lenovo IdeaPad 3-15IIL05 Heatsink Replacement, Remove the back cover: étape 9, image 2 de 3 Lenovo IdeaPad 3-15IIL05 Heatsink Replacement, Remove the back cover: étape 9, image 3 de 3
    • Remove the back cover.

    • During reassembly, lay the back cover on the frame and press firmly around the perimeter to engage all the clips.

  10. Lenovo IdeaPad 3-15IIL05 Heatsink Replacement, Disconnect the battery: étape 10, image 1 de 3 Lenovo IdeaPad 3-15IIL05 Heatsink Replacement, Disconnect the battery: étape 10, image 2 de 3 Lenovo IdeaPad 3-15IIL05 Heatsink Replacement, Disconnect the battery: étape 10, image 3 de 3
    • Use the flat end of a spudger to gently push the battery connector out of its socket on the motherboard.

  11. Lenovo IdeaPad 3-15IIL05 Heatsink Replacement, Unfasten the heatsink: étape 11, image 1 de 2 Lenovo IdeaPad 3-15IIL05 Heatsink Replacement, Unfasten the heatsink: étape 11, image 2 de 2
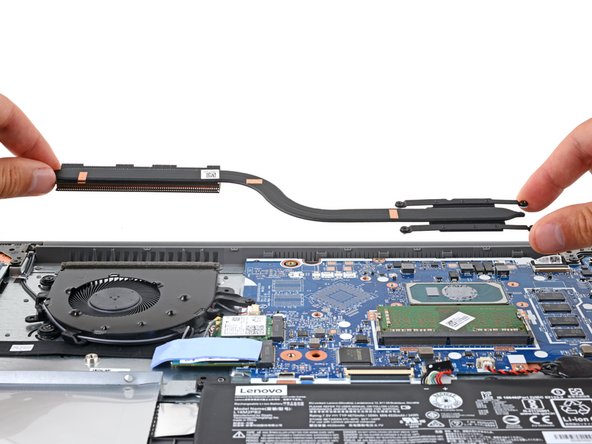
    • Use a Phillips screwdriver to loosen the four captive screws securing the heatsink.

    • During reassembly, tighten the heatsink screws in an "X" pattern. For example: top left, bottom right, top right, bottom left.

  12. Lenovo IdeaPad 3-15IIL05 Heatsink Replacement, Remove the heatsink: étape 12, image 1 de 2 Lenovo IdeaPad 3-15IIL05 Heatsink Replacement, Remove the heatsink: étape 12, image 2 de 2
    • Remove the heatsink.

    • You may feel slight resistance when removing the heatsink, as thermal paste bonds it to the CPU.

  13. Lenovo IdeaPad 3-15IIL05 Heatsink Replacement, Reassembly information: étape 13, image 1 de 3 Lenovo IdeaPad 3-15IIL05 Heatsink Replacement, Reassembly information: étape 13, image 2 de 3 Lenovo IdeaPad 3-15IIL05 Heatsink Replacement, Reassembly information: étape 13, image 3 de 3
    • Before installing a new heatsink, follow this guide to clean the CPU and heatsink and reapply thermal paste.

Conclusion

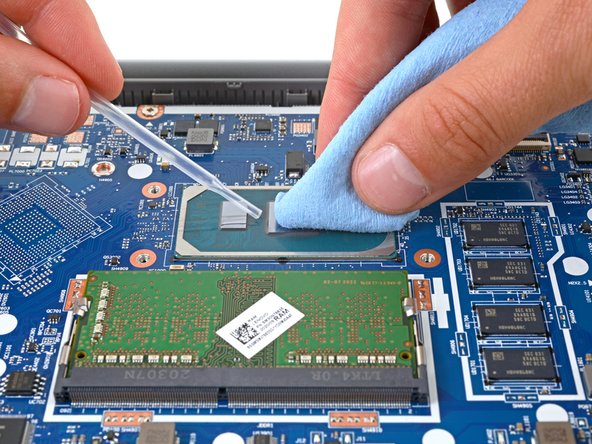
To reassemble your device, follow these instructions in reverse order.

Check your repair by running hardware tests with Lenovo Diagnostics.

Take your e-waste to an R2 or e-Stewards certified recycler.

Repair didn’t go as planned? Try some basic troubleshooting, or ask our Answers community for help.

Spencer Day

Membre depuis le 09/14/22

53 712 Réputation

394 tutoriels rédigés

Équipe

iFixit Membre de l'équipe iFixit

Staff

135 membres

17 175 tutoriels rédigés

0 commentaires

Ajouter un commentaire

Nombre de vues :

Dernières 24 heures : 0

7 derniers jours : 2

30 derniers jours : 24

Total : 243