Introduction
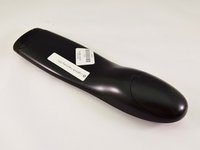
This guide shows you how to begin the disassembly of the Logitech Harmony 650 Universal Remote. It is recommended that you have the iFixit ProTech Toolkit.
Ce dont vous avez besoin
-
-
-
Remove the battery cover by applying pressure to the indented area and pushing the cover toward the rear of the device.
 Demander à FixBot
-
-
-
Using a J000 Philips head screwdriver remove the four 5mm screws around the rim of the battery chamber.
-
-
-
Outil utilisé dans cette étape :Flathead 3/32" or 2.5 mm Screwdriver$5.49
-
Remove the small plastic cover beneath the plastic LED housing by using a 3.0 flathead screwdriver and a spudger to pry it off. It is glued to the case. If you are having trouble removing it try applying some heat to loosen the glue.
-
-
-
Remove the two 5mm screws located underneath the cover using a J000 Philips screwdriver bit.
-
-
-
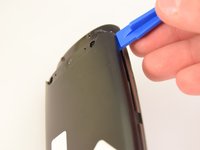
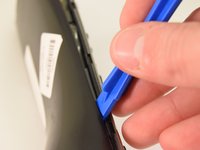
Using a plastic opening tool, pry the case off starting from the top of the device (nearest the transmitter). There are 3 tabs along the side of the case and one at the back.
-
The top led protector plastic cover will also be freed once back is removed.
-
-





To reassemble your device, follow these instructions in reverse order.
Annulation : je n'ai pas terminé ce tutoriel.
5 autres ont terminé cette réparation.

Équipe

Eastern Washington University, Team 1-2, Rowley Winter 2016 Membre de l'équipe Eastern Washington University, Team 1-2, Rowley Winter 2016
EWU-ROWLEY-W16S1G2
4 membres
10 tutoriels rédigés
1 commentaire de tutoriel
Thanks for the fix. Now I can get on replacing the corroded battery contacts. Many thanks.
