Aller au contenu principal

MacBook Air 2022 (M2) Thunderbolt Ports Replacement

Ce dont vous avez besoin

  1. MacBook Air 2022 (M2) Thunderbolt Ports Replacement, Prepare your Macbook Air for disassembly: étape 1, image 1 de 3 MacBook Air 2022 (M2) Thunderbolt Ports Replacement, Prepare your Macbook Air for disassembly: étape 1, image 2 de 3 MacBook Air 2022 (M2) Thunderbolt Ports Replacement, Prepare your Macbook Air for disassembly: étape 1, image 3 de 3
    • Before you begin, discharge your battery below 25%, as a charged lithium-ion battery can be dangerous if accidentally punctured.

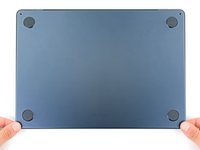
    • Power off your MacBook Air and unplug all cables.

    • Close the display and flip the laptop upside down. Keep the lid closed until you've physically disconnected the battery.

  2. MacBook Air 2022 (M2) Thunderbolt Ports Replacement, Unfasten the lower case: étape 2, image 1 de 2 MacBook Air 2022 (M2) Thunderbolt Ports Replacement, Unfasten the lower case: étape 2, image 2 de 2
    Outil utilisé dans cette étape :
    FixMat
    $36.95
    J'achète
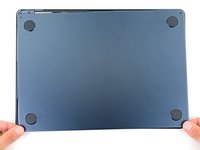
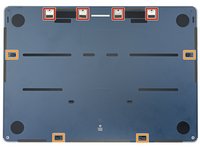
    • Use a P5 Pentalobe driver to remove the four 6.4 mm screws securing the lower case:

    • Two screws with a short threaded portion near the hinges

    • Two screws with a long threaded portion near the front of the MacBook

    • Throughout this repair, keep track of each screw and make sure it goes back exactly where it came from.

  3. MacBook Air 2022 (M2) Thunderbolt Ports Replacement, Insert an opening pick: étape 3, image 1 de 3 MacBook Air 2022 (M2) Thunderbolt Ports Replacement, Insert an opening pick: étape 3, image 2 de 3 MacBook Air 2022 (M2) Thunderbolt Ports Replacement, Insert an opening pick: étape 3, image 3 de 3
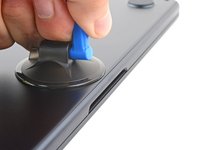
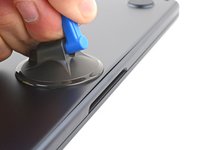
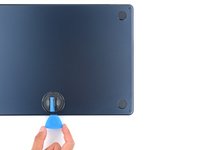
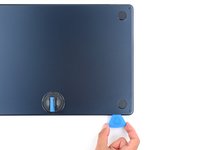
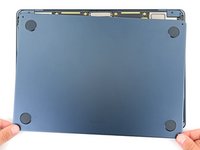
    • Apply a suction handle to the center of the lower case's front edge.

    • Pull up on the suction handle with strong, steady force to create a small gap between the lower case and the frame.

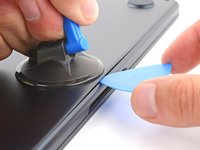
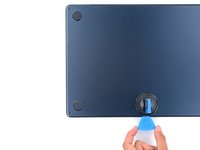
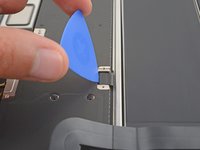
    • Insert an opening pick into the gap.

  4. MacBook Air 2022 (M2) Thunderbolt Ports Replacement, Release the snapping clips: étape 4, image 1 de 3 MacBook Air 2022 (M2) Thunderbolt Ports Replacement, Release the snapping clips: étape 4, image 2 de 3 MacBook Air 2022 (M2) Thunderbolt Ports Replacement, Release the snapping clips: étape 4, image 3 de 3
    • During the next two steps you'll feel and hear four snapping clips release. If a clip doesn't release, insert your opening pick farther and try again.

    • Slide the pick to the bottom right corner to release the first clip.

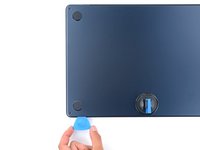
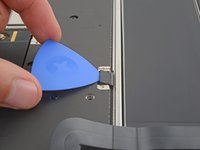
    • Slide the pick around the corner and up the right edge to release the next two clips.

  5. MacBook Air 2022 (M2) Thunderbolt Ports Replacement: étape 5, image 1 de 3 MacBook Air 2022 (M2) Thunderbolt Ports Replacement: étape 5, image 2 de 3 MacBook Air 2022 (M2) Thunderbolt Ports Replacement: étape 5, image 3 de 3
    • Insert the opening pick in the original gap created with the suction handle.

    • Slide the opening pick to the bottom left corner and up the left edge to release the three remaining snapping clips.

  6. MacBook Air 2022 (M2) Thunderbolt Ports Replacement, Release the sliding tabs: étape 6, image 1 de 3 MacBook Air 2022 (M2) Thunderbolt Ports Replacement, Release the sliding tabs: étape 6, image 2 de 3 MacBook Air 2022 (M2) Thunderbolt Ports Replacement, Release the sliding tabs: étape 6, image 3 de 3
    • Four sliding tabs along the back edge of the MacBook firmly secure the lower case. Separating these tabs requires a lot of force—consider using gloves to protect your hands from the sharp edges of the lower case.

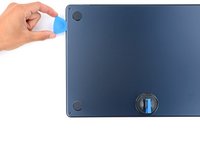
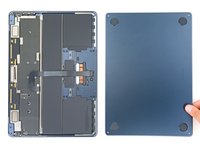
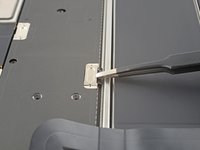
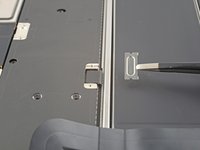
    • Keep the lower case flat and firmly pull it straight away from the back edge, one corner at a time, to disengage the sliding tabs.

    • Don't pull up until the cover is completely separated.

  7. MacBook Air 2022 (M2) Thunderbolt Ports Replacement, Remove the lower case: étape 7, image 1 de 3 MacBook Air 2022 (M2) Thunderbolt Ports Replacement, Remove the lower case: étape 7, image 2 de 3 MacBook Air 2022 (M2) Thunderbolt Ports Replacement, Remove the lower case: étape 7, image 3 de 3
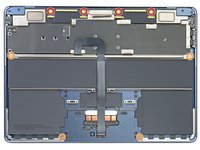
    • Remove the lower case.

    • During reassembly:

    • Set the lower case in place and align the sliding tabs with the screw heads they slide over. Press down and slide the lower case toward the back edge to engage the tabs—it'll stop sliding as the tabs engage.

    • When one side is engaged, it may push the other out of alignment. Check both sides as you push, there should be no gap along the back edge.

    • Once the lower case is flush with the frame, press down firmly along the perimeter to engage the four snapping clips.

    • You'll hear and feel a distinct click as each clip snaps into place.

  8. MacBook Air 2022 (M2) Thunderbolt Ports Replacement, Remove the battery connector cover: étape 8, image 1 de 1
    • Use a T3 Torx driver to remove the two 1.5 mm screws securing the battery connector cover.

    • Due to screw variances, you may need to use a T4 Torx instead. Keep this in mind whenever you encounter T3 Torx screws during this repair.

  9. MacBook Air 2022 (M2) Thunderbolt Ports Replacement: étape 9, image 1 de 2 MacBook Air 2022 (M2) Thunderbolt Ports Replacement: étape 9, image 2 de 2
    • Remove the battery connector cover.

  10. MacBook Air 2022 (M2) Thunderbolt Ports Replacement, Disconnect the battery: étape 10, image 1 de 2 MacBook Air 2022 (M2) Thunderbolt Ports Replacement, Disconnect the battery: étape 10, image 2 de 2
    • Use an opening pick to pry up and disconnect the battery connector.

  11. MacBook Air 2022 (M2) Thunderbolt Ports Replacement, Unfasten the top right press connector cover: étape 11, image 1 de 2 MacBook Air 2022 (M2) Thunderbolt Ports Replacement, Unfasten the top right press connector cover: étape 11, image 2 de 2
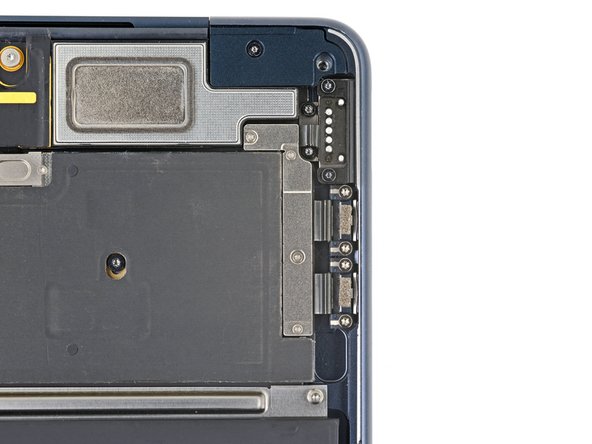
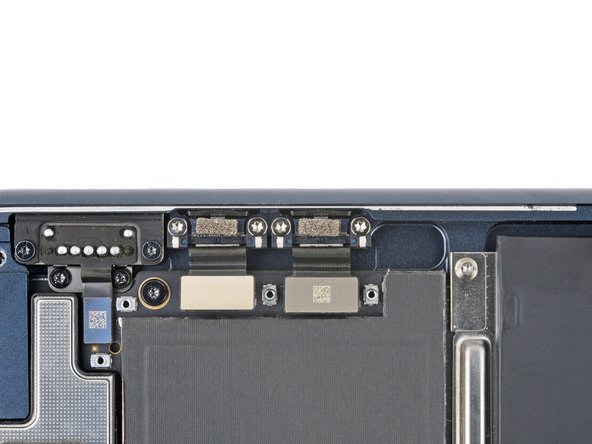
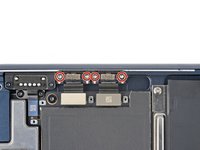
    • Use a T3 Torx driver to remove the four 1.5 mm screws securing the top right press connector cover.

  12. MacBook Air 2022 (M2) Thunderbolt Ports Replacement, Remove the top right press connector cover: étape 12, image 1 de 2 MacBook Air 2022 (M2) Thunderbolt Ports Replacement, Remove the top right press connector cover: étape 12, image 2 de 2
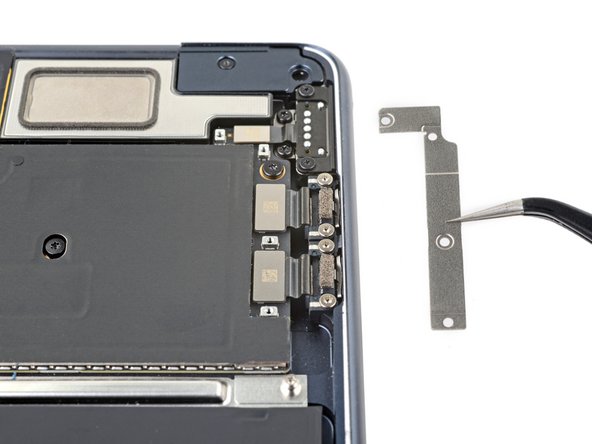
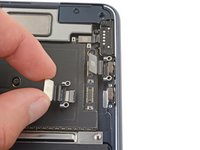
    • Remove the top right press connector cover.

  13. MacBook Air 2022 (M2) Thunderbolt Ports Replacement, Disconnect the Thunderbolt ports: étape 13, image 1 de 3 MacBook Air 2022 (M2) Thunderbolt Ports Replacement, Disconnect the Thunderbolt ports: étape 13, image 2 de 3 MacBook Air 2022 (M2) Thunderbolt Ports Replacement, Disconnect the Thunderbolt ports: étape 13, image 3 de 3
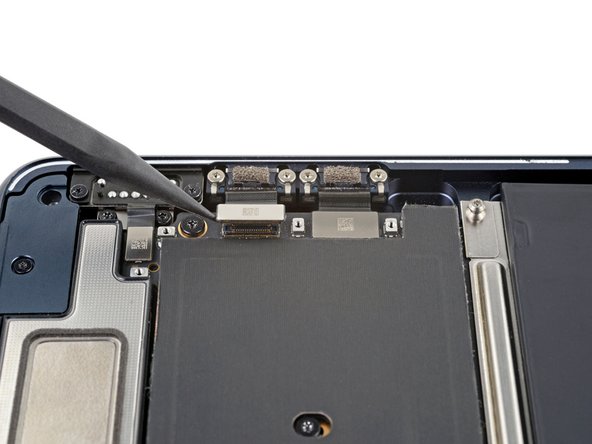
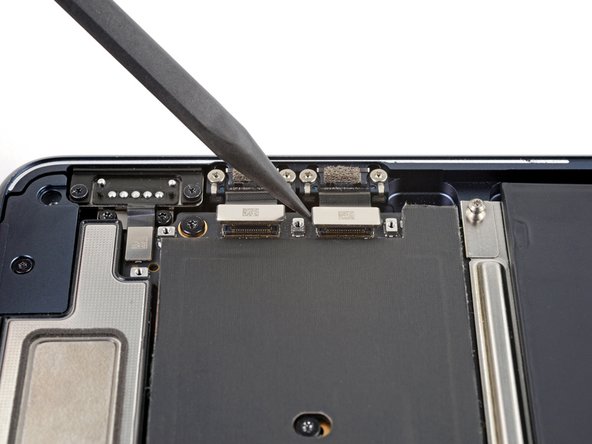
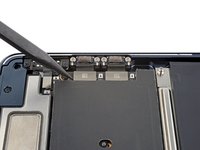
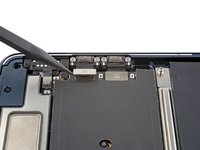
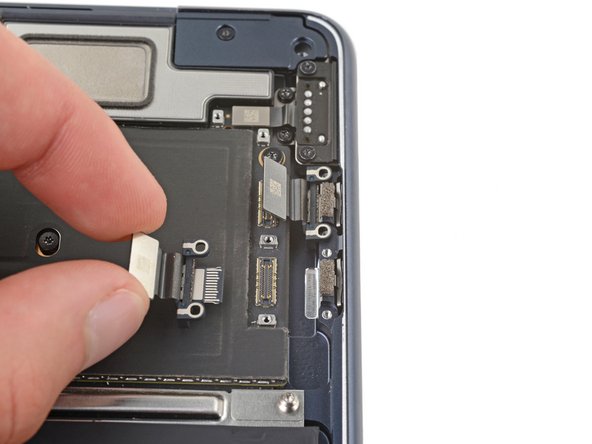
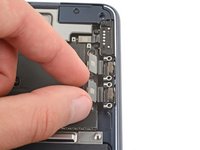
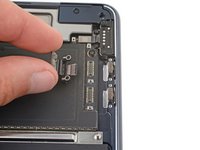
    • Use the pointed end of a spudger to pry up and disconnect both of the Thunderbolt port press connectors.

    • If you're replacing a single Thunderbolt port, only disconnect its corresponding press connector.

  14. MacBook Air 2022 (M2) Thunderbolt Ports Replacement, Unfasten the Thunderbolt ports: étape 14, image 1 de 2 MacBook Air 2022 (M2) Thunderbolt Ports Replacement, Unfasten the Thunderbolt ports: étape 14, image 2 de 2
    • Use a T5 Torx screwdriver to remove the four 3.7 mm screws securing the Thunderbolt ports.

    • If you're replacing a single Thunderbolt port, only unfasten its corresponding port.

  15. MacBook Air 2022 (M2) Thunderbolt Ports Replacement, Remove the Thunderbolt ports: étape 15, image 1 de 3 MacBook Air 2022 (M2) Thunderbolt Ports Replacement, Remove the Thunderbolt ports: étape 15, image 2 de 3 MacBook Air 2022 (M2) Thunderbolt Ports Replacement, Remove the Thunderbolt ports: étape 15, image 3 de 3
    • Use your fingers to remove the Thunderbolt ports.

Conclusion

Compare your new replacement part to the original part—you may need to transfer remaining components or remove adhesive backings from the new part before you install it.

To reassemble your device, follow these instructions in reverse order.

Take your e-waste to an R2 or e-Stewards certified recycler.

Repair didn’t go as planned? Try some basic troubleshooting or check out our Answers community for help.

Une autre personne a terminé cette réparation.

Spencer Day

Membre depuis le 09/14/22

53 745 Réputation

394 tutoriels rédigés

Équipe

iFixit Membre de l'équipe iFixit

Staff

135 membres

17 198 tutoriels rédigés

0 commentaires

Ajouter un commentaire

Nombre de vues :

Dernières 24 heures : 5

7 derniers jours : 37

30 derniers jours : 129

Total : 1,574