Aller au contenu principal

Mainboard Assembly

Conditions préalables uniquement
Ce tutoriel est uniquement destiné à être utilisé comme prérequis d'autres tutoriels. Il ne se suffit pas à lui-même.

Ce dont vous avez besoin

  1. Mainboard Assembly, Unfasten the back cover screws: étape 1, image 1 de 1
    • Use a Phillips #00 screwdriver to remove the four 11 mm-long screws securing the back cover.

  2. Mainboard Assembly, Insert an opening pick: étape 2, image 1 de 2 Mainboard Assembly, Insert an opening pick: étape 2, image 2 de 2
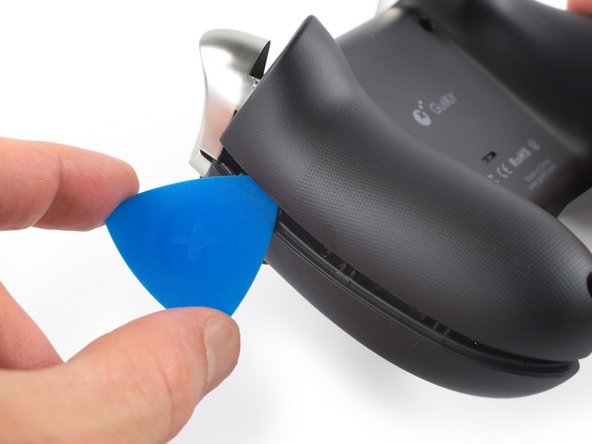
    • The back cover of the GuliKit Kingkong 2 Pro is held in place by plastic clips.

    • Insert an opening pick into the gap between the front assembly and the back cover at the bottom edge of the controller.

    • Tilt your opening pick downwards to widen the gap.

  3. Mainboard Assembly, Separate the front assembly and back cover: étape 3, image 1 de 2 Mainboard Assembly, Separate the front assembly and back cover: étape 3, image 2 de 2
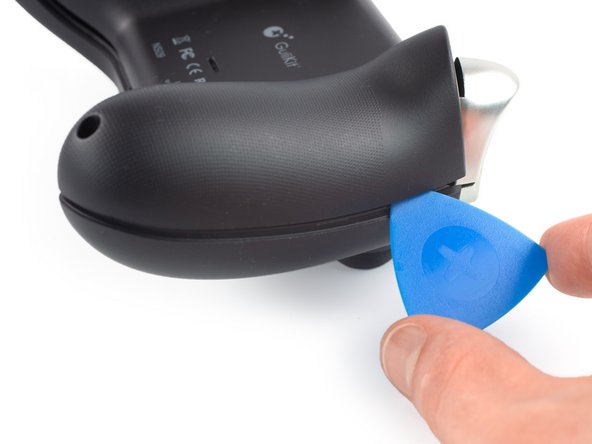
    • Insert an opening pick into the gap between the front assembly and the back cover at the outside of the right controller handle.

    • Slide the opening pick along the gap to separate the front assembly from the back cover.

  4. Mainboard Assembly: étape 4, image 1 de 2 Mainboard Assembly: étape 4, image 2 de 2
    • Insert an opening pick into the gap between the front assembly and the back cover at the outside of the left controller handle.

    • Slide the opening pick along the gap to separate the front assembly from the back cover.

  5. Mainboard Assembly, Remove the back cover: étape 5, image 1 de 2 Mainboard Assembly, Remove the back cover: étape 5, image 2 de 2
    • Separate the back cover from the front assembly and remove it.

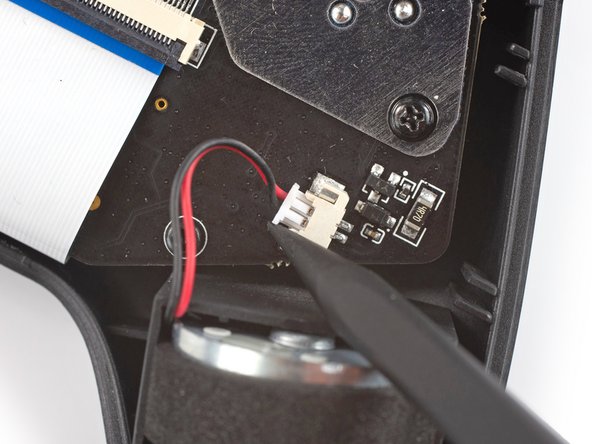
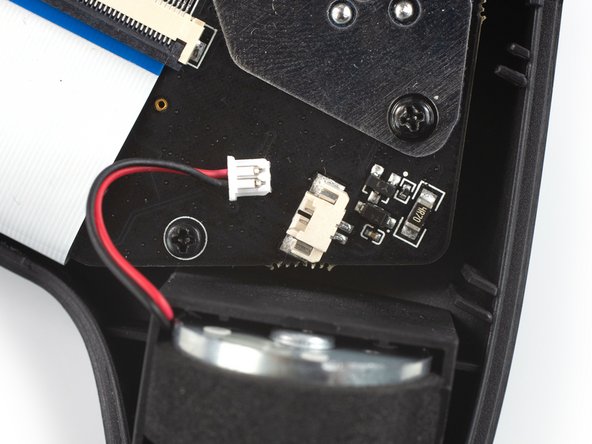
  6. Mainboard Assembly, Disconnect the right vibration motor: étape 6, image 1 de 3 Mainboard Assembly, Disconnect the right vibration motor: étape 6, image 2 de 3 Mainboard Assembly, Disconnect the right vibration motor: étape 6, image 3 de 3
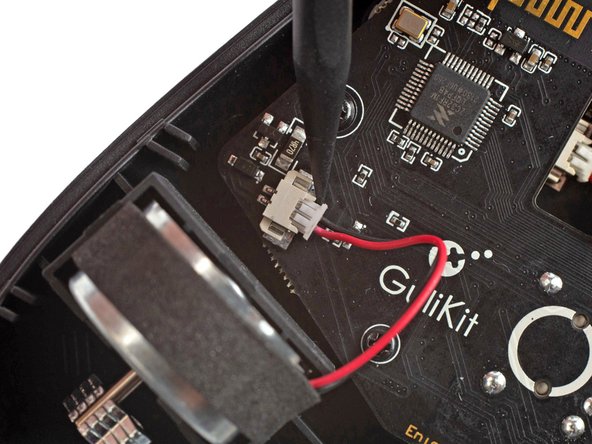
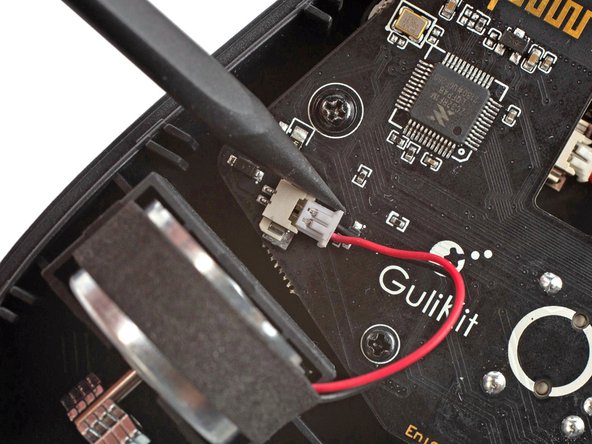
    • It's not mandatory to remove the two vibration motors to remove the mainboard assembly. However, other repairs become much easier with the motors removed. If you want to leave the motors in place, you can jump straight to step 9.

    • Pull on the connectors themselves and not the cables to avoid damaging them.

    • Use the point of a spudger to disconnect the right vibration motor by pushing the connector straight out of its socket.

    • If you can't disconnect the vibration motor with a spudger, use a pair of blunt nose tweezers to pull the connector out of its socket.

  7. Mainboard Assembly, Disconnect the left vibration motor: étape 7, image 1 de 3 Mainboard Assembly, Disconnect the left vibration motor: étape 7, image 2 de 3 Mainboard Assembly, Disconnect the left vibration motor: étape 7, image 3 de 3
    • Use the point of a spudger to disconnect the left vibration motor by pushing the connector straight out of its socket.

  8. Mainboard Assembly, Remove the vibration motors: étape 8, image 1 de 1
    • Remove the vibration motors by lifting them out of the controller housing.

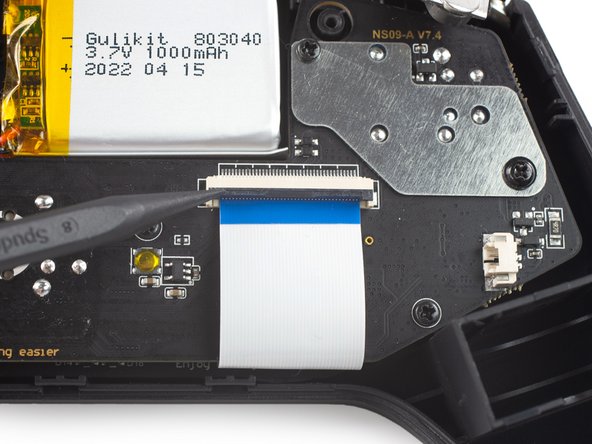
  9. Mainboard Assembly, Release the interconnect cable ZIF connector: étape 9, image 1 de 2 Mainboard Assembly, Release the interconnect cable ZIF connector: étape 9, image 2 de 2
    • Use a spudger, an opening tool, or your fingernail to flip up the small, hinged locking flap on the interconnect cable's ZIF connector.

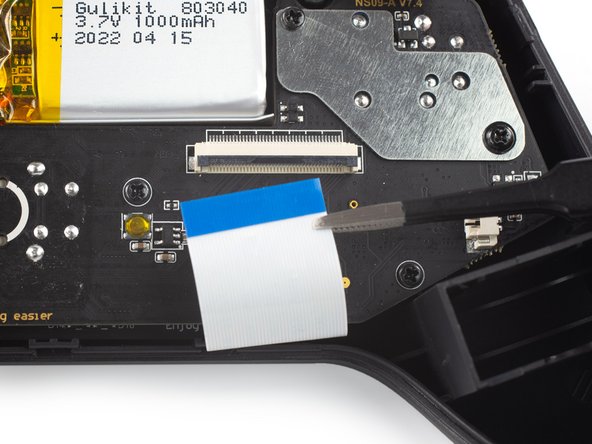
  10. Mainboard Assembly, Disconnect the interconnect cable: étape 10, image 1 de 2 Mainboard Assembly, Disconnect the interconnect cable: étape 10, image 2 de 2
    • Use a pair of blunt nose tweezers to disconnect the interconnect cable by pulling the cable straight out of the connector.

  11. Mainboard Assembly, Unfasten the mainboard assembly screws: étape 11, image 1 de 1
    • Use a Phillips #00 screwdriver to remove the screws securing the mainboard assembly:

    • Four 7.8 mm-long screws.

    • Two 11 mm-long screws.

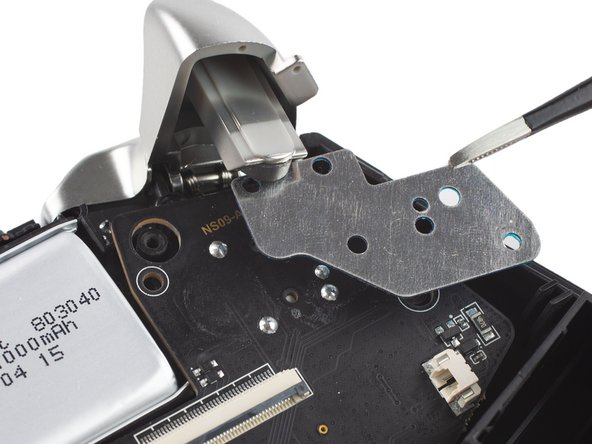
  12. Mainboard Assembly, Remove the mainboard shield: étape 12, image 1 de 2 Mainboard Assembly, Remove the mainboard shield: étape 12, image 2 de 2
    • Use a pair of blunt nose tweezers to remove the metal shield from the mainboard assembly.

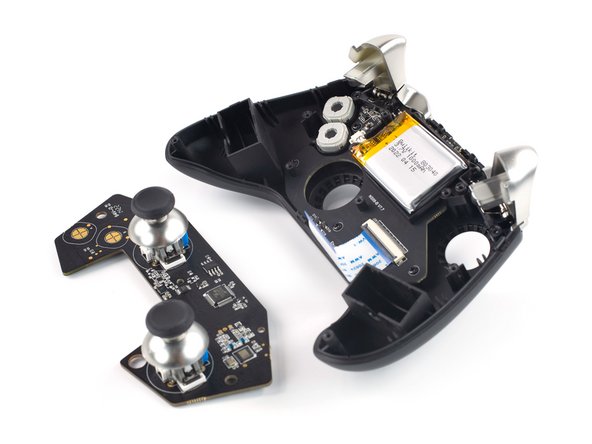
  13. Mainboard Assembly, Remove the mainboard assembly: étape 13, image 1 de 3 Mainboard Assembly, Remove the mainboard assembly: étape 13, image 2 de 3 Mainboard Assembly, Remove the mainboard assembly: étape 13, image 3 de 3
    • Remove the mainboard assembly by lifting it out of the controller housing.

Conclusion

To reassemble your device, follow these instructions in reverse order.

Dominik Schnabelrauch

Membre depuis le 11/23/16

204 077 Réputation

682 tutoriels rédigés

Équipe

iFixit Membre de l'équipe iFixit

Staff

135 membres

17 199 tutoriels rédigés

0 commentaires

Ajouter un commentaire

Nombre de vues :

Dernières 24 heures : 0

7 derniers jours : 2

30 derniers jours : 3

Total : 197