Aller au contenu principal
Pour réparer ensemble - Je crée un compte

Merch Source Projector Entertainment II Motherboard

Ce dont vous avez besoin

  1. Merch Source Projector Entertainment II Motherboard, Outer Casing: étape 1, image 1 de 2 Merch Source Projector Entertainment II Motherboard, Outer Casing: étape 1, image 2 de 2
    • Flip the projector onto its back and unscrew the nine 15mm screws using the Phillips #0 screw driver.

    Demander à FixBot

    Ajouter un commentaire

  2. Merch Source Projector Entertainment II Motherboard: étape 2, image 1 de 1
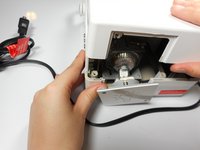
    • Flip the projector right side up and unscrew the two 12mm screws on the light bulb panel located at the rear of the projector with a Phillips #0 screw head.

    • The bottom right panel screw does not come completely out the panel door.

    Demander à FixBot

    Ajouter un commentaire

  3. Merch Source Projector Entertainment II Motherboard: étape 3, image 1 de 2 Merch Source Projector Entertainment II Motherboard: étape 3, image 2 de 2
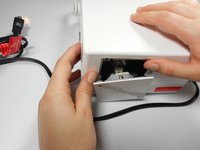
    • Using your hands, gently pry the top and bottom of the projector casing apart.

    Demander à FixBot

    Ajouter un commentaire

  4. Merch Source Projector Entertainment II Motherboard, Motherboard: étape 4, image 1 de 2 Merch Source Projector Entertainment II Motherboard, Motherboard: étape 4, image 2 de 2
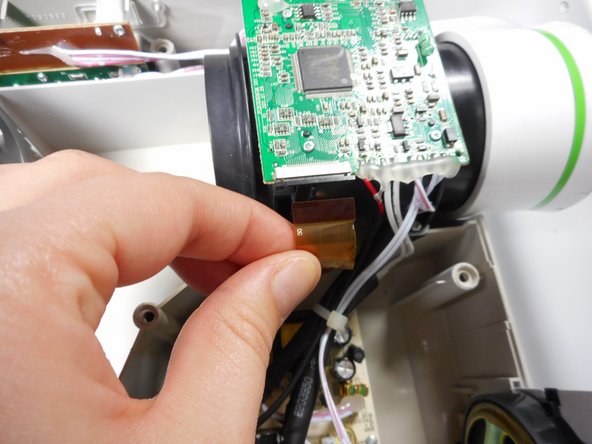
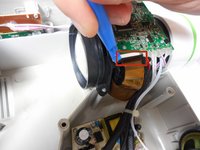
    • Use the plastic opening tool to gently disengage the ribbon cable from its back housing.

    • Once the ribbon cable is disengaged gently pull the cable off the motherboard.

    • Once the housing is disengaged, the ribbon cable should slide out easy. Do not pull too hard on the ribbon cable as it is very fragile.

    Demander à FixBot

    Ajouter un commentaire

  5. Merch Source Projector Entertainment II Motherboard: étape 5, image 1 de 2 Merch Source Projector Entertainment II Motherboard: étape 5, image 2 de 2
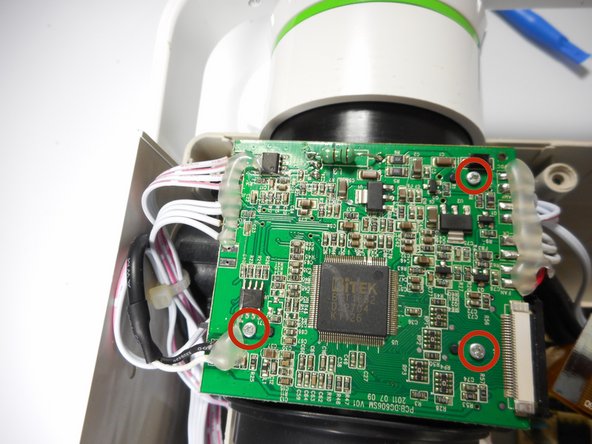
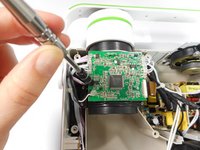
    • Unscrew the three 6 mm screws from the motherboard with the Phillips #0 screwdriver.

    • Be sure not to damage any of the wires atached to the motherboard.

    Demander à FixBot

    Ajouter un commentaire

  6. Merch Source Projector Entertainment II Motherboard: étape 6, image 1 de 2 Merch Source Projector Entertainment II Motherboard: étape 6, image 2 de 2
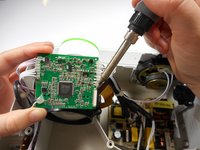
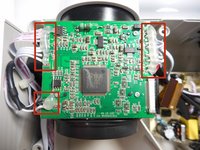
    • Solder off all of the connections on the motherboard with a soldering iron.

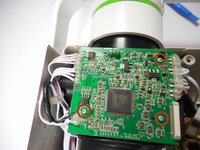
    • Once connections are soldered off, the motherboard should be detached and ready for replacement.

    • Need some help? Follow this guide to learn soldering basics.

    • While soldering the metal connections can get very hot. Never touch the iron with your hand. also make sure that the projector is fully turned off and not plugged in.

    • If there is hot glue on top on the connection with the motherboard, you will need to peel it off using your fingers.

    Demander à FixBot

    Ajouter un commentaire

Conclusion

To reassemble your device, follow these instructions in reverse order.

Annulation : je n'ai pas terminé ce tutoriel.

Une autre personne a terminé cette réparation.

Michael Tan

Membre depuis le 01/08/15

590 Réputation

3 tutoriels rédigés

3 commentaires de tutoriel

Was wondering if you could help me identify a microchip on the board by the speaker?

Brad Langland - Réponse Partager

Where can I get parts for the projector? I think my board is cooked.

Delgtm - Réponse Partager

mine acts like it does not recognize the rca cords. help

Kamela Mitchell - Réponse Partager

Ajouter un commentaire

Nombre de vues :

Dernières 24 heures : 1

7 derniers jours : 6

30 derniers jours : 43

Total : 2,361