Introduction
Replace a dead or failing battery in your Nexus 10 by completing the following guide. The battery should also be removed as a safety precaution before performing any other repairs on this device.
Ce dont vous avez besoin
-
-
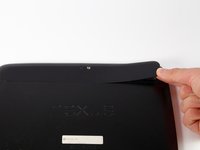
Using a plastic opening tool, remove the thin plastic cover from back of the tablet by prying up from its small tab.
 Demander à FixBot
-
-
-
Remove the five 2mm screws on the back of the device using a PH00 screwdriver.
-
-
-
-
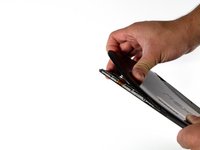
Pry the device apart by inserting a plastic opening tool in the seam between the plastic backing and display assembly. Use the tool to unclip the plastic tabs in between the backing and the display.
-
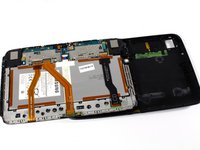
Pull the the plastic backing off the display assembly using your hands.
-
-
-
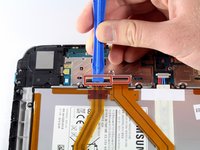
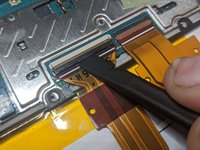
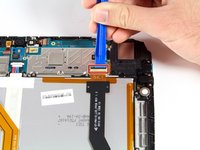
Detach the three connector ribbons passing over the battery using the plastic opening tool.
-
-
-
Remove the twelve 2mm screws around the perimeter of the battery with a PH00 screwdriver.
-
-
-
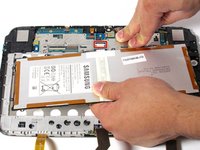
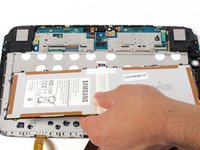
Disconnect the battery by lifting it upward and pulling it away from the connector.
-


To reassemble your device, follow these instructions in reverse order.
Annulation : je n'ai pas terminé ce tutoriel.
64 autres ont terminé cette réparation.
Équipe

Cal Poly, Team 34-18, Maness Spring 2016 Membre de l'équipe Cal Poly, Team 34-18, Maness Spring 2016
CPSU-MANESS-S16S34G18
4 membres
5 tutoriels rédigés
20 commentaires de tutoriel
that worked! watch connectors,though!
I am not never before doing something like this before, but now i do this battery replacement and it worked very well. Maybe there could be more text describing steps 4 and 6 those were parts were me as complete novice had most difficult to understand at first. Step 4 you should say that you need to open that small lever-thing what locks ribboncables in its place (picture here is accurate, but i did not understand it at first). And step 6 disconnecting actual battery cable were more simple than i first thought, just lifting it upwards and then its basically free already just pull it away. Same connecting new battery cable back is same kind simple, just push it back there but better to do it first time right since that connector loosens easily i think.
The back cover is one tough motherFer. The hardest is get to the pins behind the both speakers and in the curved corners. But the overall design is so cool