Aller au contenu principal
Pour réparer ensemble - Je crée un compte
Nintendo Switch Front Frame Replacement

Ce dont vous avez besoin

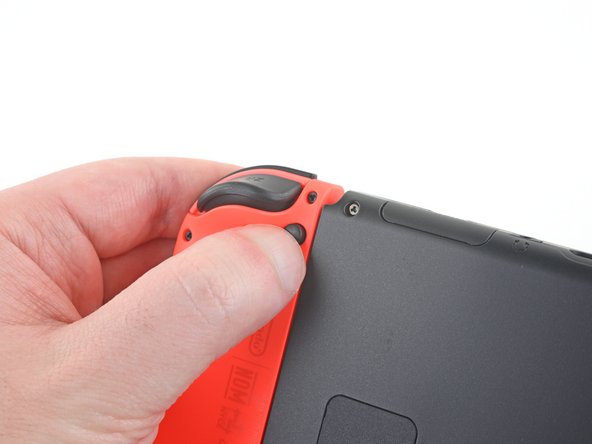
  1. Nintendo Switch Front Frame Replacement, Release the Joy Con controller locking tabs: étape 1, image 1 de 3 Nintendo Switch Front Frame Replacement, Release the Joy Con controller locking tabs: étape 1, image 2 de 3 Nintendo Switch Front Frame Replacement, Release the Joy Con controller locking tabs: étape 1, image 3 de 3
    • Before you begin this repair, make sure the device is completely powered off.

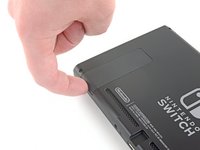
    • Press and hold down the small round button on the back of the Joy Con controller.

    • While you hold down the button, slide the controller upward.

    Demander à FixBot

    Ajouter un commentaire

  2. Nintendo Switch Front Frame Replacement, Remove the Joy Con controllers: étape 2, image 1 de 3 Nintendo Switch Front Frame Replacement, Remove the Joy Con controllers: étape 2, image 2 de 3 Nintendo Switch Front Frame Replacement, Remove the Joy Con controllers: étape 2, image 3 de 3
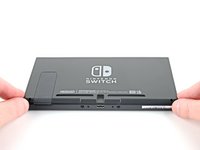
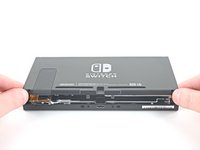
    • Continue sliding the Joy Con upward until it's completely removed from the console.

    • Repeat this same process for the other Joy Con.

    Demander à FixBot

    Ajouter un commentaire

  3. Nintendo Switch Front Frame Replacement, Remove the back-side screws: étape 3, image 1 de 1
    Outil utilisé dans cette étape :
    Magnetic Project Mat
    $19.95
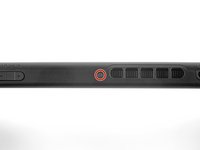
    • Use a Y00 screwdriver to remove the four 6.3 mm-long screws securing the rear panel.

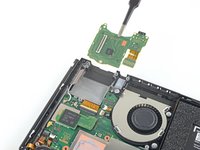
    • Throughout this repair, keep track of each screw and make sure it goes back exactly where it came from.

    • If you do happen to strip one of the four 6.3 mm-long Y00 screws, If you are lucky and careful, you may be able to use a Y0 bit to remove the screw(s). Please note that if you do attempt this, a bit of extra pressure will need to be applied to the screwdriver so that the screwdriver bit catches the screw.

    • If you do end up removing the stripped screw with this method, PLEASE do not reuse the screw again and instead replace the screw.

    Demander à FixBot

    Ajouter un commentaire

  4. Nintendo Switch Front Frame Replacement, Remove the top and bottom screws: étape 4, image 1 de 2 Nintendo Switch Front Frame Replacement, Remove the top and bottom screws: étape 4, image 2 de 2
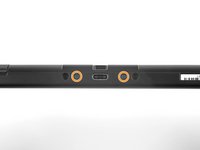
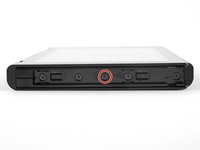
    • Use a JIS 00 driver to remove the following screws securing the rear panel:

    • One 2.5 mm-long screw on the top edge of the device

    • Two 2.5 mm-long screws on the bottom edge of the device

    • To prevent these tight screws from stripping, apply firm downward force, work slowly, and try another JIS 00 driver if the screws won't come out. Make sure the driver is fully inserted.

    • You can use a Phillips #000 screwdriver in a pinch, but you risk damaging or stripping the screws. Push down firmly on the screwdriver and twist slowly. Often, switching drivers may help, even if they are the same size.

    Demander à FixBot

    Ajouter un commentaire

  5. Nintendo Switch Front Frame Replacement, Remove the center side screws: étape 5, image 1 de 2 Nintendo Switch Front Frame Replacement, Remove the center side screws: étape 5, image 2 de 2
    • Use a JIS 00 driver to remove the two 3.8 mm center screws on the sides of the device (one on each side).

    Demander à FixBot

    Ajouter un commentaire

  6. Nintendo Switch Front Frame Replacement: étape 6, image 1 de 2 Nintendo Switch Front Frame Replacement: étape 6, image 2 de 2
    • Use your finger to flip up the kickstand on the back of the device.

    • If there's a microSD card in the microSD card slot, remove it now before you continue to the next step.

    Demander à FixBot

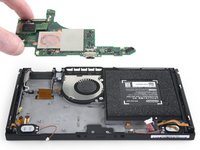
    Ajouter un commentaire

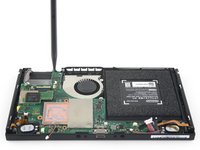
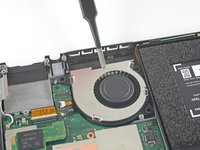
  7. Nintendo Switch Front Frame Replacement, Remove the kickstand well screw: étape 7, image 1 de 1
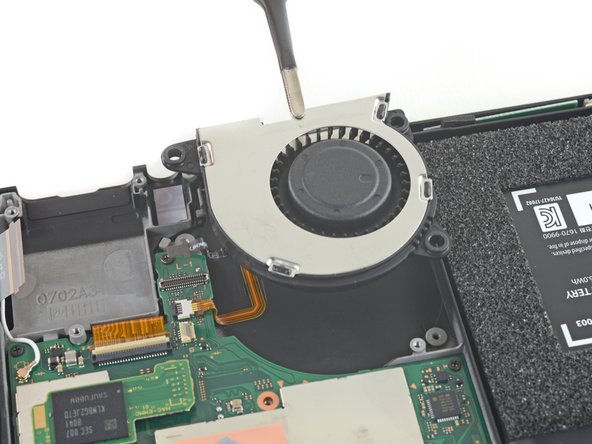
    • Use a JIS 00 driver to remove the 1.6 mm screw in the kickstand well.

    • Close the kickstand.

    Demander à FixBot

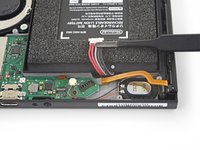
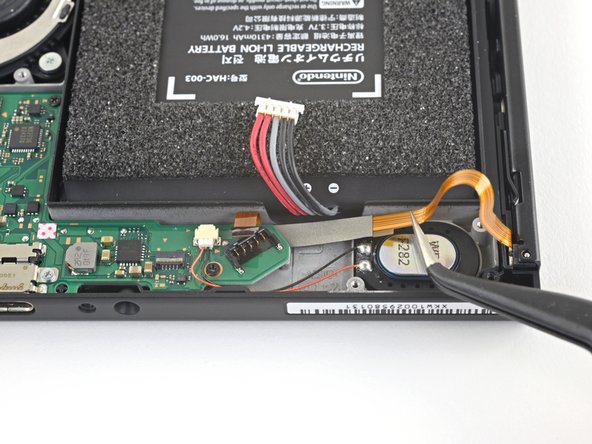
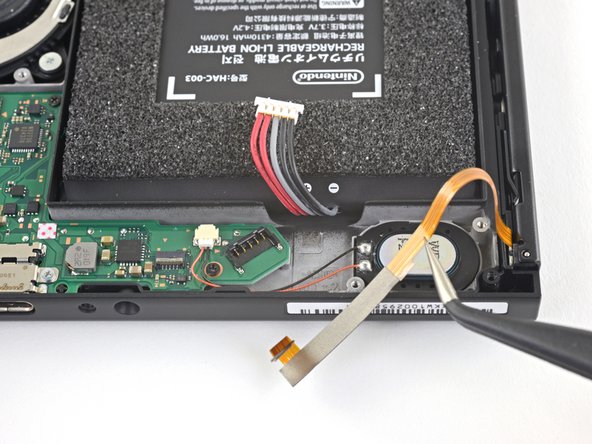
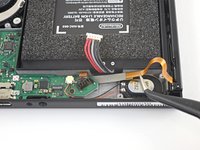
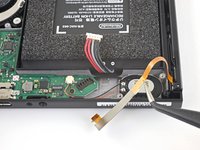
    Ajouter un commentaire

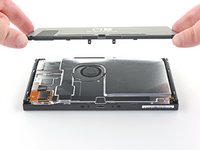
  8. Nintendo Switch Front Frame Replacement, Remove the rear panel: étape 8, image 1 de 3 Nintendo Switch Front Frame Replacement, Remove the rear panel: étape 8, image 2 de 3 Nintendo Switch Front Frame Replacement, Remove the rear panel: étape 8, image 3 de 3
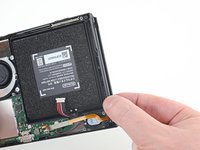
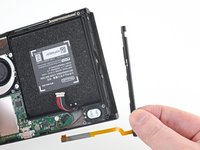
    • Open the game card cartridge flap.

    • The game card cartridge flap attaches to the other half of the plastic shell, preventing you from completely lifting up the rear panel if it's closed.

    • Lift the rear panel straight up from the bottom of the device and remove it.

    • Don't tilt it upwards while opening or else you risk breaking the plastic tabs on the top edge of the panel.

    Demander à FixBot

    Ajouter un commentaire

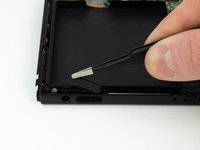
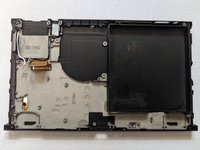
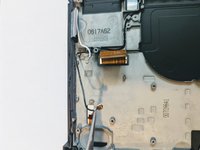
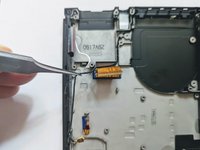
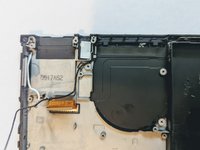
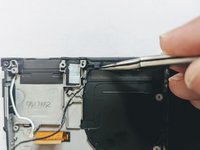
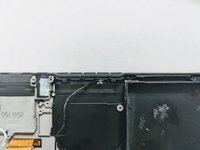
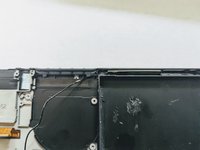
  9. Nintendo Switch Front Frame Replacement, Remove the microSD card reader: étape 9, image 1 de 1
    • Use a JIS 00 driver to remove the 3.1 mm screw securing the microSD card reader to the device.

    Demander à FixBot

    Ajouter un commentaire

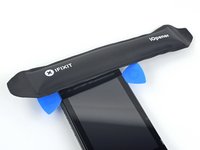
  10. Nintendo Switch Front Frame Replacement: étape 10, image 1 de 2 Nintendo Switch Front Frame Replacement: étape 10, image 2 de 2
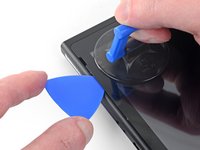
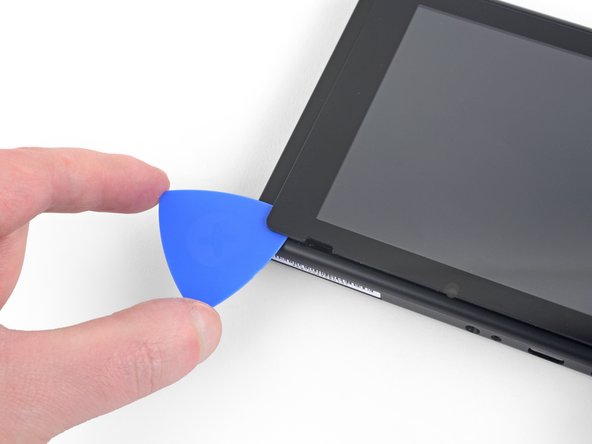
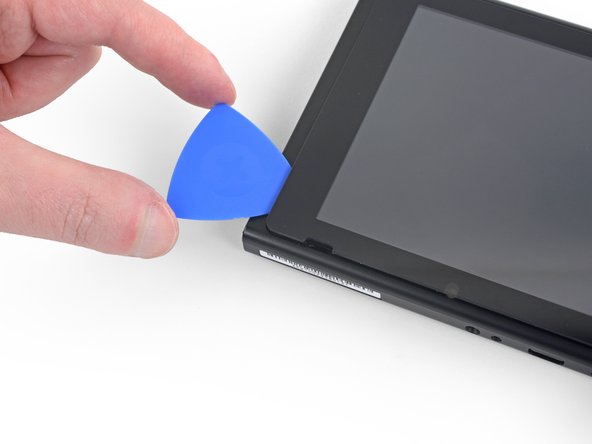
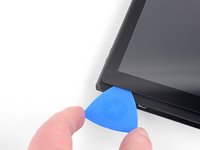
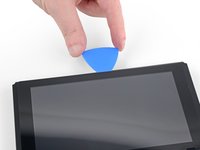
    Outil utilisé dans cette étape :
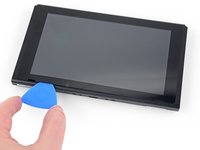
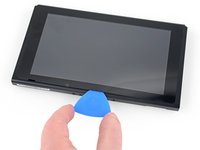
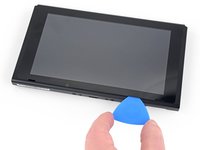
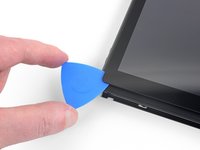
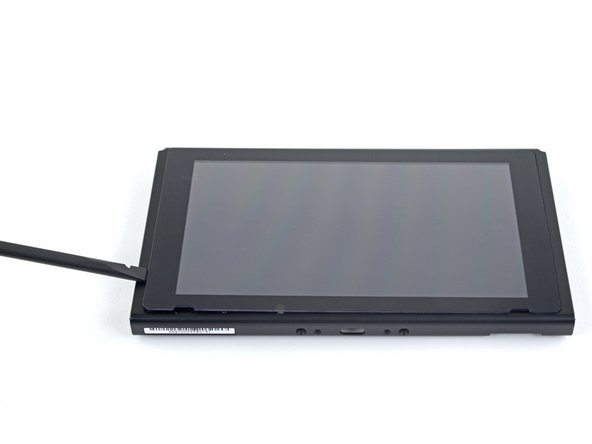
    Tweezers
    $4.99
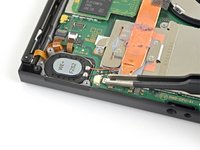
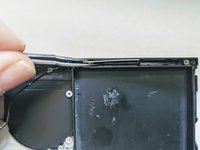
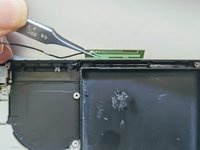
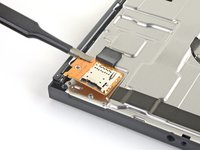
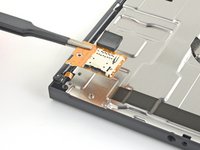
    • Use your fingers or a pair of tweezers to lift the microSD card reader straight up from the device to disconnect and remove it.

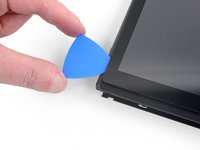
    • During reassembly, remove the foam pad before connecting the press connector to the motherboard. Set the foam pad back in place after you verify it's connected.

    Demander à FixBot

    Ajouter un commentaire

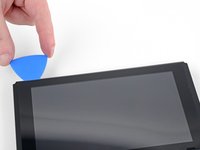
  11. Nintendo Switch Front Frame Replacement, Remove the shield plate: étape 11, image 1 de 1
    • Use a JIS 00 driver to remove the six 3 mm screws securing the shield plate to the device.

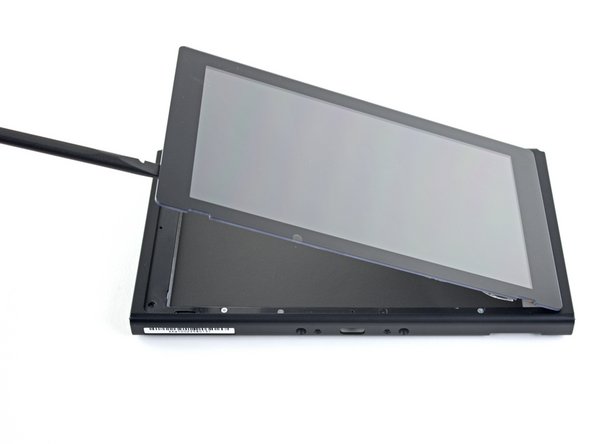
    Demander à FixBot

    Ajouter un commentaire

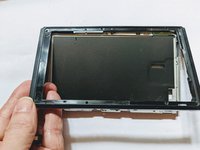
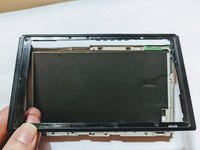
  12. Nintendo Switch Front Frame Replacement: étape 12, image 1 de 2 Nintendo Switch Front Frame Replacement: étape 12, image 2 de 2
    Outil utilisé dans cette étape :
    Tweezers
    $4.99
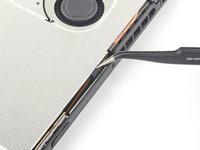
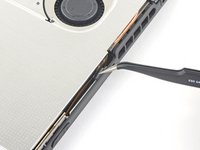
    • If the console doesn't have this foam, skip this step.

    • Use your fingers or a pair of tweezers to peel back the piece of foam on the top edge of the device near the fan exhaust port.

    • If the foam doesn't easily peel away, don't force it as it might end up tearing. Carefully peel at different spots to pull back the foam.

    Demander à FixBot

    Ajouter un commentaire

  13. Nintendo Switch Front Frame Replacement: étape 13, image 1 de 3 Nintendo Switch Front Frame Replacement: étape 13, image 2 de 3 Nintendo Switch Front Frame Replacement: étape 13, image 3 de 3
    Outil utilisé dans cette étape :
    iFixit Thermal Putty
    $9.95
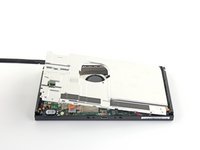
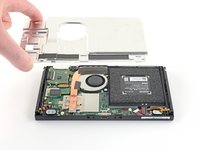
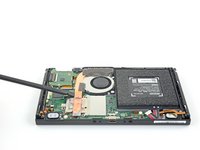
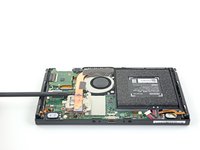
    • Insert a spudger underneath the shield plate along the edge of the device.

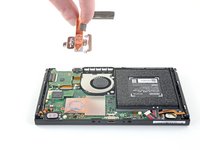
    • Pry up to lift the shield plate and remove it from the device.

    • You may feel a bit of resistance. This is normal, since the shield plate is slightly bonded to the heat sink with thermal paste.

    • A thick pink thermal compound bridges the gap between the shield plate and the copper heat sink underneath. This helps prevent the Switch from overheating.

    • During reassembly, if you don't have replacement thermal compound, use the flat end of a spudger to distribute the old compound evenly across the heat pipe, as thick as possible to ensure proper contact. Repeat this process on the shield plate.

    • If you need to replace it, refer to our thermal paste guide to remove the old thermal compound and replace it with an appropriate compound, such as thermal putty or K5 Pro, during reassembly.

    Demander à FixBot

    Ajouter un commentaire

  14. Nintendo Switch Front Frame Replacement, Disconnect the battery: étape 14, image 1 de 2 Nintendo Switch Front Frame Replacement, Disconnect the battery: étape 14, image 2 de 2
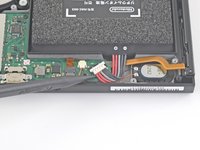
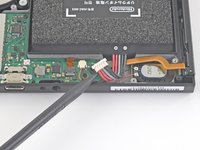
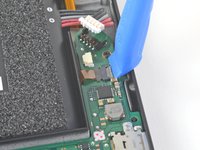
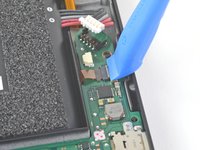
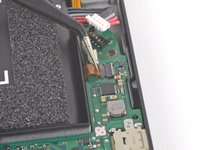
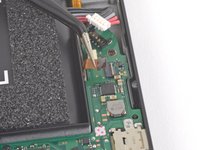
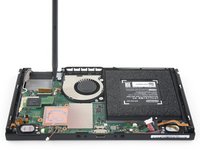
    • Use the point of a spudger to pry the battery connector straight up and out of its socket on the motherboard.

    Demander à FixBot

    Ajouter un commentaire

  15. Nintendo Switch Front Frame Replacement, Remove the heat sink: étape 15, image 1 de 1
    • Use a JIS 00 driver to remove the three 3 mm screws securing the heat sink to the motherboard.

    Demander à FixBot

    Ajouter un commentaire

  16. Outil utilisé dans cette étape :
    iFixit Adhesive Remover
    $19.99
    • Carefully peel the two foam pieces stuck over both the heatsink and the fan away from the fan.

    • The foam only needs to be peeled back enough to clear the fan.

    • The foam is really delicate and tears easily. Use the following technique to peel the foam:

    • If you have some, dip the point of a spudger in adhesive remover or isopropyl alcohol (90% or greater).

    • Insert the point of a spudger underneath a part of the foam that isn't stuck to anything.

    • Press the top of the foam with your finger to hold it in place.

    • Roll the spudger tip underneath the foam all the way to the other end of the foam to release it.

    Demander à FixBot

    Ajouter un commentaire

  17. Nintendo Switch Front Frame Replacement: étape 17, image 1 de 3 Nintendo Switch Front Frame Replacement: étape 17, image 2 de 3 Nintendo Switch Front Frame Replacement: étape 17, image 3 de 3
    • Use a spudger or your fingers to lift the heatsink up and off the motherboard to remove it.

    • You may feel a bit of resistance. This is normal, since the heat sink is slightly bonded to the CPU with thermal paste.

    • Clean off the old thermal paste from the heat sink and CPU using high-concentration (90% or higher) isopropyl alcohol and a microfiber cloth. Apply new thermal paste to the CPU before reassembly. Don't reuse the old thermal paste.

    • Apply thermal paste to all surfaces that had thermal paste applied previously. This includes between the heatpipe and aluminum shield, which the Switch uses as additional heatsinking.

    Demander à FixBot

    Ajouter un commentaire

  18. Nintendo Switch Front Frame Replacement, Remove the headphone jack and game card reader: étape 18, image 1 de 2 Nintendo Switch Front Frame Replacement, Remove the headphone jack and game card reader: étape 18, image 2 de 2
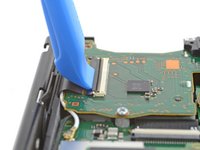
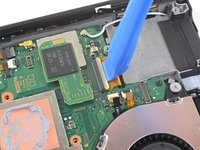
    • Use an opening tool or your fingernail to flip up the small, hinged locking flap on the digitizer cable's ZIF connector.

    Demander à FixBot

    Ajouter un commentaire

  19. Nintendo Switch Front Frame Replacement: étape 19, image 1 de 2 Nintendo Switch Front Frame Replacement: étape 19, image 2 de 2
    Outil utilisé dans cette étape :
    Tweezers
    $4.99
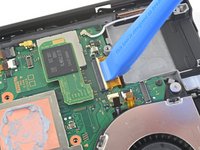
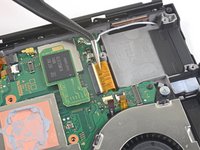
    • Use a pair of tweezers to slide the digitizer cable horizontally out of its connector on the game card reader board.

    • Before inserting the cable during reassembly, make sure the ZIF connector locking flap is flipped up.

    • With the cable parallel to the board, gently slide it into its connector.

    • Don't force the cable into the connector. If it doesn't insert, ensure the locking flap is flipped up, reposition the cable, and try again.

    • If your touchscreen doesn't work after the repair but your Game Card reader does, make sure this cable is properly inserted. If your Game Card reader also doesn't work, check the Game Card connector in the next step instead.

    Demander à FixBot

    Ajouter un commentaire

  20. Nintendo Switch Front Frame Replacement: étape 20, image 1 de 2 Nintendo Switch Front Frame Replacement: étape 20, image 2 de 2
    • Use the point of a spudger to pry the headphone jack and game card reader connector straight up to disconnect it from the motherboard.

    • To re-attach press connectors like this one, carefully align and press down on one side until it clicks into place, then repeat on the other side. Do not press down on the middle. If the connector is misaligned, the pins can bend and cause permanent damage.

    • If the touch screen doesn't work and/or game cards aren't detected after reassembly, you might have not fully reconnected this press connector. Carefully disconnect it and try again.

    Demander à FixBot

    Ajouter un commentaire

  21. Nintendo Switch Front Frame Replacement: étape 21, image 1 de 1
    • Use a JIS 00 driver to remove the three 3.1 mm screws securing the headphone jack and game card reader board to the device.

    Demander à FixBot

    Ajouter un commentaire

  22. Nintendo Switch Front Frame Replacement: étape 22, image 1 de 2 Nintendo Switch Front Frame Replacement: étape 22, image 2 de 2
    • Use a pair of tweezers or your fingers to remove the headphone jack bracket.

    Demander à FixBot

    Ajouter un commentaire

  23. Nintendo Switch Front Frame Replacement: étape 23, image 1 de 2 Nintendo Switch Front Frame Replacement: étape 23, image 2 de 2
    • Use a pair of tweezers or your fingers to remove the headphone jack and game card reader board.

    Demander à FixBot

    Ajouter un commentaire

  24. Nintendo Switch Front Frame Replacement, Remove the motherboard: étape 24, image 1 de 2 Nintendo Switch Front Frame Replacement, Remove the motherboard: étape 24, image 2 de 2
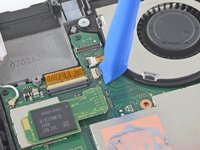
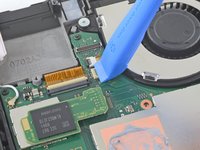
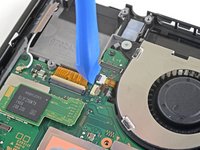
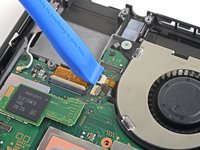
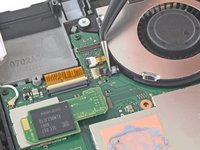
    • Use an opening tool, spudger, or your fingernail to flip up the small, hinged locking flap on the LCD ribbon cable ZIF connector.

    Demander à FixBot

    Ajouter un commentaire

  25. Nintendo Switch Front Frame Replacement: étape 25, image 1 de 2 Nintendo Switch Front Frame Replacement: étape 25, image 2 de 2
    Outil utilisé dans cette étape :
    Tweezers
    $4.99
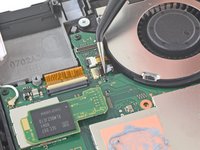
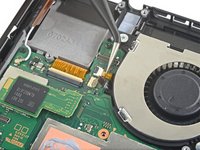
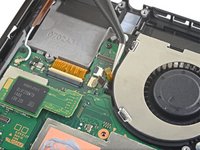
    • Use a pair of tweezers to pull the ribbon cable straight out of its connector on the motherboard.

    Demander à FixBot

    Ajouter un commentaire

  26. Nintendo Switch Front Frame Replacement: étape 26, image 1 de 2 Nintendo Switch Front Frame Replacement: étape 26, image 2 de 2
    • Use an opening tool, spudger, or your fingernail to flip up the small, hinged locking flap on the fan cable ZIF connector.

    Demander à FixBot

    Ajouter un commentaire

  27. Nintendo Switch Front Frame Replacement: étape 27, image 1 de 2 Nintendo Switch Front Frame Replacement: étape 27, image 2 de 2
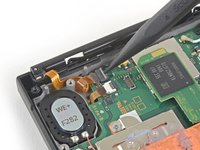
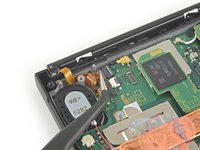
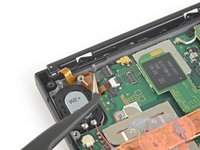
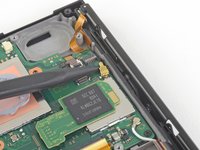
    • Use a pair of tweezers to pull the fan cable straight out of its connector on the motherboard.

    Demander à FixBot

    Ajouter un commentaire

  28. Nintendo Switch Front Frame Replacement: étape 28, image 1 de 2 Nintendo Switch Front Frame Replacement: étape 28, image 2 de 2
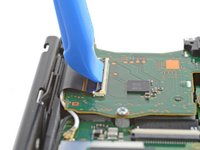
    • Use an opening tool, spudger, or your fingernail to flip up the small, hinged locking flap on the power and volume button ribbon cable ZIF connector.

    Demander à FixBot

    Ajouter un commentaire

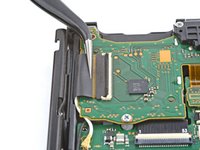
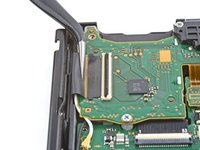
  29. Nintendo Switch Front Frame Replacement: étape 29, image 1 de 2 Nintendo Switch Front Frame Replacement: étape 29, image 2 de 2
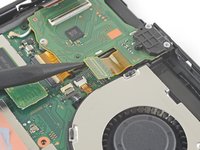
    • Use a pair of tweezers to pull the ribbon cable straight out of its connector on the motherboard.

    Demander à FixBot

    Ajouter un commentaire

  30. Nintendo Switch Front Frame Replacement: étape 30, image 1 de 2 Nintendo Switch Front Frame Replacement: étape 30, image 2 de 2
    • Use an opening tool, spudger, or your fingernail to flip up the small, hinged locking flap on the smaller LCD ribbon cable ZIF connector.

    Demander à FixBot

    Ajouter un commentaire

  31. Nintendo Switch Front Frame Replacement: étape 31, image 1 de 2 Nintendo Switch Front Frame Replacement: étape 31, image 2 de 2
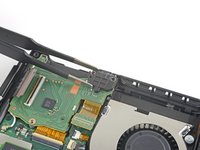
    • Use a pair of tweezers to pull the ribbon cable straight out of its connector on the motherboard.

    Demander à FixBot

    Ajouter un commentaire

  32. Nintendo Switch Front Frame Replacement: étape 32, image 1 de 2 Nintendo Switch Front Frame Replacement: étape 32, image 2 de 2
    • Use the point of a spudger, an opening tool, or your fingernail to flip up the small, hinged locking flap on the Joy Con sensor rail's data cable ZIF connector.

    Demander à FixBot

    Ajouter un commentaire

  33. Nintendo Switch Front Frame Replacement: étape 33, image 1 de 2 Nintendo Switch Front Frame Replacement: étape 33, image 2 de 2
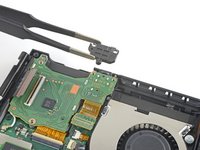
    • Use a pair of tweezers to pull the ribbon cable straight out of its connector on the motherboard.

    Demander à FixBot

    Ajouter un commentaire

  34. Nintendo Switch Front Frame Replacement: étape 34, image 1 de 2 Nintendo Switch Front Frame Replacement: étape 34, image 2 de 2
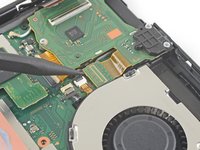
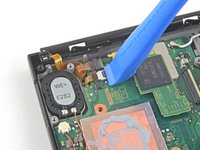
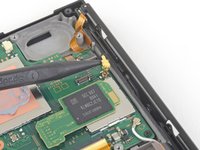
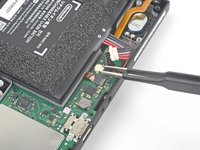
    • Use the point of a spudger to pry up the black antenna cable straight up out of its socket on the motherboard.

    Demander à FixBot

    Ajouter un commentaire

  35. Nintendo Switch Front Frame Replacement: étape 35, image 1 de 2 Nintendo Switch Front Frame Replacement: étape 35, image 2 de 2
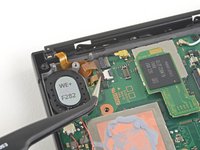
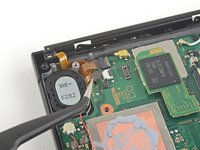
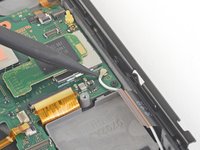
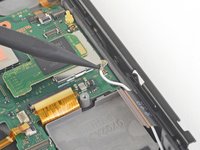
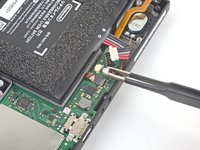
    • Use the point of a spudger to pry up the white antenna cable straight up out of its socket on the motherboard.

    Demander à FixBot

    Ajouter un commentaire

  36. Nintendo Switch Front Frame Replacement: étape 36, image 1 de 2 Nintendo Switch Front Frame Replacement: étape 36, image 2 de 2
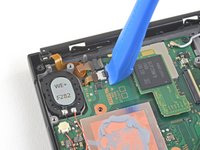
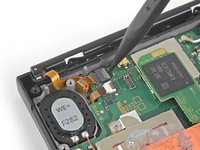
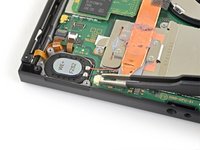
    • Use your fingers or a pair of tweezers to pull the right speaker connector straight out of its socket on the motherboard.

    • Do not pull on the connector by the speaker wires. They're very thin and can easily snap off the connector.

    Demander à FixBot

    Ajouter un commentaire

  37. Nintendo Switch Front Frame Replacement: étape 37, image 1 de 2 Nintendo Switch Front Frame Replacement: étape 37, image 2 de 2
    • Use your fingers or a pair of tweezers to pull the left speaker connector straight out of its socket on the motherboard.

    • Do not pull on the connector by the speaker wires. They're very thin and can easily snap off the connector.

    Demander à FixBot

    Ajouter un commentaire

  38. Nintendo Switch Front Frame Replacement: étape 38, image 1 de 2 Nintendo Switch Front Frame Replacement: étape 38, image 2 de 2
    • Use an opening tool, spudger, or your fingernail to flip up the small, hinged locking flap on the Joy Con sensor rail data cable ZIF connector.

    Demander à FixBot

    Ajouter un commentaire

  39. Nintendo Switch Front Frame Replacement: étape 39, image 1 de 2 Nintendo Switch Front Frame Replacement: étape 39, image 2 de 2
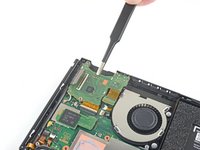
    • Use a pair of tweezers to slide the Joy Con rail data cable straight out of its connector on the motherboard.

    Demander à FixBot

    Ajouter un commentaire

  40. Nintendo Switch Front Frame Replacement: étape 40, image 1 de 1
    • Use a JIS 00 driver to remove the following screws:

    • Four 2.5 mm screws

    • Two 3.1 mm screws

    Demander à FixBot

    Ajouter un commentaire

  41. Nintendo Switch Front Frame Replacement: étape 41, image 1 de 3 Nintendo Switch Front Frame Replacement: étape 41, image 2 de 3 Nintendo Switch Front Frame Replacement: étape 41, image 3 de 3
    • Insert a spudger into a gap between the motherboard and the frame.

    • Carefully lift up the motherboard and remove it from the frame.

    Demander à FixBot

    Ajouter un commentaire

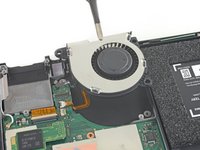
  42. Nintendo Switch Front Frame Replacement, Remove the Fan: étape 42, image 1 de 1
    • Use a JIS 00 driver to remove the three 4.8 mm screws securing the fan.

    Demander à FixBot

    Ajouter un commentaire

  43. Nintendo Switch Front Frame Replacement: étape 43, image 1 de 2 Nintendo Switch Front Frame Replacement: étape 43, image 2 de 2
    Outil utilisé dans cette étape :
    Tweezers
    $4.99
    • Use a pair of tweezers or your fingers to lift the fan straight up and remove it from the device.

    • Compare your new replacement part to the original part. You may need to transfer remaining components (such as the rubber bushings) to the new part before installing.

    Demander à FixBot

    Ajouter un commentaire

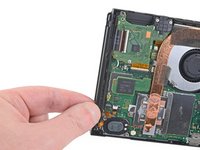
  44. Nintendo Switch Front Frame Replacement, Remove the Right Joy Con Sensor Rail: étape 44, image 1 de 1
    • Use a JIS 00 driver to remove the four 3.7 mm screws securing the right Joy Con rail to the frame of the device.

    • These screws are torqued down and can be difficult to remove. To prevent them from stripping, apply firm downward force, work slowly and try a different screwdriver if the screws won't come out.

    Demander à FixBot

    Ajouter un commentaire

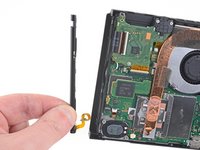
  45. Nintendo Switch Front Frame Replacement: étape 45, image 1 de 2 Nintendo Switch Front Frame Replacement: étape 45, image 2 de 2
    • Remove the right Joy Con sensor rail.

    • Take care not to snag the rail's data cable on the device frame as you remove it.

    Demander à FixBot

    Ajouter un commentaire

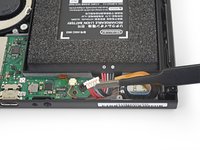
  46. Nintendo Switch Front Frame Replacement, Remove the Left Joy Con Sensor Rail: étape 46, image 1 de 2 Nintendo Switch Front Frame Replacement, Remove the Left Joy Con Sensor Rail: étape 46, image 2 de 2
    • Use your fingers or a pair of tweezers to lift the battery connector up and out of the way of the Joy Con rail's data cable.

    Demander à FixBot

    Ajouter un commentaire

  47. Nintendo Switch Front Frame Replacement: étape 47, image 1 de 3 Nintendo Switch Front Frame Replacement: étape 47, image 2 de 3 Nintendo Switch Front Frame Replacement: étape 47, image 3 de 3
    • Use your fingers or a pair of tweezers to lift the battery connector up and out of the way of the Joy Con rail's data cable.

    Demander à FixBot

    Ajouter un commentaire

  48. Nintendo Switch Front Frame Replacement: étape 48, image 1 de 1
    • Use a JIS 00 driver to remove the four 3.7 mm screws securing the left Joy Con rail to the frame of the device.

    • These screws are torqued down and can be difficult to remove. To prevent them from stripping, apply firm downward force, work slowly and try a different screwdriver if the screws won't come out.

    Demander à FixBot

    Ajouter un commentaire

  49. Nintendo Switch Front Frame Replacement: étape 49, image 1 de 2 Nintendo Switch Front Frame Replacement: étape 49, image 2 de 2
    • Remove the left Joy Con sensor rail from the device.

    Demander à FixBot

    Ajouter un commentaire

  50. Nintendo Switch Front Frame Replacement, Remove the Power and Volume Button Board: étape 50, image 1 de 1
    • Use the flat end of a spudger to pry up the taped down power/volume ribbon cable.

    Demander à FixBot

    Ajouter un commentaire

  51. Nintendo Switch Front Frame Replacement: étape 51, image 1 de 2 Nintendo Switch Front Frame Replacement: étape 51, image 2 de 2
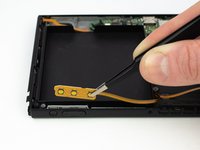
    • Remove the power/volume board with a pair of blunt nose tweezers.

    Demander à FixBot

    Ajouter un commentaire

  52. Nintendo Switch Front Frame Replacement, Remove the Exterior Power and Volume Buttons: étape 52, image 1 de 1
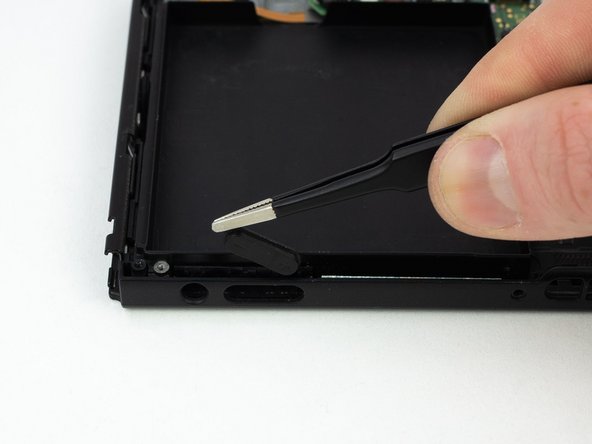
    • Pull the rubber conductive pad out with a pair of blunt nose tweezers.

    Demander à FixBot

    Ajouter un commentaire

  53. Nintendo Switch Front Frame Replacement: étape 53, image 1 de 2 Nintendo Switch Front Frame Replacement: étape 53, image 2 de 2
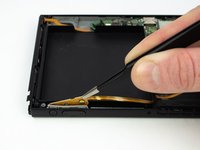
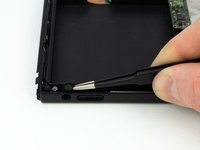
    • Pull the power and volume buttons out with a pair of blunt nose tweezers.

    Demander à FixBot

    Ajouter un commentaire

  54. Nintendo Switch Front Frame Replacement, Remove the WiFi Antenna: étape 54, image 1 de 3 Nintendo Switch Front Frame Replacement, Remove the WiFi Antenna: étape 54, image 2 de 3 Nintendo Switch Front Frame Replacement, Remove the WiFi Antenna: étape 54, image 3 de 3
    • Deroute the black coax cable from the midframe.

    Demander à FixBot

    Ajouter un commentaire

  55. Nintendo Switch Front Frame Replacement: étape 55, image 1 de 2 Nintendo Switch Front Frame Replacement: étape 55, image 2 de 2
    • Continue following the wire, derouting it as you go.

    Demander à FixBot

    Ajouter un commentaire

  56. Nintendo Switch Front Frame Replacement: étape 56, image 1 de 2 Nintendo Switch Front Frame Replacement: étape 56, image 2 de 2
    • Pry the metal barrel surrounding the coax up from the midframe.

    Demander à FixBot

    Ajouter un commentaire

  57. Nintendo Switch Front Frame Replacement: étape 57, image 1 de 2 Nintendo Switch Front Frame Replacement: étape 57, image 2 de 2
    • Grasp the WiFi antenna board with a pair of tweezers and lift straight up to remove it.

    Demander à FixBot

    Ajouter un commentaire

  58. Nintendo Switch Front Frame Replacement, Remove the Screen: étape 58, image 1 de 1
    • Heat an iOpener and apply it to the bottom edge of the screen for around two minutes to to help soften the adhesive.

    • A hair dryer, heat gun, or hot plate may also be used, but be careful not to overheat the device—the display and internal battery are both susceptible to heat damage.

    Demander à FixBot

    Ajouter un commentaire

  59. Nintendo Switch Front Frame Replacement: étape 59, image 1 de 3 Nintendo Switch Front Frame Replacement: étape 59, image 2 de 3 Nintendo Switch Front Frame Replacement: étape 59, image 3 de 3
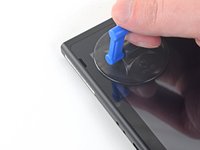
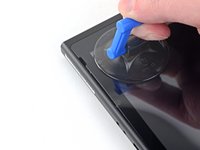
    • Apply a suction cup to the bottom-left corner of the screen.

    • Pull up on the suction up with strong, steady force to create a gap.

    • Depending on the age of your device, this may be difficult. If you have trouble, apply more heat and try again.

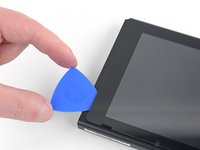
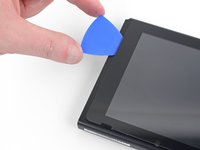
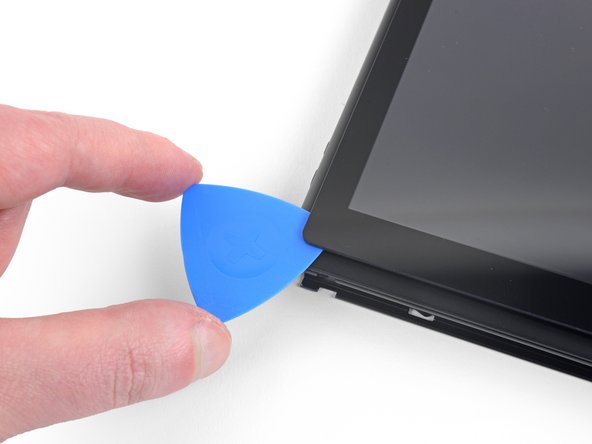
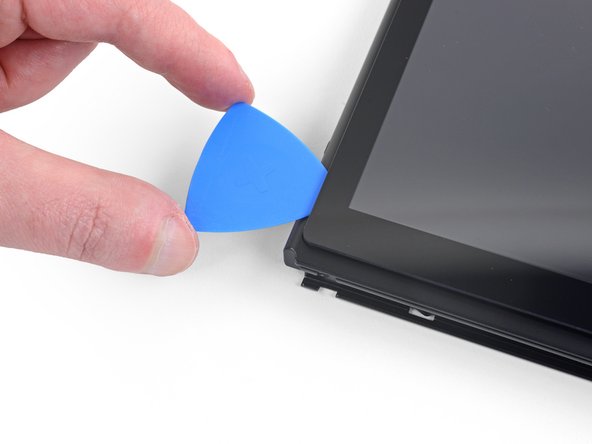
    • Insert the point of an opening pick into the gap, making sure to only insert the pick about 5 mm.

    Demander à FixBot

    Ajouter un commentaire

  60. Nintendo Switch Front Frame Replacement: étape 60, image 1 de 3 Nintendo Switch Front Frame Replacement: étape 60, image 2 de 3 Nintendo Switch Front Frame Replacement: étape 60, image 3 de 3
    • Slide the opening pick along the bottom edge of the screen to slice the adhesive.

    • Leave the pick inserted to prevent the adhesive from re-adhering to the frame.

    Demander à FixBot

    Ajouter un commentaire

  61. Nintendo Switch Front Frame Replacement: étape 61, image 1 de 3 Nintendo Switch Front Frame Replacement: étape 61, image 2 de 3 Nintendo Switch Front Frame Replacement: étape 61, image 3 de 3
    • Insert a second opening pick into the gap to the left of the first pick.

    • Slide the opening pick back towards the left side of the device.

    • Leave the opening pick inserted.

    Demander à FixBot

    Ajouter un commentaire

  62. Nintendo Switch Front Frame Replacement: étape 62, image 1 de 1
    • Heat the left edge of the screen for around two minutes to help soften the adhesive.

    Demander à FixBot

    Ajouter un commentaire

  63. Nintendo Switch Front Frame Replacement: étape 63, image 1 de 3 Nintendo Switch Front Frame Replacement: étape 63, image 2 de 3 Nintendo Switch Front Frame Replacement: étape 63, image 3 de 3
    • Continue sliding the opening pick around the bottom-left corner to slice the adhesive.

    Demander à FixBot

    Ajouter un commentaire

  64. Nintendo Switch Front Frame Replacement: étape 64, image 1 de 2 Nintendo Switch Front Frame Replacement: étape 64, image 2 de 2
    • Continue sliding the opening pick along the left edge of the screen to slice to adhesive.

    Demander à FixBot

    Ajouter un commentaire

  65. Nintendo Switch Front Frame Replacement: étape 65, image 1 de 1
    • Heat the top edge of the screen for around two minutes to help soften the adhesive.

    Demander à FixBot

    Ajouter un commentaire

  66. Nintendo Switch Front Frame Replacement: étape 66, image 1 de 3 Nintendo Switch Front Frame Replacement: étape 66, image 2 de 3 Nintendo Switch Front Frame Replacement: étape 66, image 3 de 3
    • Continue sliding the opening pick around the top-left corner of the screen to slice the adhesive.

    Demander à FixBot

    Ajouter un commentaire

  67. Nintendo Switch Front Frame Replacement: étape 67, image 1 de 3 Nintendo Switch Front Frame Replacement: étape 67, image 2 de 3 Nintendo Switch Front Frame Replacement: étape 67, image 3 de 3
    • Continue sliding the opening pick along the top edge of the screen to slice the adhesive.

    Demander à FixBot

    Ajouter un commentaire

  68. Nintendo Switch Front Frame Replacement: étape 68, image 1 de 3 Nintendo Switch Front Frame Replacement: étape 68, image 2 de 3 Nintendo Switch Front Frame Replacement: étape 68, image 3 de 3
    • Heat the right edge of the screen for around two minutes to help soften the adhesive.

    • Place the flat end of a spudger into the gap along the left edge of the screen.

    • Carefully and slowly lift the left edge of the screen, opening it like a book.

    Demander à FixBot

    Ajouter un commentaire

  69. Nintendo Switch Front Frame Replacement: étape 69, image 1 de 3 Nintendo Switch Front Frame Replacement: étape 69, image 2 de 3 Nintendo Switch Front Frame Replacement: étape 69, image 3 de 3
    • Lift the right edge of the screen straight off the device, threading the ribbon cables through the frame as you do so.

    • Take care not to snag any of the ribbon cables on the frame as you remove the screen.

    • You can reuse the screen adhesive if it is still sticky. Otherwise, replace the adhesive with double-sided tape such as Tesa tape.

    Demander à FixBot

    Ajouter un commentaire

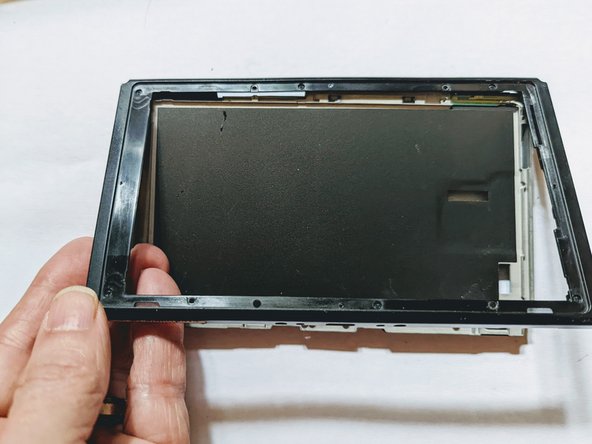
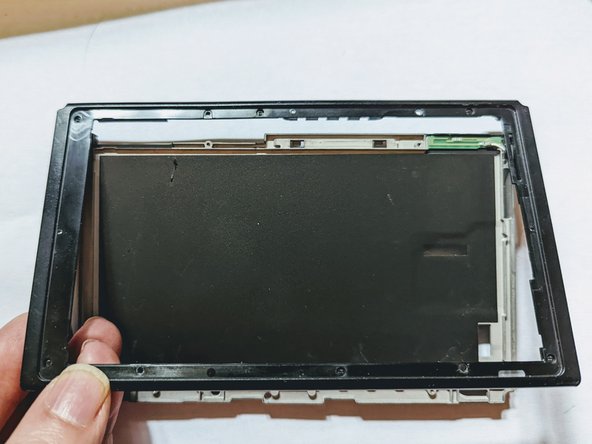
  70. Nintendo Switch Front Frame Replacement, Remove the Front Frame: étape 70, image 1 de 1
    • Remove the four screws securing the front frame to the midframe.

    Demander à FixBot

    Ajouter un commentaire

  71. Nintendo Switch Front Frame Replacement: étape 71, image 1 de 3 Nintendo Switch Front Frame Replacement: étape 71, image 2 de 3 Nintendo Switch Front Frame Replacement: étape 71, image 3 de 3
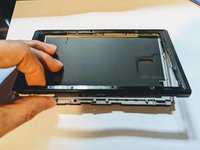
    • Lift the front edge of the frame then slide the frame up toward the top of the display to remove it.

    Demander à FixBot

    Ajouter un commentaire

Conclusion

To reassemble your device, follow these instructions in reverse order.

Annulation : je n'ai pas terminé ce tutoriel.

28 autres ont terminé cette réparation.

Jerry Wheeler

Membre depuis le 03/21/22

97 829 Réputation

92 tutoriels rédigés

4 commentaires de tutoriel

What kind of adhesive is originally used and where to buy? don't really want to use tape...

GBG HNM - Réponse Partager
Depending where you are, this vendor is selling precut adhesive for the screen to frame.

https://www.repairsuniverse.com/products...

Jerry Wheeler - Réponse Partager
The guide does not mention how to remove the battery! Only how to unplug it!

Carson Froelich - Réponse Partager

That's because the battery does not need to be removed for this procedure.

The photos were taken during a midframe replacement where the battery had already been removed, which is why I placed a note at the beginning of the guide stating:

Jerry Wheeler - Réponse Partager

Ajouter un commentaire

Nombre de vues :

Dernières 24 heures : 14

7 derniers jours : 159

30 derniers jours : 603

Total : 37,207