Cette version peut contenir des modifications incorrectes. Passez au dernier aperçu vérifié.
Introduction
Le remplacement de l'assemblage du flash comprend le fait de pénétrer profondément dans l'appareil photo et de retirer la carte mère nécessitant une soudure et d'autres aspects techniques.
Ce dont vous avez besoin
-
Cette étape n’est pas traduite. Aidez à la traduire
-
Use a Phillips #00 screwdriver to remove the single 4mm screw located directly to the right of the viewfinder on the back of the camera.
-
Remove the two 2mm screws from the left side panel.
-
Remove the single 3mm screw from the right side panel.
-
Remove the five 3mm screws from the bottom of the camera.
-
-
Cette étape n’est pas traduite. Aidez à la traduire
-
Rock the two ribbon cables gently out of their sockets.
-
Grasp and pull the white cable out of its clip with metal tweezers.
-
Remove the back panel completely.
-
-
Cette étape n’est pas traduite. Aidez à la traduire
-
Peel off the black plastic sheets.
-
Use the Phillips #00 screwdriver to remove the two 3mm screws holding the motherboard in place.
-
-
Cette étape n’est pas traduite. Aidez à la traduire
-
Remove the ribbon cable directly below the viewfinder.
-
Detach the white plastic clip from its socket with a pair of tweezers.
-
Disconnect the ribbon cable from the center of the board, near the central hole.
-
Disconnect the three ribbon cables from the top right of the motherboard, near the selector wheel. One is on the top of the board, and the other two are on the underside.
-
-
-
Cette étape n’est pas traduite. Aidez à la traduire
-
Remove the single 3mm ground screw attached to the right side of the camera body using the Phillips #00 screwdriver.
-
-
Cette étape n’est pas traduite. Aidez à la traduire
-
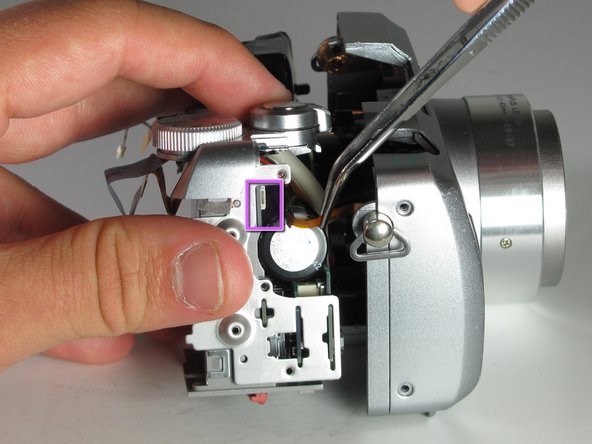
Use the soldering iron to desolder the connections from the motherboard.
-
-
-
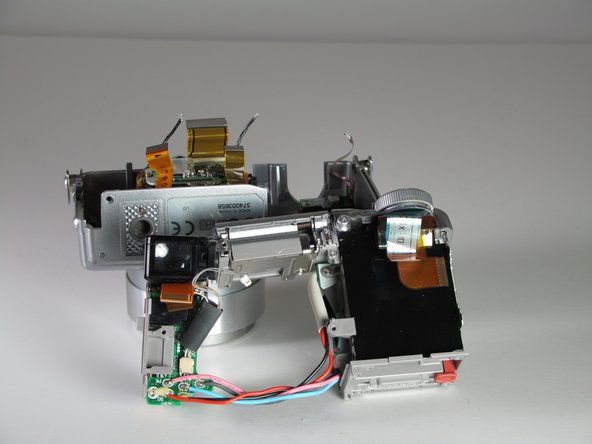
Maintenant, nous retirons la majeure partie des composants de la caméra de l'avant du boîtier
-
Dévissez les vis de 2-3 mm du côté droit du boîtier
-
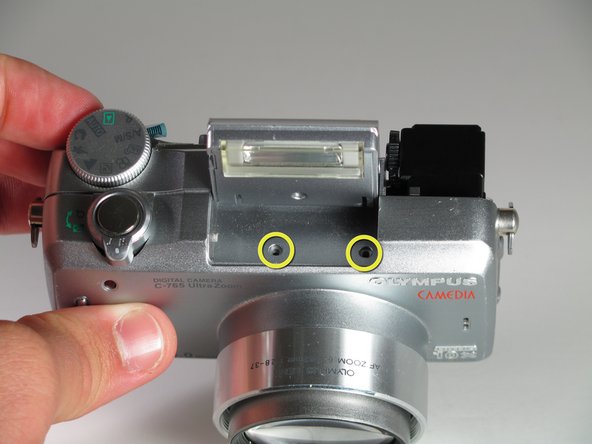
Ouvrez le flash pour accéder aux deux vis du corps en dessous
-
Dévissez les vis de 2-3 mm
-


Pour remonter votre appareil, suivez ces instructions dans l'ordre inverse.
Pour remonter votre appareil, suivez ces instructions dans l'ordre inverse.
Merci à ces traducteurs :
100%
[deleted] nous aide à réparer le monde ! Vous voulez contribuer ?
Commencez à traduire ›
Équipe

Cal Poly, Team 12-33, Maness Spring 2011 Membre de l'équipe Cal Poly, Team 12-33, Maness Spring 2011
CPSU-MANESS-S11S12G33
3 membres
7 tutoriels rédigés