Cette version peut contenir des modifications incorrectes. Passez au dernier aperçu vérifié.
Ce dont vous avez besoin
-
-
Insérez un outil ou embout éjecteur de carte SIM ou bien un trombone déplié dans le petit trou situé sous le tiroir de la carte SIM, près des caméras arrière, le long du bord du téléphone.
-
Appuyez fermement pour éjecter le tiroir.
-
-
-
Retirez les deux vis T2 de 2,6 mm de part et d'autre du port USB-C, sur le bord inférieur du téléphone.
-
-
-
Jointure de l’écran : celle-ci fait partie de l’écran. Ne faites pas levier ici ou vous allez dissocier et endommager l’écran.
-
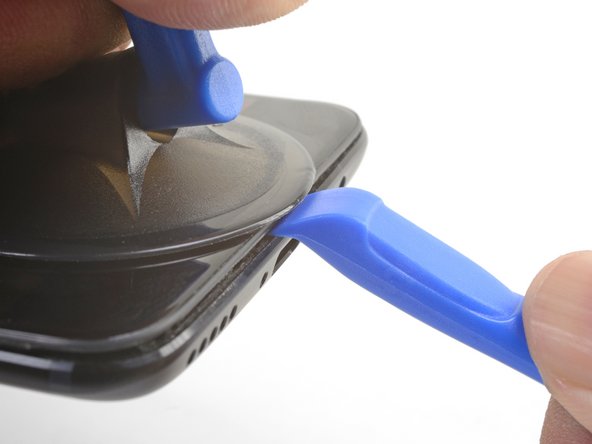
Jointure du châssis : c’est là où le châssis en plastique touche la coque arrière. Il est encastré dans la coque arrière. Faites levier uniquement ici.
-
Il y a douze clips qui maintiennent le châssis contre la coque arrière. Soyez attentif à leur emplacement lorsque vous ferez levier pour retirer la coque arrière au cours des étapes suivantes.
-
-
-
Placez une ventouse près du bord inférieur de l’écran.
-
Tirez fermement sur la ventouse avec une force constante.
-
Insérez l’arête d’un outil pour ouvrir directement dans la jointure du châssis, près de la ventouse, jusqu’à ce qu’il se glisse entre le châssis en plastique et la coque arrière.
-
-
-
Une fois que les bords inférieur et gauche du téléphone sont détachés, remuez légèrement le châssis pour détacher les clips supérieurs et droits.
-
Alignez l’arête supérieure du châssis avec la coque arrière et assurez-vous que les clips supérieurs sont en place.
-
Appuyez sur le long des long bords du téléphone pour attacher les clips restants.
-
-
-
-
Utilisez la pointe d’une spatule pour faire levier et débrancher le connecteur de la batterie de sa prise.
-
-
-
Retirez les six vis cruciformes de 2,6 mm qui maintiennent le haut-parleur au châssis.
-
-
-
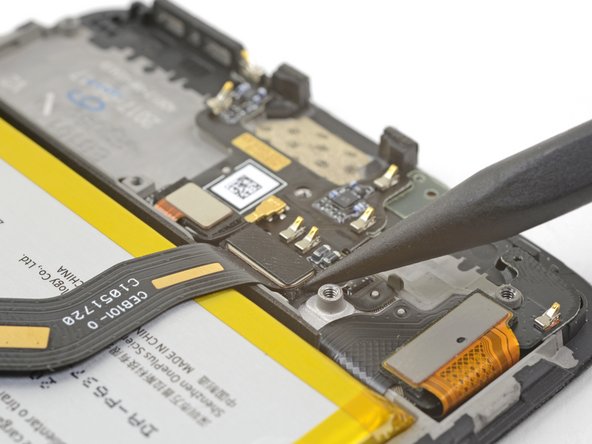
Utilisez la pointe d’une spatule pour faire levier et débrancher la nappe d’interconnexion de sa prise.
-
-
Cette étape n’est pas traduite. Aidez à la traduire
-
Use the point of a spudger to pry up and disconnect the display interconnect cable from its socket near the bottom edge of the motherboard.
-
-
Cette étape n’est pas traduite. Aidez à la traduire
-
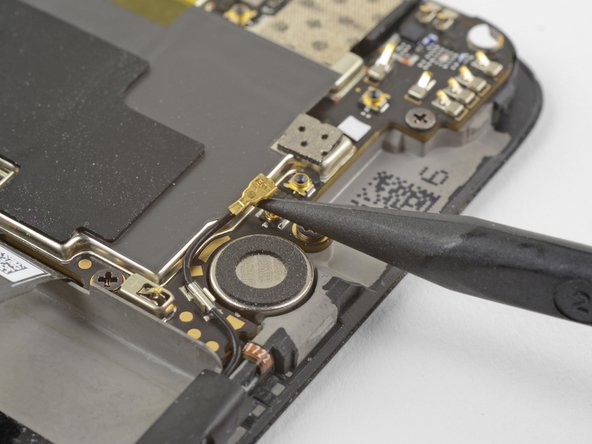
Slide the point of a spudger underneath the antenna interconnect cable that is connected to the motherboard above the vibration motor.
-
Pry up to disconnect the cable from its socket.
-
De-route the cable out of its motherboard grounding clip and move it out of the way.
-
-
Cette étape n’est pas traduite. Aidez à la traduire
-
Slide the point of a spudger under the small square antenna connector connected to the motherboard near the top edge.
-
Pry up to disconnect the antenna connector from its socket.
-
-
Cette étape n’est pas traduite. Aidez à la traduire
-
Remove the following seven 2.6 mm Phillips screws securing the motherboard:
-
-
Cette étape n’est pas traduite. Aidez à la traduire
-
Use your fingers to lift up the top edge of the motherboard.
-
Lift the motherboard out of its recess and remove it.
-
-
Cette étape n’est pas traduite. Aidez à la traduire
-
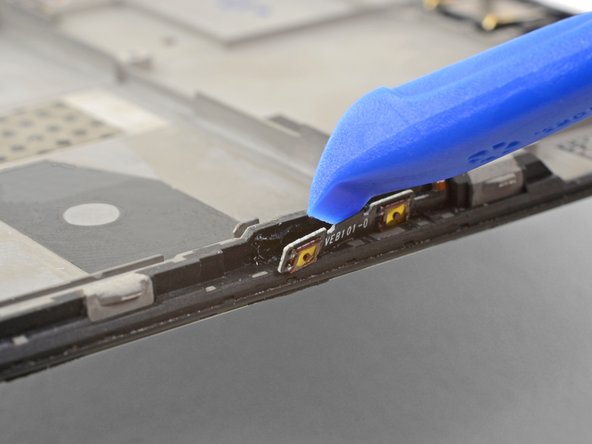
Use tweezers or the point of a spudger to pry up and remove the black tape covering the volume buttons on the right edge of the phone.
-
Repeat the process with the black tape covering the power button on the left edge of the phone.
-
-
Cette étape n’est pas traduite. Aidez à la traduire
-
Use the edge of an opening tool to gently pry the volume button board away from the frame.
-
Continue prying until you loosen the volume button board from the frame.
-
-
Cette étape n’est pas traduite. Aidez à la traduire
-
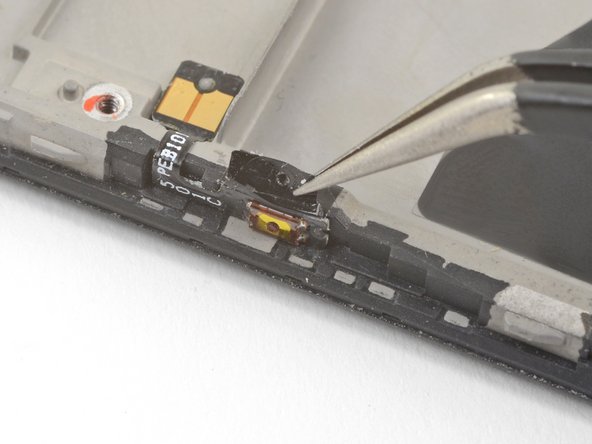
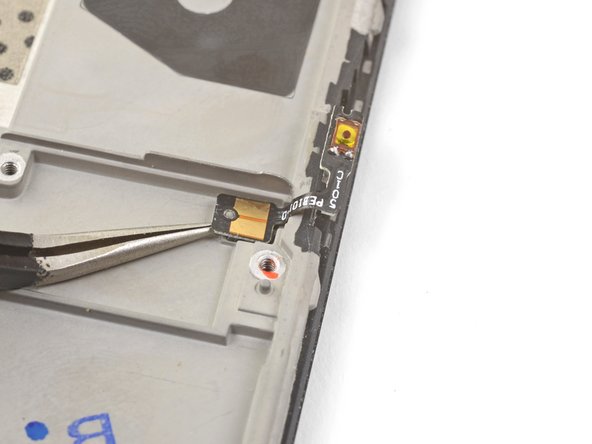
Squeeze the tweezer tips together and insert the point underneath the volume button board's contact pad near the top right edge of the frame.
-
Pry upwards to loosen the contact pad from the frame.
-
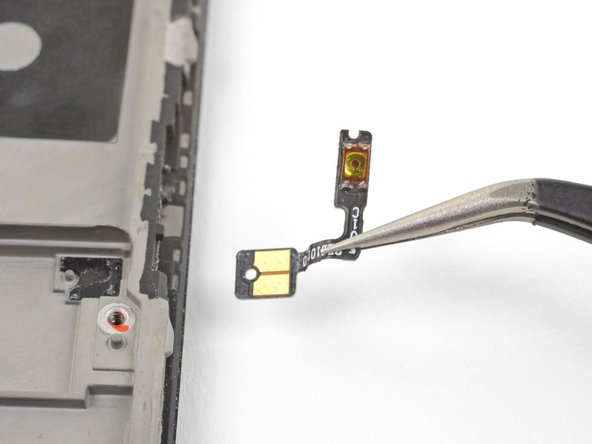
Remove the volume buttons.
-
-
Cette étape n’est pas traduite. Aidez à la traduire
-
Repeat the previous two steps to remove the power button from the left edge of the frame.
-


Annulation : je n'ai pas terminé ce tutoriel.
6 autres ont terminé cette réparation.


2 commentaires
I’ve just spent the afternoon migrating to a new frame, and the power button seating lugs were just a tiny bit mislocated. The result was permanent press on the power button when the back was fitted. I resolved this by trimming the power button circuit board with some sharp sidecutters. Charging now and seems ok. Would have been much harder without my ifixit toolkit.
Fantastic guide! Thanks! Some steps were slightly different for my OnePlus 5T but still quite helpful! I used it to replace the power button that was barely working.
Unfortunately it seems my replacement part had maybe slightly different tolerances and the button was being pressed permanently. I managed to fix it by very carefully shaving off a little bit of the case's mechanism that presses the button.