Aller au contenu principal

OnePlus Nord N200 Motherboard Replacement

Ce dont vous avez besoin

  1. OnePlus Nord N200 Motherboard Replacement, Back Cover: étape 1, image 1 de 3 OnePlus Nord N200 Motherboard Replacement, Back Cover: étape 1, image 2 de 3 OnePlus Nord N200 Motherboard Replacement, Back Cover: étape 1, image 3 de 3
    • Due to its surface, the suction tool won't hold onto the phone's rear glass. A thin slicing tool is required.

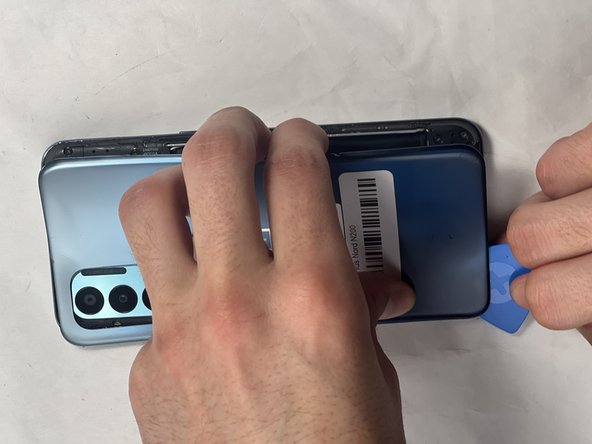
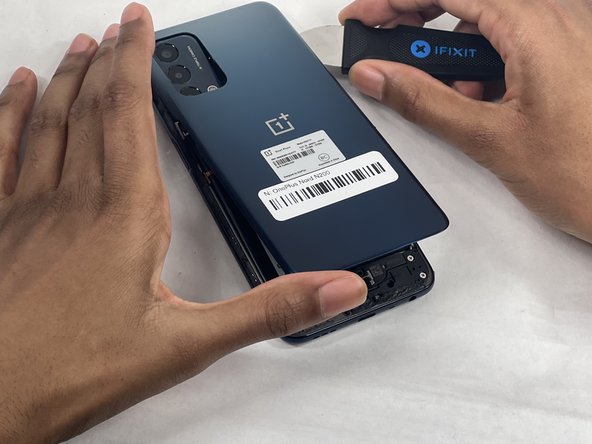
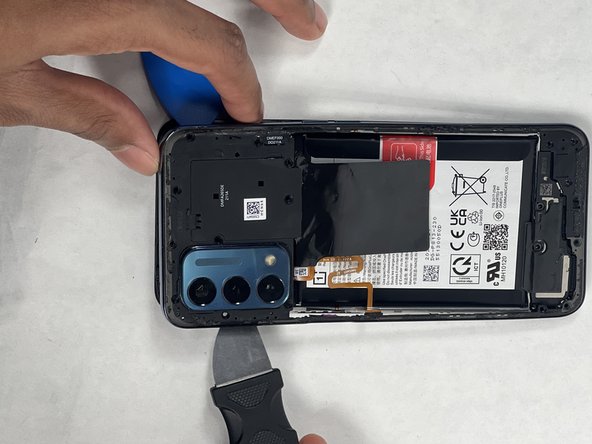
    • Insert the Jimmy into the seam between the rear glass and the midframe at the bottom edge of the phone to create a gap.

    • This may require some force.

    • Leave the Jimmy in place for a few seconds to prevent the adhesive from resealing.

  2. OnePlus Nord N200 Motherboard Replacement: étape 2, image 1 de 3 OnePlus Nord N200 Motherboard Replacement: étape 2, image 2 de 3 OnePlus Nord N200 Motherboard Replacement: étape 2, image 3 de 3
    • Insert an iFixit opening pick into the gap you created with the Jimmy.

    • Slide the Jimmy around the phone to slice the adhesive.

    • Insert a second iFixit opening pick at the spot you have sliced open to keep it open.

  3. OnePlus Nord N200 Motherboard Replacement: étape 3, image 1 de 3 OnePlus Nord N200 Motherboard Replacement: étape 3, image 2 de 3 OnePlus Nord N200 Motherboard Replacement: étape 3, image 3 de 3
    • Slide the iFixit opening pick along the top edge to slice the adhesive.

    • Start prying the back plate off the phone.

  4. OnePlus Nord N200 Motherboard Replacement: étape 4, image 1 de 3 OnePlus Nord N200 Motherboard Replacement: étape 4, image 2 de 3 OnePlus Nord N200 Motherboard Replacement: étape 4, image 3 de 3
    • Remove the back cover.

  5. OnePlus Nord N200 Motherboard Replacement, Midframe: étape 5, image 1 de 3 OnePlus Nord N200 Motherboard Replacement, Midframe: étape 5, image 2 de 3 OnePlus Nord N200 Motherboard Replacement, Midframe: étape 5, image 3 de 3
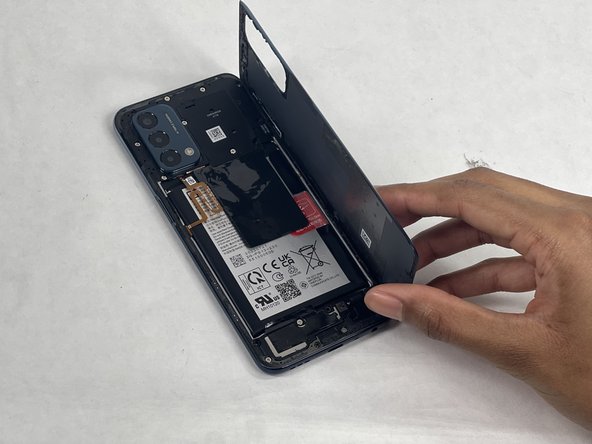
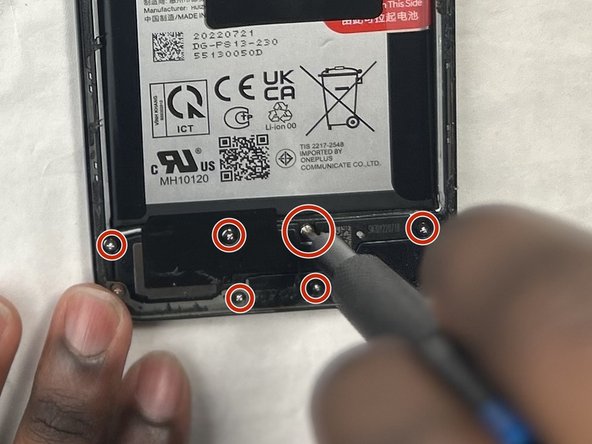
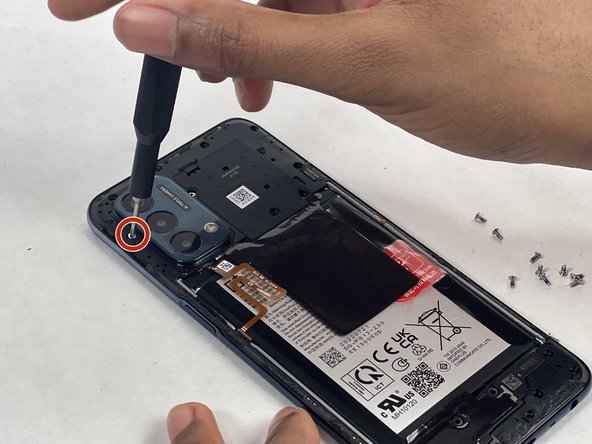
    • Use a Phillips #00 screwdriver to remove the sixteen 3.6 mm-long screws securing the midframe.

    • The orange circle represents a hidden screw that also needs to be screwed out. (At first glance it may not look like a screw).

  6. OnePlus Nord N200 Motherboard Replacement: étape 6, image 1 de 3 OnePlus Nord N200 Motherboard Replacement: étape 6, image 2 de 3 OnePlus Nord N200 Motherboard Replacement: étape 6, image 3 de 3
    • Gently insert the Jimmy to create a gap between the midframe and the top of components in the bottom case.

    • Slide an opening pick around the edge of the midframe to slice the adhesive.

    • Use the Jimmy to pry off the midframe of the phone.

  7. OnePlus Nord N200 Motherboard Replacement: étape 7, image 1 de 3 OnePlus Nord N200 Motherboard Replacement: étape 7, image 2 de 3 OnePlus Nord N200 Motherboard Replacement: étape 7, image 3 de 3
    • Use your hands to finish prying open the midframe off the phone.

    • Watch out for the fingerprint reader cable when taking off the back tray as it is still connected. If you are not careful, it could be damaged.

    • Pull the midframe off of the phone and lay it to the side of the phone.

  8. OnePlus Nord N200 Motherboard Replacement: étape 8, image 1 de 3 OnePlus Nord N200 Motherboard Replacement: étape 8, image 2 de 3 OnePlus Nord N200 Motherboard Replacement: étape 8, image 3 de 3
    • Place a spudger or an opening tool under the connector's edge and pry straight up to disconnect the fingerprint cable connector.

    • Move the fingerprint reader cable to the side along with the midframe.

  9. OnePlus Nord N200 Motherboard Replacement: étape 9, image 1 de 1
    • Remove the midframe.

  10. OnePlus Nord N200 Motherboard Replacement, OnePlus Nord N200 Battery Connector Replacement: étape 10, image 1 de 3 OnePlus Nord N200 Motherboard Replacement, OnePlus Nord N200 Battery Connector Replacement: étape 10, image 2 de 3 OnePlus Nord N200 Motherboard Replacement, OnePlus Nord N200 Battery Connector Replacement: étape 10, image 3 de 3
    • Before you start with the repair, make sure to disconnect the battery from the charger to avoid damaging your phone.

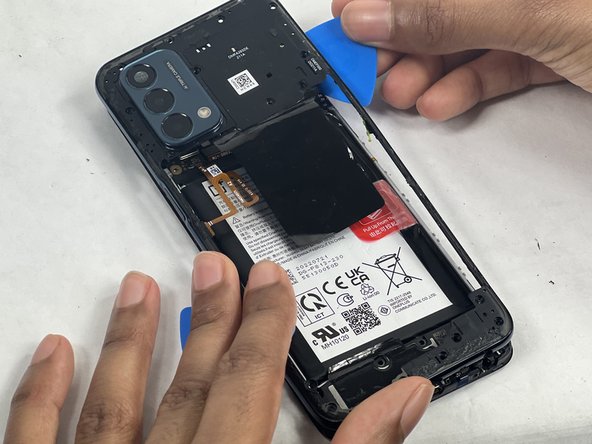
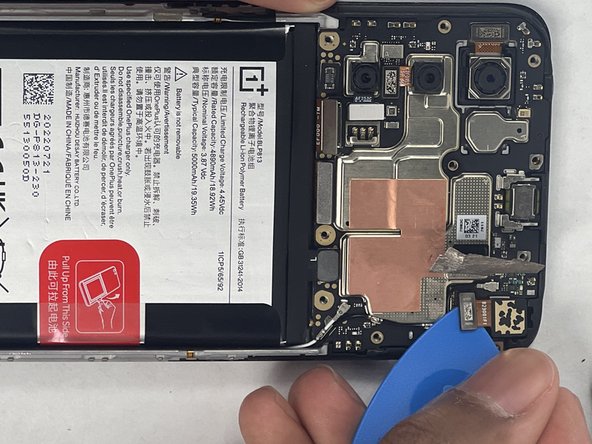
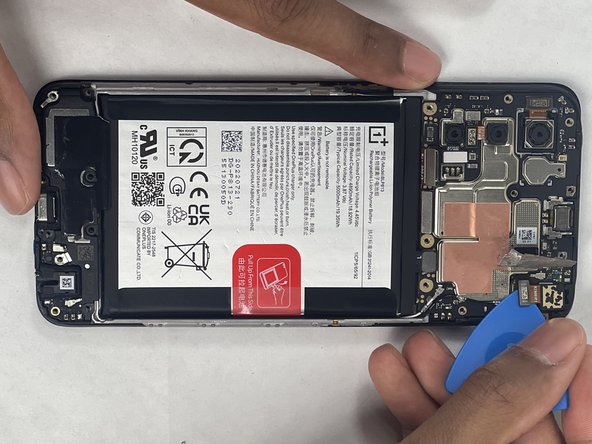
    • Place a spudger or an opening pick under the connector's edge and pry straight up to disconnect the battery.

    • Make sure to pry under the edge of the connector itself, and not under the socket on the board. Otherwise, you risk permanently damaging the socket.

    • Work carefully: don't pry on or accidentally scrape any small, surface mounted components on the board.

    • To reconnect, align the connector carefully over its socket and press down with your fingertip—first on one side, then the other—until it clicks into place. Don't try to force the connector into place. If you're having trouble, reposition it and try again.

    • Don't press down on the middle of wider connectors until they're fully seated. If misaligned, the connector or the pins underneath can bend or break, causing permanent damage.

  11. OnePlus Nord N200 Motherboard Replacement, Front-Facing Camera: étape 11, image 1 de 2 OnePlus Nord N200 Motherboard Replacement, Front-Facing Camera: étape 11, image 2 de 2
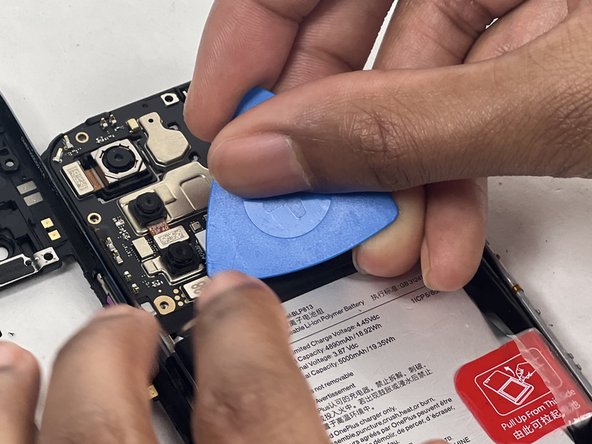
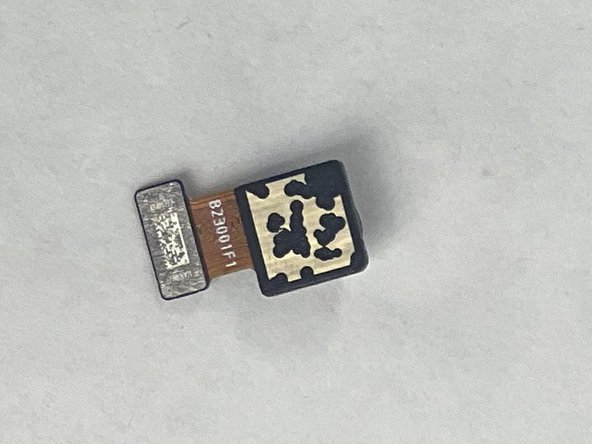
    • Use the Jimmy or your fingers to lift up the tape covering the front-facing camera.

  12. OnePlus Nord N200 Motherboard Replacement: étape 12, image 1 de 3 OnePlus Nord N200 Motherboard Replacement: étape 12, image 2 de 3 OnePlus Nord N200 Motherboard Replacement: étape 12, image 3 de 3
    • Use tweezers or your hands to pull off the rest of the tape.

  13. OnePlus Nord N200 Motherboard Replacement: étape 13, image 1 de 3 OnePlus Nord N200 Motherboard Replacement: étape 13, image 2 de 3 OnePlus Nord N200 Motherboard Replacement: étape 13, image 3 de 3
    • Place a spudger or an opening tool under the connector's edge and pry straight up to disconnect the front-facing camera from the motherboard.

    • Make sure to pry under the edge of the connector itself, and not under the socket on the board. Otherwise, you risk permanently damaging the socket

    • Work carefully: don't pry on or accidentally scrape any small, surface mounted components on the board.

    • To reconnect, align the connector carefully over its socket and press down with your fingertip—first on one side, then the other—until it clicks into place. Don't try to force the connector into place. If you're having trouble, reposition it and try again.

    • Don't press down on the middle of wider connectors until they're fully seated. If misaligned, the connector or the pins underneath can bend or break, causing permanent damage.

  14. OnePlus Nord N200 Motherboard Replacement: étape 14, image 1 de 3 OnePlus Nord N200 Motherboard Replacement: étape 14, image 2 de 3 OnePlus Nord N200 Motherboard Replacement: étape 14, image 3 de 3
    • Remove the front-facing camera.

  15. OnePlus Nord N200 Motherboard Replacement, Motherboard: étape 15, image 1 de 3 OnePlus Nord N200 Motherboard Replacement, Motherboard: étape 15, image 2 de 3 OnePlus Nord N200 Motherboard Replacement, Motherboard: étape 15, image 3 de 3
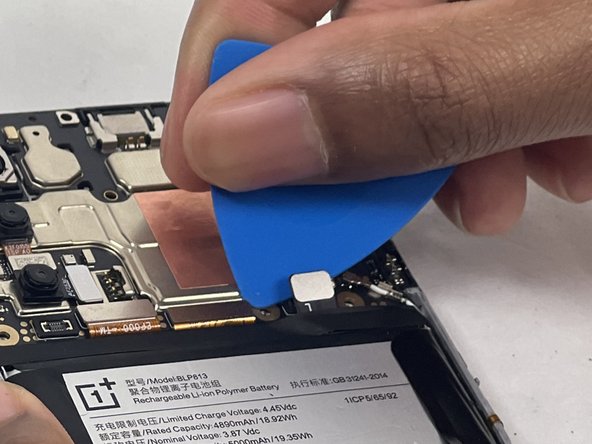
    • Place an opening pick or a spudger under edge of the two press connectors and pry straight up to disconnect them.

    • Make sure to pry under the edge of the connector itself, and not under the socket on the board. Otherwise, you risk permanently damaging the socket.

    • Work carefully: don't pry on or accidentally scrape any small, surface mounted components on the board.

    • To reconnect, align the connector carefully over its socket and press down with your fingertip—first on one side, then the other—until it clicks into place. Don't try to force the connector into place. If you're having trouble, reposition it and try again.

    • Don't press down on the middle of wider connectors until they're fully seated. If misaligned, the connector or the pins underneath can bend or break, causing permanent damage.

  16. OnePlus Nord N200 Motherboard Replacement: étape 16, image 1 de 3 OnePlus Nord N200 Motherboard Replacement: étape 16, image 2 de 3 OnePlus Nord N200 Motherboard Replacement: étape 16, image 3 de 3
    • The black coaxial connector should be disconnected first as it is the ground connector.

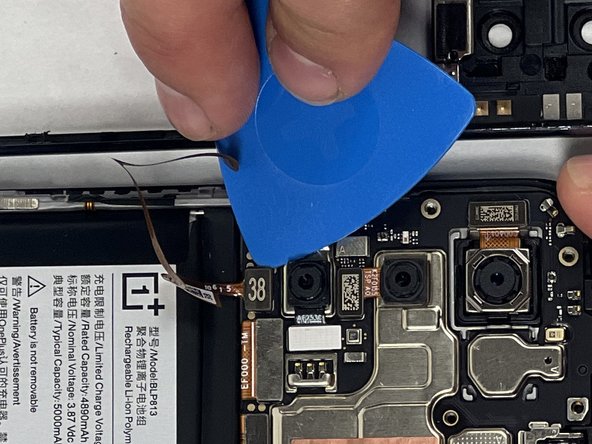
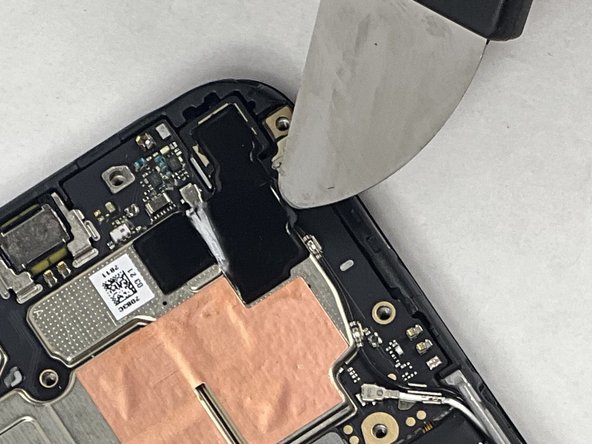
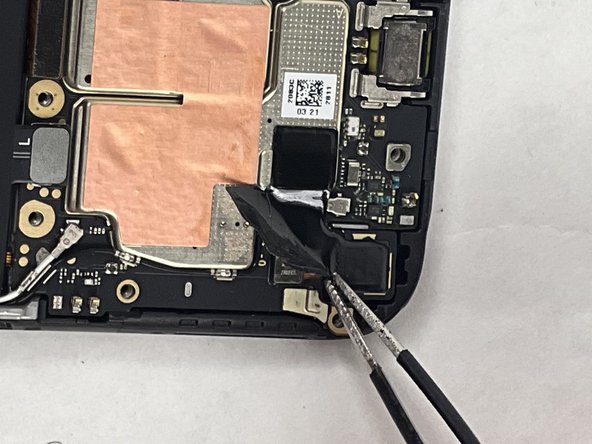
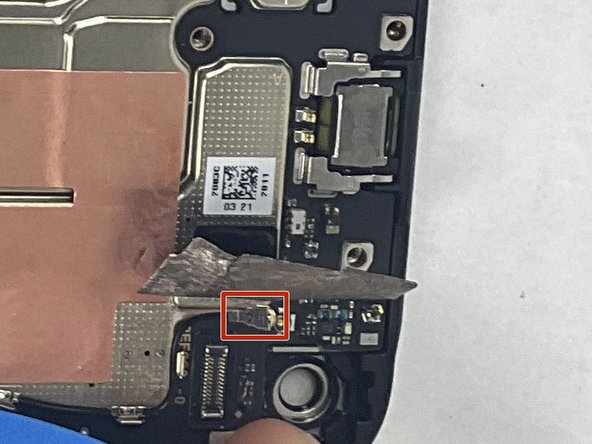
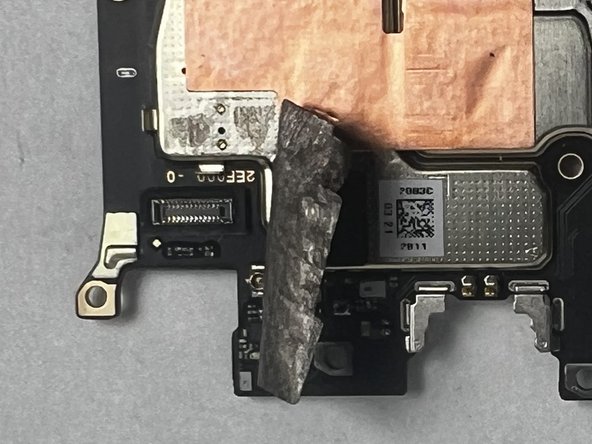
    • Peal the tape up in the upper right corner of the phone to reveal the black coaxial cable.

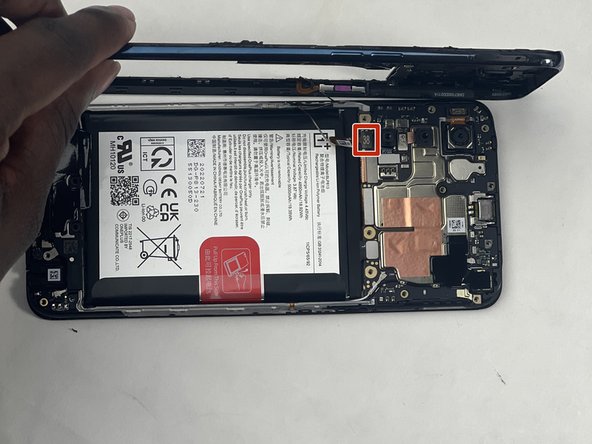
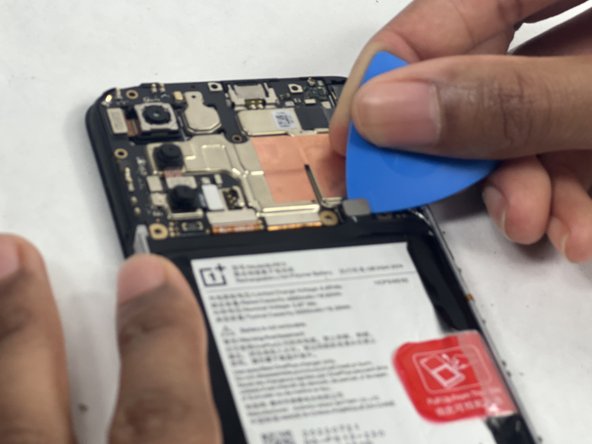
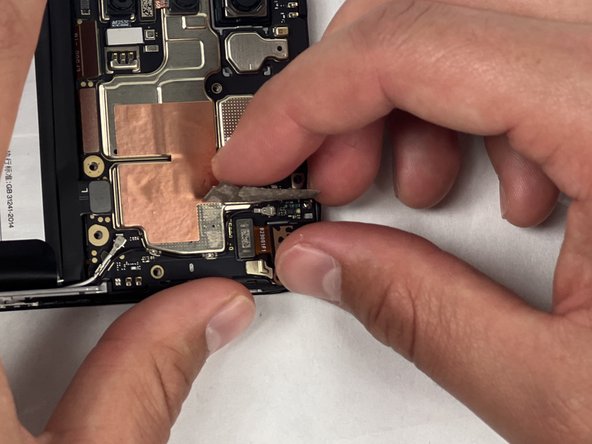
    • To disconnect the black coaxial cable, slide a thin, ESD-safe pry tool or angled tweezers under the metal neck of the connector (as close to the head as possible) and lift straight up from the board.

    • When working with these connectors, it's key to always lift the head straight up. If pried on at an odd angle, you risk breaking the socket off of the board underneath.

    • Reconnecting these can be tricky. Use tweezers to hold the connector in place over its socket and gently press down with your finger or a spudger—the connector should "snap" into place. If you're having trouble, reposition the head and try again.

    • Don't try to force the connector into place or you may permanently damage it.

  17. OnePlus Nord N200 Motherboard Replacement: étape 17, image 1 de 3 OnePlus Nord N200 Motherboard Replacement: étape 17, image 2 de 3 OnePlus Nord N200 Motherboard Replacement: étape 17, image 3 de 3
    • Slide a thin, ESD-safe pry tool or angled tweezers under the metal neck of the white coaxial cable connector and lift straight up from the board.

    • Use the tweezers to move the white coaxial connector away from the board.

  18. OnePlus Nord N200 Motherboard Replacement: étape 18, image 1 de 3 OnePlus Nord N200 Motherboard Replacement: étape 18, image 2 de 3 OnePlus Nord N200 Motherboard Replacement: étape 18, image 3 de 3
    • Insert an opening pick or spudger under the gold clip on the top right of the phone to unclip the motherboard.

    • Slide the opening pick under the edge of the motherboard to begin removing it.

    • Make sure all the wires and connector cables are disconnected before removing the motherboard.

  19. OnePlus Nord N200 Motherboard Replacement: étape 19, image 1 de 3 OnePlus Nord N200 Motherboard Replacement: étape 19, image 2 de 3 OnePlus Nord N200 Motherboard Replacement: étape 19, image 3 de 3
    • Remove the motherboard from the case.

  20. OnePlus Nord N200 Motherboard Replacement: étape 20, image 1 de 3 OnePlus Nord N200 Motherboard Replacement: étape 20, image 2 de 3 OnePlus Nord N200 Motherboard Replacement: étape 20, image 3 de 3
    • Remove the motherboard.

Conclusion

To reassemble your device, follow these instructions in reverse order. Take your e-waste to an R2 or e-Stewards certified recycler.

Une autre personne a terminé cette réparation.

Fabrise Niyonkuru

Membre depuis le 03/18/24

1 069 Réputation

9 tutoriels rédigés

Équipe

UMass Dartmouth, Team 1-1, Konn Spring 2024 Membre de l'équipe UMass Dartmouth, Team 1-1, Konn Spring 2024

UMASSD-KONN-S24S1G1

4 membres

9 tutoriels rédigés

0 commentaires

Ajouter un commentaire

Nombre de vues :

Dernières 24 heures : 1

7 derniers jours : 15

30 derniers jours : 15

Total : 55