Aller au contenu principal
Pour réparer ensemble - Je crée un compte

Oster 6329 Lever Catch Spring Replacement

Ce dont vous avez besoin

    1. Oster 6329 Lever Catch Spring Replacement, Outer Shell Removal: étape 1, image 1 de 2 Oster 6329 Lever Catch Spring Replacement, Outer Shell Removal: étape 1, image 2 de 2
      • Using the Phillips-head #2 screwdriver, unscrew the three 1cm Phillips-head screws on the plastic base of the toaster to separate the outer metal shell from the plastic base.

      Demander à FixBot

      Ajouter un commentaire

    2. Oster 6329 Lever Catch Spring Replacement: étape 2, image 1 de 1
      • Push the plastic push-down handle down and pull the plastic handle straight from metal arm.

      Demander à FixBot

      Ajouter un commentaire

    3. Oster 6329 Lever Catch Spring Replacement: étape 3, image 1 de 1
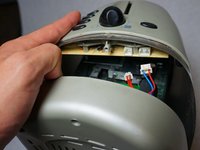
      • Loosen the outer metal shell from the plastic base by holding the plastic base while pulling up on the metal shell.

      • Only lift the outer shell a little so as not to disconnect the cables that connect the circuit board.

      Demander à FixBot

      Ajouter un commentaire

    4. Oster 6329 Lever Catch Spring Replacement: étape 4, image 1 de 2 Oster 6329 Lever Catch Spring Replacement: étape 4, image 2 de 2
      Outil utilisé dans cette étape :
      Tweezers
      $4.99
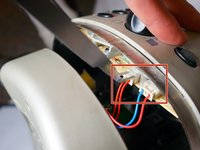
      • Disconnect the cable clips from the circuit board using the tweezers to free the outer metal shell from the plastic base.

      Demander à FixBot

      Ajouter un commentaire

    5. Oster 6329 Lever Catch Spring Replacement: étape 5, image 1 de 2 Oster 6329 Lever Catch Spring Replacement: étape 5, image 2 de 2
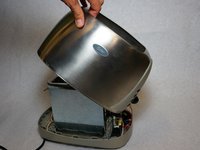
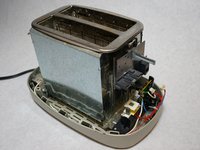
      • Lift the top outer metal shell.

      • Carefully lift the outer metal shell at an angle so as not to damage the components in the front of the toaster.

      Demander à FixBot

      Ajouter un commentaire

    1. Oster 6329 Lever Catch Spring Replacement, Lever Catch Spring: étape 6, image 1 de 1
      Outil utilisé dans cette étape :
      Tweezers
      $4.99
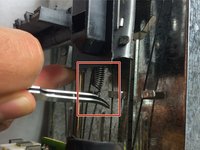
      • Insert the tweezers between the spring and the bottom of the lever to release the spring.

      Demander à FixBot

      Ajouter un commentaire

    2. Oster 6329 Lever Catch Spring Replacement: étape 7, image 1 de 2 Oster 6329 Lever Catch Spring Replacement: étape 7, image 2 de 2
      • Remove spring from the bottom of the lever.

      • The spring should only be connected to the top of the toaster after this is complete.

      Demander à FixBot

      Ajouter un commentaire

    3. Oster 6329 Lever Catch Spring Replacement: étape 8, image 1 de 1
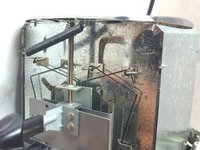
      • Insert the tweezers between the two metal flaps located at the top of the toaster.

      • Hold the spring and turn it sideways to lay it flat along the top of the toaster.

      • Pry the spring from the top of the toaster.

      Demander à FixBot

      Ajouter un commentaire

Conclusion

To reassemble your device, follow these instructions in reverse order.

Annulation : je n'ai pas terminé ce tutoriel.

Blaine Oelkers

Membre depuis le 01/24/14

131 Réputation

1 tutoriel rédigé

Équipe

Cal Poly, Team 13-15, Regan Winter 2014 Membre de l'équipe Cal Poly, Team 13-15, Regan Winter 2014

CPSU-REGAN-W14S13G15

5 membres

12 tutoriels rédigés

0 commentaires de tutoriel

Ajouter un commentaire

Nombre de vues :

Dernières 24 heures : 1

7 derniers jours : 9

30 derniers jours : 30

Total : 1,660