Aller au contenu principal
Pour réparer ensemble - Je crée un compte

Palm TX Power Button Replacement

Ce dont vous avez besoin

    1. Palm TX Power Button Replacement, Back Panel: étape 1, image 1 de 2 Palm TX Power Button Replacement, Back Panel: étape 1, image 2 de 2
      • Orient the device so that the display faces forward.

      • Remove the stylus from the right side.

      Demander à FixBot

      Ajouter un commentaire

    2. Palm TX Power Button Replacement: étape 2, image 1 de 1
      • Turn over the device so that the back panel faces forward.

      • Use a T5 Torx screwdriver to remove the four 6.35mm corner screws.

      Demander à FixBot

      Ajouter un commentaire

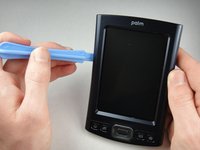
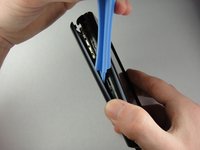
    3. Palm TX Power Button Replacement: étape 3, image 1 de 2 Palm TX Power Button Replacement: étape 3, image 2 de 2
      • Rotate the device so that the display faces forward.

      • Insert a plastic opening tool with the angled tip pointing downward into the crevice on the left side of the device.

      • Pry along the crevice to loosen the back panel.

      • Repeat this process for the right side.

      Demander à FixBot

      Ajouter un commentaire

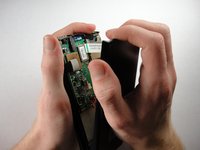
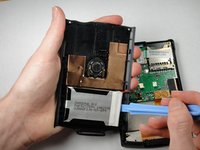
    4. Palm TX Power Button Replacement: étape 4, image 1 de 2 Palm TX Power Button Replacement: étape 4, image 2 de 2
      • Carefully pry the back panel to open the device.

      • Be careful not to break the wire that connects the battery pack to the motherboard.

      • When reassembling, snap the back panel back into place and then insert the top cover.

      Demander à FixBot

      Ajouter un commentaire

    5. Palm TX Power Button Replacement: étape 5, image 1 de 2 Palm TX Power Button Replacement: étape 5, image 2 de 2
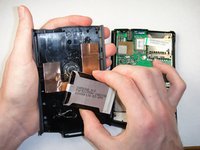
      • Use a plastic opening tool to peel the battery pack from the back panel.

      • The battery pack is glued to the back panel so removing it may require considerable effort.

      Demander à FixBot

      Ajouter un commentaire

    1. Palm TX Power Button Replacement, Battery Pack: étape 6, image 1 de 2 Palm TX Power Button Replacement, Battery Pack: étape 6, image 2 de 2
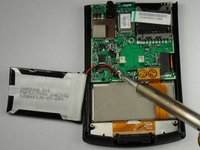
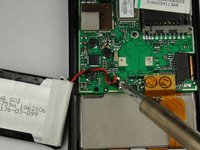
      • Use a soldering iron to disconnect the battery wires from the motherboard.

      • For soldering instructions, you can view the Soldering Guide.

      Demander à FixBot

      Ajouter un commentaire

    1. Palm TX Power Button Replacement, Motherboard: étape 7, image 1 de 2 Palm TX Power Button Replacement, Motherboard: étape 7, image 2 de 2
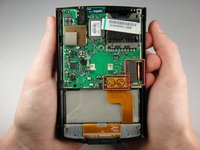
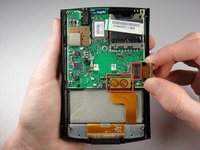
      • Pull straight up on the ribbon cables located on the bottom right of the motherboard to disconnect them.

      Demander à FixBot

      Ajouter un commentaire

    2. Palm TX Power Button Replacement: étape 8, image 1 de 2 Palm TX Power Button Replacement: étape 8, image 2 de 2
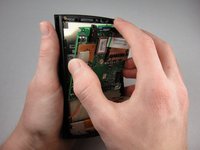
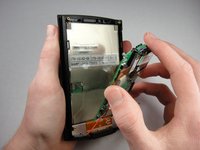
      • Lift the mother board out of the device.

      • A weak adhesive attaches the motherboard to the device.

      • The red wire in the picture will not be attached to your device at this point.

      Demander à FixBot

      Ajouter un commentaire

    1. Palm TX Power Button Replacement, Power Button: étape 9, image 1 de 1
      • Flip the motherboard so that the black rubber cover faces upward. The power switch is in the top right corner.

      • Remove the button with a soldering iron.

      • For soldering instructions, view the Soldering Guide.

      Demander à FixBot

      Ajouter un commentaire

Conclusion

To reassemble your device, follow these instructions in reverse order.

Annulation : je n'ai pas terminé ce tutoriel.

Spencer Lewson

Membre depuis le 01/19/11

793 Réputation

6 tutoriels rédigés

Équipe

Cal Poly, Team 1-15, Amido Winter 2011 Membre de l'équipe Cal Poly, Team 1-15, Amido Winter 2011

CPSU-AMIDO-W11S1G15

4 membres

23 tutoriels rédigés

2 commentaires de tutoriel

what do i do after i remove said button?

Dewm - Réponse Partager

what do i do aftert i desolder the button

Dewm - Réponse Partager

Ajouter un commentaire

Nombre de vues :

Dernières 24 heures : 1

7 derniers jours : 8

30 derniers jours : 43

Total : 3,868