Aller au contenu principal
Pour réparer ensemble - Je crée un compte

Preliminary Main Board Removal

Ce dont vous avez besoin

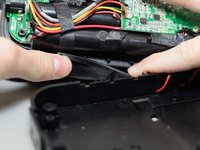
    1. Preliminary Main Board Removal, Exterior Housing: étape 1, image 1 de 3 Preliminary Main Board Removal, Exterior Housing: étape 1, image 2 de 3 Preliminary Main Board Removal, Exterior Housing: étape 1, image 3 de 3
      Outil utilisé dans cette étape :
      iOpener
      $24.95
      • Pry the exterior housing off the iHome iP37. You may need extra leverage to do this.

      • Note: This step is the most difficult due to the way it is attached. The glue holding the exterior housing to the internals does not break easily. You may want to use iFixit's iOpener to soften the glue.

      • Note: The process is the same for both the upper half and the lower half. To identify the halves, look for these details: the upper half has a metal grid, and the lower half has buttons. If you are replacing any other components, pry off the lower half.

      Demander à FixBot

      Ajouter un commentaire

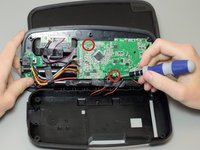
    1. Preliminary Main Board Removal, Lower Half Casing: étape 2, image 1 de 3 Preliminary Main Board Removal, Lower Half Casing: étape 2, image 2 de 3 Preliminary Main Board Removal, Lower Half Casing: étape 2, image 3 de 3
      • Remove these four 9 mm screws from the plastic casing; you will need a Phillips #2 driver to do this.

      • Remove the flanged 9 mm screw from the counterweight; you will need a Phillips #2 driver to do this.

      • Lift and remove the counterweight.

      Demander à FixBot

      Ajouter un commentaire

    2. Preliminary Main Board Removal: étape 3, image 1 de 3 Preliminary Main Board Removal: étape 3, image 2 de 3 Preliminary Main Board Removal: étape 3, image 3 de 3
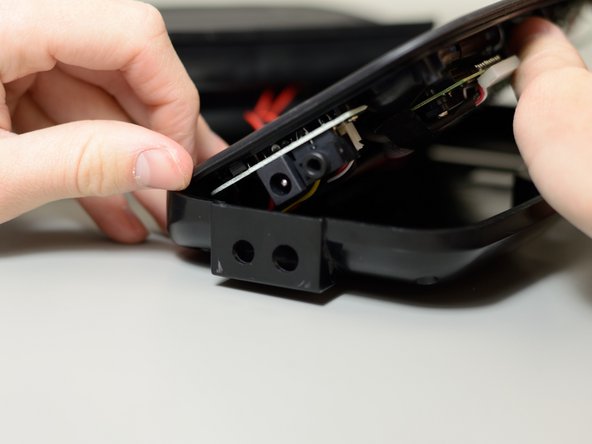
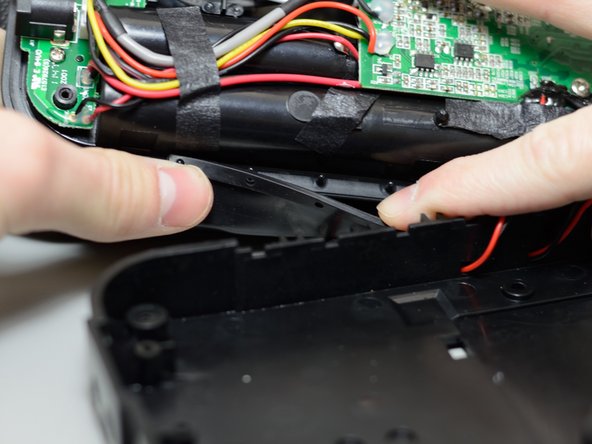
      • Lift and remove the plastic casing.

      • Note: It is best to lift the casing starting from the side without the protruding 3.5mm audio port and power port.

      • Reminder: During this process, a rubber cover will likely be dislodged. Make sure to re-seat this cover on the small pegs before putting the plastic casing back on.

      Demander à FixBot

      Ajouter un commentaire

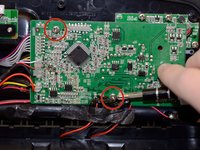
    1. Preliminary Main Board Removal, Preliminary Main Board: étape 4, image 1 de 2 Preliminary Main Board Removal, Preliminary Main Board: étape 4, image 2 de 2
      • Remove the two 9 mm screws that hold the main printed circuit board onto the rest of the iP37; you will need a Phillips #2 driver to do this.

      Demander à FixBot

      Ajouter un commentaire

    2. Preliminary Main Board Removal: étape 5, image 1 de 1
      • Peel away the black tape covering the red wires that connect to the PCB.

      Demander à FixBot

      Ajouter un commentaire

    3. Preliminary Main Board Removal: étape 6, image 1 de 1
      • There is ribbon wiring under this PCB. Be careful not to damage it while removing the PCB.

      • Slowly lift the PCB away from the rest of the device

      • Remove the ribbon by first removing the brown insert piece from the connector on the button board

      • Pull the ribbon out of the connector on the button board by the blue tab.

      Demander à FixBot

      Ajouter un commentaire

    4. Preliminary Main Board Removal: étape 7, image 1 de 1
      • Carefully disconnect the white 11-pin connector from the main board.

      • Pull firmly on the connector and use a screwdriver to pry it slightly if necessary.

      Demander à FixBot

      Ajouter un commentaire

Conclusion

To reassemble your device, follow these instructions in reverse order.

Annulation : je n'ai pas terminé ce tutoriel.

Une autre personne a terminé cette réparation.

Jerrell

Membre depuis le 04/23/14

730 Réputation

7 tutoriels rédigés

Équipe

Cal Poly, Team 11-50, Amido Spring 2014 Membre de l'équipe Cal Poly, Team 11-50, Amido Spring 2014

CPSU-AMIDO-S14S11G50

4 membres

26 tutoriels rédigés

0 commentaires de tutoriel

Ajouter un commentaire

Nombre de vues :

Dernières 24 heures : 0

7 derniers jours : 5

30 derniers jours : 28

Total : 1,022