Introduction
The guitar keys can wear out over time or stop working completely. This guide demonstrates how to successfully remove the keys to diagnose internal problems.
Ce dont vous avez besoin
-
-
Remove the strap by pulling it off of the mounts located on the body and neck.
 Demander à FixBot
-
-
-
Remove the nine 12mm Phillips #1 screws around the perimeter of the case with a screwdriver.
-
Remove the two 15mm Phillips #1 screws connecting the body panel to the neck panel with a screwdriver.
-
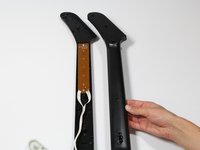
Pull off the rear case.
-
-
-
-
Remove the five 12mm Phillips #1 screws along the neck with a screwdriver.
-
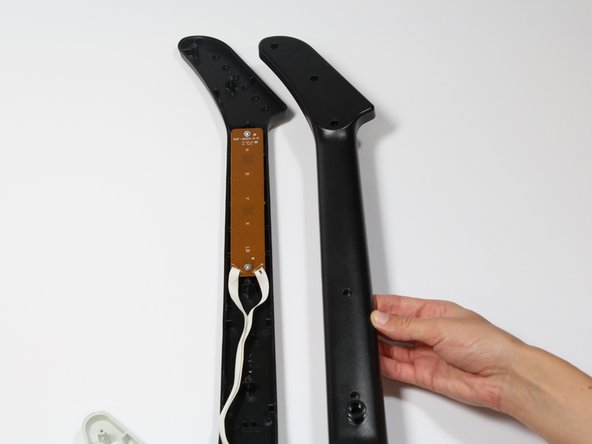
Pull off the top shell of the neck to expose the internal features.
-
-
-
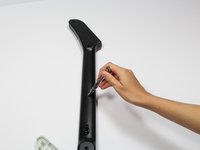
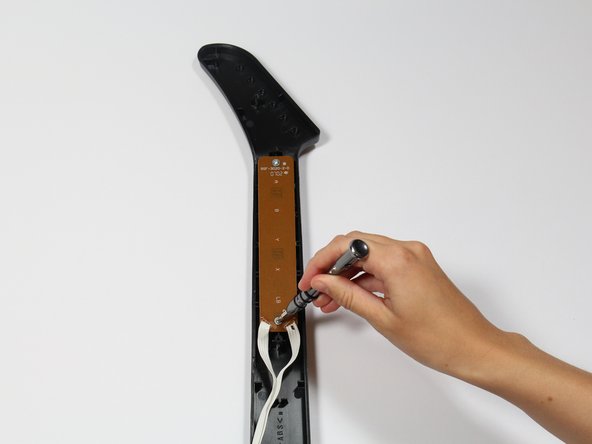
Use a screwdriver to remove the 10 mm Phillips #1 screws from the key sensor board.
-
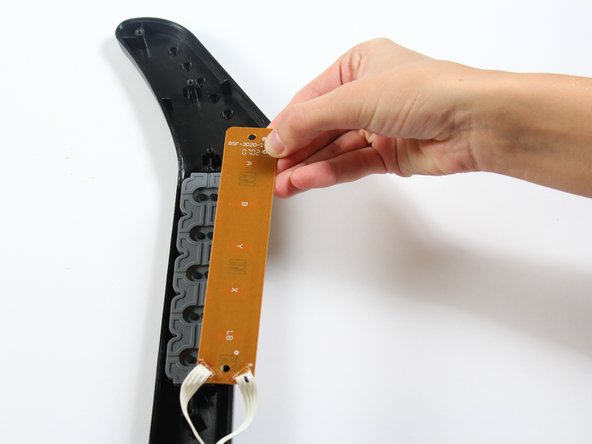
Lift up on the key sensor board to remove it from the guitar neck.
-
-
-
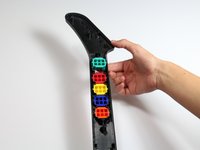
Using your fingers, remove the rubber pad to expose the colored keys.
-
-
-
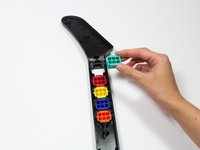
Reach one finger under the guitar to push the key out of the casing.
-
Repeat this step for the four remaining keys.
-


To reassemble your device, follow these instructions in reverse order.
Annulation : je n'ai pas terminé ce tutoriel.
3 autres ont terminé cette réparation.
Équipe

Cal Poly, Team S17-G1, Livingston Spring 2018 Membre de l'équipe Cal Poly, Team S17-G1, Livingston Spring 2018
CPSU-LIVINGSTON-S18S17G1
3 membres
9 tutoriels rédigés