Introduction
Au fil du temps, les batteries rechargeables perdent leur capacité de recharge. Ce tutoriel vous explique comment remplacer la batterie d'une tondeuse Braun.
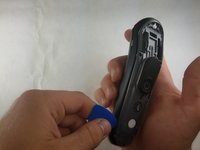
Ce dont vous avez besoin
-
-
-
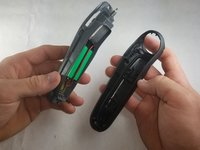
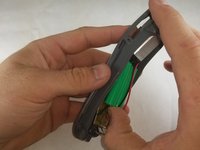
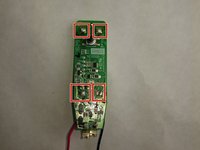
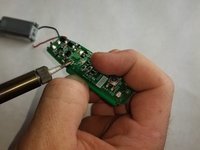
Dessoudez les quatre languettes reliant les batteries au circuit imprimé.
-
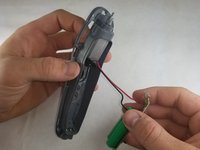
Faites de même pour l’autre côté de la batterie.
Where i can buy mainboard for braun 5541
Thanks. These are great instructions.
I didn't need Torx #6 for screws since mine had a slot for small flat blade screw driver.
The desolder is a little tricky. I used desolder wick that helped soak up the solder. Having a small metal pick helped pry up the battery tabs that were folded on the pc board.
-


Pour le remontage, suivez ces étapes en sens inverse.
Pour le remontage, suivez ces étapes en sens inverse.
Annulation : je n'ai pas terminé ce tutoriel.
27 autres ont terminé cette réparation.
Merci à ces traducteurs :
100%
jc67 nous aide à réparer le monde ! Vous voulez contribuer ?
Commencez à traduire ›
Équipe

IUPUI, Team S2-G2, Harley Summer 2018 Membre de l'équipe IUPUI, Team S2-G2, Harley Summer 2018
IUPUI-HARLEY-SU18S2G2
4 membres
8 tutoriels rédigés
12 commentaires
What is the name/part nr. of the battery?
Same goes for 5515.
Thanks for the guide :)
Thanks, I was looking how to take apart 5513, similar enough, as far as the battery replacement goes, any rechargeable AAA battery should do. Batteries don’t like the heat from soldering iron, there are kits for welding batteries, another idea is to get cheap battery holder if you can fit it in.
Does the 1.2V Ni-MH AAA 1000mAh battery work, have an older model MGK5280 ?
Thanks.
I've successfully replaced the batteries on a 5515 with 1.2V Ni-MH AAA 1100 mAh following this guide.
Thanks for this, great info. After researching the batteries that were in my trimmer, I found out they were 750mAh. I purchased a 4 pack of 1000mAh batteries on Amazon for $10. They were called "1.2V Ni-MH AAA 1000mAh Rechargeable Battery w/Tabs." The tabs were a little longer than the original batteries and were covered in insulation. The insulation was easily removed and I just bent the tabs back over themselves so they wouldn't short anything out.
As written before, works for Braun BT 5516, too. This model is much easier to fix. Before opening procedure, I heated the plastic housing with a simple hair dryer for 2min. Careful, don't blow to long and strong on the same area. Plastic is more flexible when warm. Start opening at the shaving head side, works easy.
Hi, a couple of points. I have the French version Type 5516...There is only 1 battery!!!! NOT 2!! It was 1.2V 700ma. Replaced with 1.2 V 1100ma. A bit fiddly to solder but in the end worked ok. Also there are no screws - use the guitar pick or similar to open. Be careful when remounting - make sure the receptacle for the charger plug (Part of the circuit board) is in the right way ie it needs to lie on its side...otherwise it will move forward when you connect the charger plug and not work. Otherwise for the moment seems to work fine...
Cheers!
I did that and charged the battery at least 14 hours.
The LED is still blinking red, but it runs perfectly well.
Do I need to „tell“ the trimmer, that the battery was replaced?
Or has the battery to be fully charged or discharged, when changing?
Hi!
could I bypass the battery circuit and just connect the charger to the drive to use it plugged? I'm always forgeting charging the device before I want to use it. It'd be nice just to plug and play it.