Introduction
Consultez ce tutoriel pour remplacer la batterie usée ou défaillante de votre Huawei Mate 20 Pro.
Ouvrir le Huawei Mate 20 Pro endommagera les joints étanches de l'appareil. Si vous ne remplacez pas ceux-là, votre téléphone fonctionnera normalement, mais ne sera plus étanche.
Si votre batterie est gonflée, prenez les précautions nécessaires. Pour votre sécurité, laissez la batterie se vider en dessous de 25 % avant de vous lancer. Cela réduit les risques de déclencher un incendie dangereux si jamais vous abîmez accidentellement la batterie pendant la réparation.
Bien qu'il soit possible de retirer la batterie en laissant l'ensemble port de charge/nappe principale, nous vous recommandons de le démonter pour éviter d'endommager les composants qui l'entourent.
Lors du remontage, vous aurez besoin d’adhésif de remplacement pour rattacher certains composants.
Ce dont vous avez besoin
-
-
Avant de commencer, éteignez votre téléphone.
-
Posez un iOpener chauffé au dos du téléphone pour ramollir l'adhésif sous la coque. Laissez l'iOpener agir pendant au moins deux minutes.
-
-
-
Posez une ventouse sur la partie inférieure de la coque arrière, aussi près que possible du bord.
-
Soulevez la coque arrière avec la ventouse pour ouvrir un léger espace entre la coque et le châssis.
-
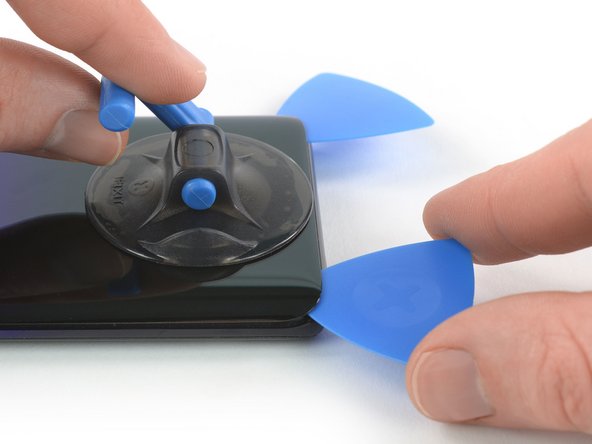
Insérez un médiator dans l'espace.
-
Faites glisser le médiator vers le coin inférieur droit.
-
-
-
Si vous commencez à avoir du mal à progresser, l'adhésif a probablement refroidi. Servez-vous de votre iOpener pour le réchauffer.
-
Insérez un quatrième médiator sous le coin supérieur gauche de la coque arrière.
-
Faites glisser le médiator le long du bord supérieur du téléphone afin de trancher l'adhésif.
-
Laissez le médiator dans le coin supérieur droit pour empêcher l'adhésif de coller de nouveau.
-
-
-
Dévissez les huit vis cruciformes #00 de 4,3 mm de long.
Hallo, es sind nur 7 Kreuzschlitzschrauben à 4.3mm. Eine (die zweite von unten links nach rechts) ist massiv kürzer und silbern.Gruss Jörg
-
-
-
-
Faites levier sur le connecteur de la batterie pour le débrancher.
-
-
-
Dévissez les trois vis cruciformes #00 de 4,3 mm de long.
-
Si vous avez l'intention de retirer ou remplacer le haut-parleur, la carte fille, la batterie ou bien l'écran OLED, dévissez également les quatre vis cruciformes #00 de 4,3 mm qui fixent l'ensemble haut-parleur.
-
-
-
Faites levier sur la nappe d'interconnexion avec une spatule pour la débrancher de la carte fille.
-
-
-
Faites glisser un médiator sous le coin supérieur gauche du cache du haut-parleur.
-
Faites ensuite levier sur l'ensemble haut-parleur et carte fille.
This part is difficult to remove, does not come out easily.
Turns out that you have to remove the 4 orange screws of step 14.
Not sure why there is a IF statement on this step.
-
-
-
Faites levier sur la nappe principale avec une spatule pour la débrancher de sa prise sur la carte mère.
-
-
-
Décollez la bande adhésive orange étiquetée 1 de la batterie. Elle devrait se déchirer le long d'une ligne perforée.
-


Pour remonter votre appareil, suivez ces instructions en sens inverse. Nettoyez les zones d'adhérence avec de l'alcool isopropylique (> 90 %) et posez une nouvelle couche d'adhésif là où c'est nécessaire.
Pour une performance optimale, calibrez votre nouvelle batterie : chargez-la à 100 % et laissez-la charger pendant au moins deux heures supplémentaires. Puis, utilisez votre téléphone jusqu’à ce que la batterie soit vide et qu’il s’éteigne. Enfin rechargez-le à 100 % sans interruption.
Déposez vos déchets électroniques dans un centre de recyclage certifié R2 ou e-Stewards.
La réparation ne s’est pas déroulée comme prévu ? Consultez notre Forum pour obtenir de l’aide au diagnostic.
Annulation : je n'ai pas terminé ce tutoriel.
12 autres ont terminé cette réparation.
Merci à ces traducteurs :
100%

Claire Miesch nous aide à réparer le monde ! Vous voulez contribuer ?
Commencez à traduire ›


17 commentaires
I have tried this with two new batteries now. I believe the device was water damaged by plugging the charger in while there was moisture in the port. The existing battery works but doesn't fast charge and gets very hot when charging, the battery also drains extremely quickly. Everytime insert a new battery the phone just get stuck in a boot loop, bringing up the Huawei powered by android screen before restarting, I have also replaced the charging port in hopes that may of been damaged and was causing the issue but this didn't work either. Any suggestion?
Excellent Step by step guide thank you
Sorry what do you mean by “reusing the board at the base of the battery body”?
Hi, I had the same issue that the phone did not accept the new battery. Luckily I found a workaround in a German newsgroup: 1) Boot up the device using the original Battery 2) connect an USB charger to the mobile 3) Disconnect the original batery and connect the new one ( you have to be quite fast, if the phone shuts down during the change you have to go back to step 1) 4) charge the phone for about 10 minutes and check if the batteryindicator moves up. 5) restart the phone and double check that the new battery is accepted. I’ve tested this method and it worked for me.
You saved my life, I saw it in the German website but it was not that easy explained
Please show us or explain a bit better how to do this?? I tried it but the phone dies immediately if you remove the battery plug
Oh my gosh! After I tried out every suggestion I found on the internet, this eventually worked for me too! But I put a spin on it. To reduce energy consumption and keep it alive during the switch, I unplugged the screen! Beforehand, my phone died the moment I took off the battery cable. But having the screen not attached, it worked. So happy. By the way, the screen is the yellow/reddish cable that comes from underneath the battery and attaches below the lower-left camera. Having tried out the other methods suggested online, I must say that I also left my phone charging for some hours while it continuously rebooted, and I did a factory reset beforehand. But I don't think that was necessary
axeld.90 -
How did you do it the phone dies
Could you maybe post a link of the original website showing how to do this?
I changed the battery without any problems but the phone gets stuck in bootlooping as I feared... When I let the phone bootlooping while being charged, it eventually starts but it can take a while… And then if I shut down the phone, or let the battery discharged totally, I have to do the whole thing again. Is there a way with a booted phone to change the battery ID so that the phone thinks it’s the old battery inside to prevent bootlooping? Also, can someone elaborate the hardware fix “I solved it by reusing the board at the base of the battery body” ?
Thank you for your help
Yeah I tried and just gave up, old battery still works fine with about 2/3 capacity so I popped it back in. I highly suspect that with the new HarmonyOS the trick they posted about in 2021 is patched. This is a known issue, I guess it's time to change brands for the next phone oh well.
What I tried was following all the steps outlined by the other person, while it seems to work at first the phone refuses to boot after the flashlight is plugged back in and the metal cover plate is installed on top of the motherboard.
More complicated instructions in Chinese, really feel like ifixit needs to put a warning at the top of this tutorial...