Introduction
Nous vous apprendrons comment retirer d'abord la batterie et le panneau arrière, puis accéder au joystick à des fins de réparation ou de nettoyage.
Ce dont vous avez besoin
-
-
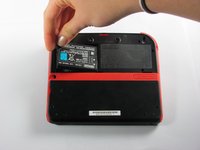
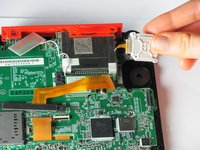
Retirez les 2 vis captives cruciformes qui fixent la coque arrière supérieure.
-
-
-
-
Pour remonter votre appareil, suivez ces instructions dans l'ordre inverse.
-
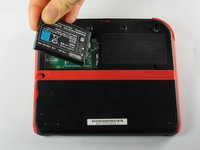
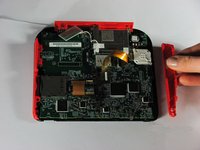
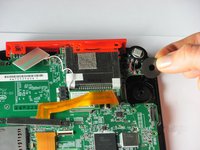
Retirez le panneau latéral rouge droit en le tirant vers l'extérieur.
-


Pour remonter votre appareil, suivez ces instructions dans l'ordre inverse.
Pour remonter votre appareil, suivez ces instructions dans l'ordre inverse.
Annulation : je n'ai pas terminé ce tutoriel.
25 autres ont terminé cette réparation.
Merci à ces traducteurs :
100%

Ces traducteurs nous aident réparer le monde ! Vous voulez contribuer ?
Commencez à traduire ›
Équipe

Cal Poly, Team 70-1, Forte Winter 2015 Membre de l'équipe Cal Poly, Team 70-1, Forte Winter 2015
CPSU-FORTE-W15S70G1
4 membres
35 tutoriels rédigés
12 commentaires
My ribbon cable is broke, Is there a way to fix it?Thanks.
When I put the circle pad back in, my 2DS thinks that I am holding up and right on it, when in reality it is in the neutral position. Please help.
Use the calibrate option in system settings. Also make sure the cable is connected nicely.
Recalibrate it in system settings.
The guide fails to mention that the joystick ribbon cable is locked into the motherboard. You can use a spudger to lift the grey tab, leveraging upwards on the side opposite of the ribbon cable. The tab will pop up and should make getting the ribbon cable out (and back in) easier.
I followed this guide and ripped the ribbon cable while attempting to get it connected back to the system. If I had known the grey tab unlocks, I might not have ripped the cable by trying to force it back under the pins. My iFixit tweezers were also very sharp, and may have cut the ribbon cable. Would anyone be able to recommend something gentler for the ribbon cable?