Introduction
Utilisez ce tutoriel pour séparer et remplacer le panneau frontal et la vitre tactile d'un iPhone 3GS.
Ce dont vous avez besoin
Vidéo d'introduction
-
-
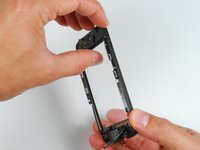
Lorsque la vitre de votre iPhone est brisée, évitez toute autre casse ainsi que des blessures éventuelles en scotchant la vitre.
-
Posez des bandes adhésives transparentes se chevauchant sur la vitre de façon à la couvrir complètement.
-
-
-
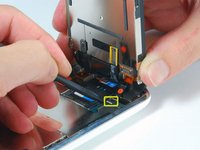
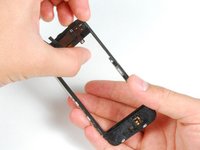
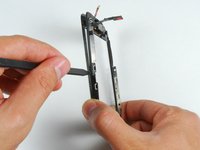
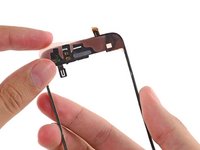
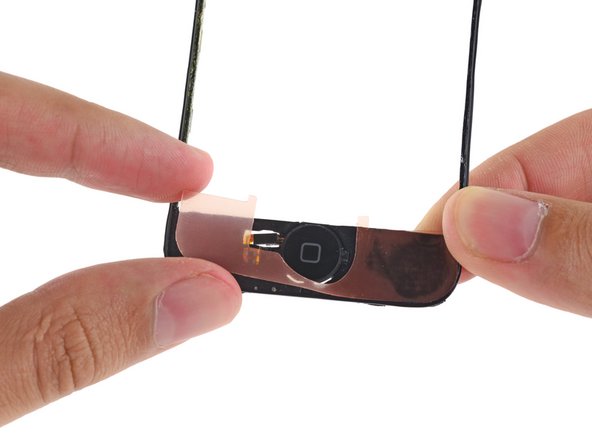
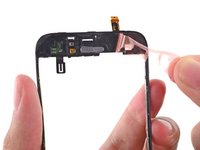
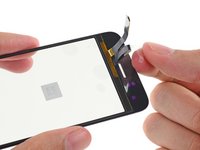
Tout en tenant l'écran avec une main, déconnectez la nappe noire marquée "1" à l'aide d'une spatule (spudger).
-
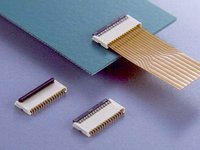
La nappe "1" est branchée avec un connecteur du type prise. Le bloc au bout de la nappe sert de prise et est simplement inséré dans son emplacement sur le circuit imprimé. Il n'y a pas d'autre système de verrouillage.
-
-
-
-
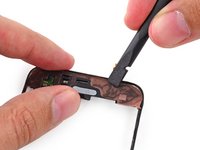
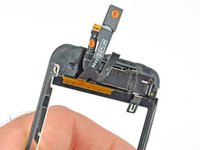
Si la vitre s'est brisée en haut ou en bas, soyez particulièrement patient et soigneux en retirant les fragments. En cas extrême, il se peut que vous deviez retirer chaque éclat de verre resté collé au plastique.
-
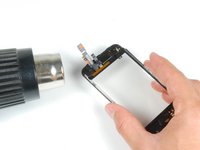
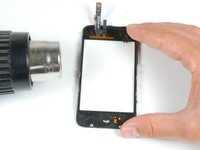
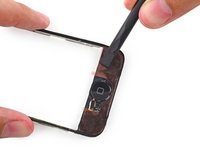
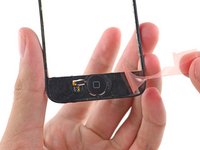
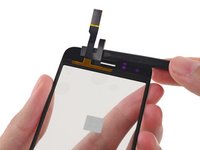
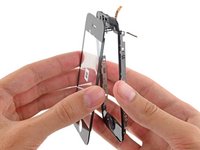
Chauffez la partie supérieure gauche de la vitre tactile avec un pistolet à air chaud ou un sèche-cheveux.
-
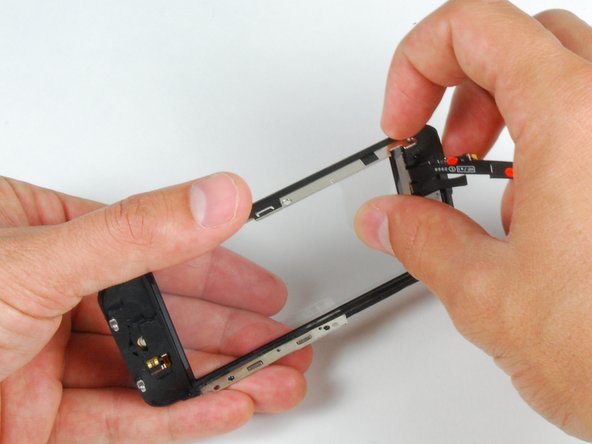
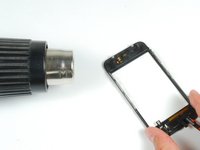
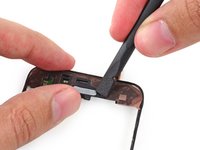
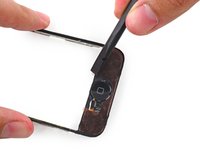
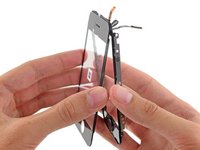
Utilisez vos ongles pour soulever doucement le coin gauche. Le support en plastique de la vitre tactile est maintenu à la vitre avec de l'adhésif. Décoller les coins peut demander des efforts.
-
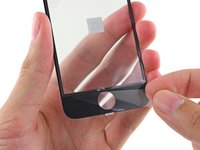
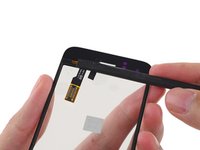
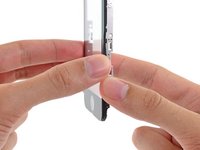
Chauffez et recommencez du côté droit.
-


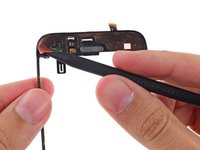


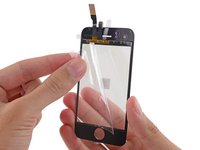


Pour remonter votre appareil, suivez les étapes dans l'ordre inverse.
Pour remonter votre appareil, suivez les étapes dans l'ordre inverse.
Annulation : je n'ai pas terminé ce tutoriel.
541 autres ont terminé cette réparation.
Merci à ces traducteurs :
100%


Ces traducteurs nous aident réparer le monde ! Vous voulez contribuer ?
Commencez à traduire ›

8 commentaires
Step 15:
the screen sort of sits in the plastic because of the band of material running around the perimeter of the assembly being more firmly attached to the plastic than the screen. I found this step much easier to complete the second time around because i knew to dig my nail in between the screen and the material running around the perimeter of the assembly in a front to back motion. Then i pivoted my nail up 90 degrees so it was between the plastic and the screen and was able to gently pry them apart while heating.
i second that, it should really be another bulletpoint because its really hard to see if you are not looking for it. Something like:
Push gently on the thin plastic bezel surrounding the frontpanel, do not try to push into the side of the assembly. It can look like there is a seam but there is not!
Its really the only way to get it done without ripping off any parts of the plastic bezel... it does not show when reassembled but its creating a wide portal for dust particles.
NOTE: Just completed the installation and was supremely frustrated when the screen didn't turn back on. My first inclination was that the 3rd connector wasn't seated properly...so I opened up and re-attached 3 times. With girlfriend peering over my 'soon to be a failure of a bf' shoulder, I asked her to google up a 'hard reset'. Eureka. Hold down the black nav button and the top power button at the same time until the silver apple reappears. Crisis averted, great tutorial otherwise!
When removing the broken glass, be sure to remove adhesive from the side rails of the iPhone front panel assembly, otherwise your front panel won't fit as snugly as it should.
When reassembling, take care to properly insert ribbon cable 3, as it is much easier to remove it than it is to install it. Having an extra set of hands was invaluable for this repair.
I wish the instructions warned me to make sure a sim card is in the socket before reassembling, and/or they gave detailed reassembly instructions, and/or had higher quality pictures (I zoomed in on the pictures multiple times while reassembling, and could not see exactly how things were supposed to fit back together). My replacement went well, and all was working perfectly, but a piece of the cable was apparently sticking down into the sim card socket, and when my 21 yr old son forced the sim card it, it destroyed the cable that is attached to the plastic speaker assembly. Now I get to buy the more expensive repair kit that includes that part, and try again. D amn, I'm frustrated. -Bill