Introduction
Utilisez ce tutoriel pour remplacer le ventilateur.
N'oubliez pas de consulter notre tutoriel d'application de pâte thermique avant de réinstaller votre dissipateur thermique.
Ce dont vous avez besoin
-
-
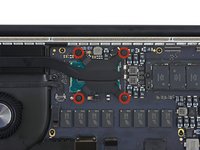
Ôtez les dix vis suivantes, qui fixent le boîtier inférieur au boîtier supérieur :
-
Deux vis Pentalobe P5 de 2,3 mm
-
Huit vis Pentalobe P5 de 3,0 mm
-
-
-
-
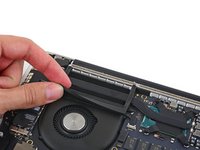
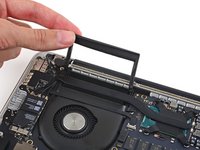
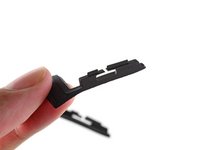
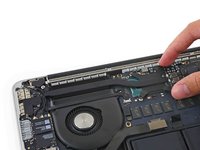
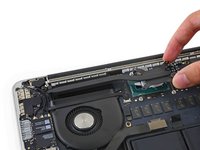
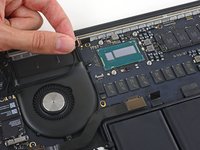
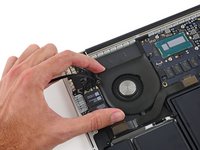
Enlevez doucement la protection en caoutchouc du ventilateur qui se trouve au bord du dissipateur thermique.
-
-
-
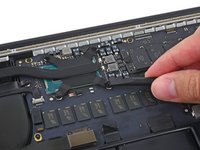
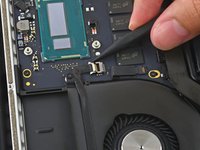
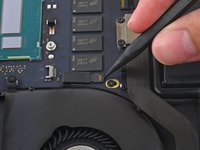
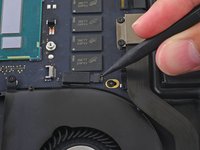
Utilisez la pointe d'un spudger pour pousser de chaque côté du connecteur de la nappe de la caméra iSight pour le faire sortir de sa prise sur la carte mère.
-


Pour réassembler votre appareil, suivez ces instructions dans l'ordre inverse.
Pour réassembler votre appareil, suivez ces instructions dans l'ordre inverse.
Annulation : je n'ai pas terminé ce tutoriel.
44 autres ont terminé cette réparation.
Merci à ces traducteurs :
100%

Ces traducteurs nous aident réparer le monde ! Vous voulez contribuer ?
Commencez à traduire ›


4 commentaires
in step#9, Phillips # 000 screwdriver did not fit in replacing fan?
When putting it all back together:
Step 15
Make sure to put the end furthest away from the hinge under the ribbon cable first.
Then place the hinge side. The screw furthest away from the hinge is partially obscured by the ribbon cable.
Step 14 (Part 1)
Start the screws enough to hold the fan in place but don’t tighten them until after step 13.
Step 13
Since the screws are not tight from step 14, putting the fan cable back into the ZIF connector is easier.
Step 14 (Part 2)
Tighten the screws after step 13
Step 12
Continue doing the steps backwards as normal.
Should the fan on this machine be on all the time, or only when needed?