Introduction
Hopefully this will give you the confidence to strip down the monitor and effect a repair which will extend the life of your monitor by many years.
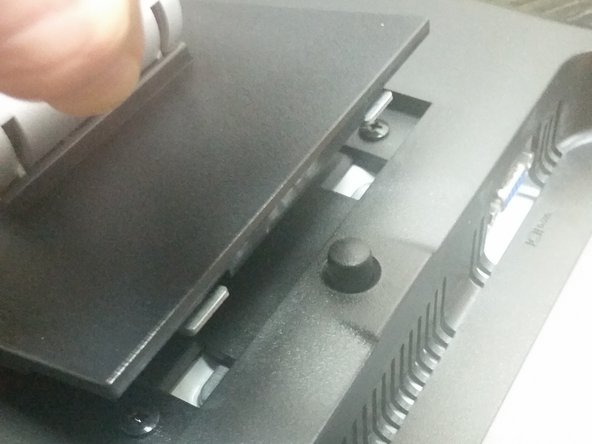
1. remove plinth from monitor by pressing the button on the back of the screen
2. Remove four black screws that attach back bezel to inside of monitor
3. Flip the monitor over so the screen is facing you and start prying up the front bezel moving the flat bladed screwdriver along as you pop open the top bezel.
4 once the bezel is loose you can leave the front bezel in place and remove the back cover leaving the front bezel in situ.
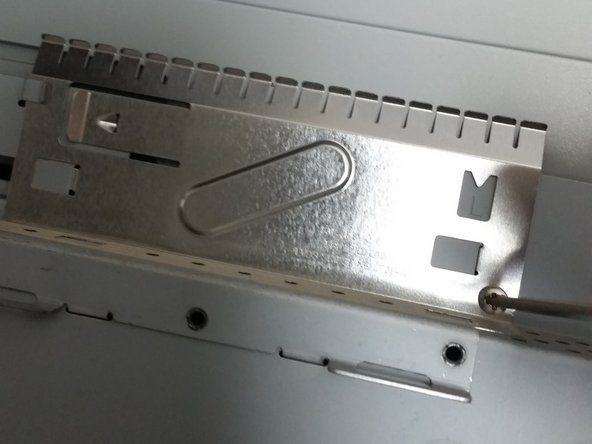
5. You will see two shiny shields fixed with two screws, remove the screws and you can pop/slide the shields off.
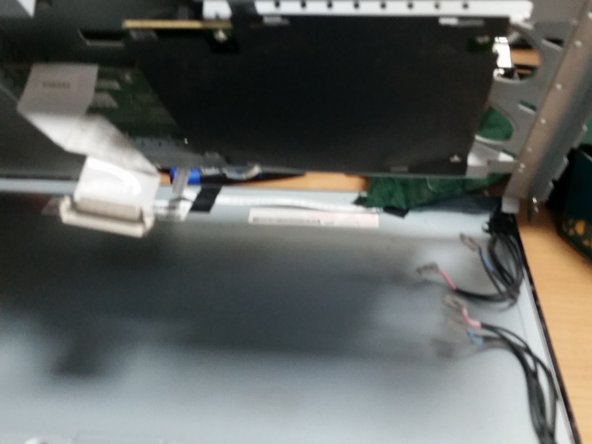
6. Once they are removed, you will see one connecting to the screen which has two levers either side, press those in and wiggle the ribbon cable out.
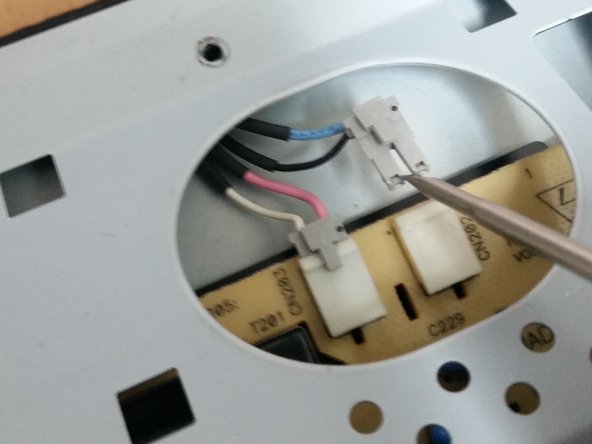
7. on the other side you'll see a smaller ribbon cable which simply pulls out. You'll also see the high tension plugs which were under one of the RF shields they are usually pink and blue, make a note of which goes into where and unplug
8. You're now ready to remove the screws around the edge of the LCD screen and it should come off as one unit.
9. You'll see two boards with one of them which has a black non shorting cover held on by one screw, remove the cover, then proceed to remove the other three screws.
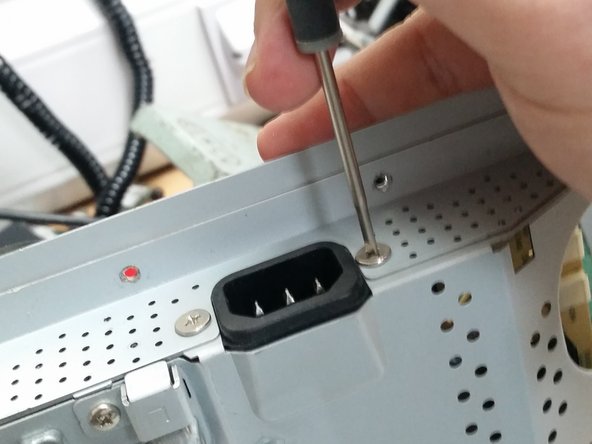
10. Locate where the power is usually plugged in and you'll see two screws either side of the power socket remove those.
11. You should see that the power supply board is now loose and can be wiggled free making sure you don't damage the berg strip connector which attaches it to the other board. it usually comes out at a slight angle quite easily.
12. Once out flip it over and examine the tops of the brown capacitors you'll see that two have vented, and gone pyramid shaped, they've blown.... In my experience and I've repaired hundreds of these monitors it is only ever these two that have gone, but if you find others that have vented replace those as well, making sure you observe polarity and type correctly with the replacement capacitors.
Ce dont vous avez besoin
-
-
1. remove plinth from monitor by pressing the button on the back of the screen
-
-
-
Best to do this with the screen facing down so you don't rip out the ribbon cable that attaches to the buttons on the front of the screen, start in the middle of the bezel to get purchase then slip a screwdriver underneath to gently prize up the bezel working along until its released, the edges are stubborn but do release with patience
-
-
-
remove back of monitor and remove the shiny steel RF shields one screw each then then simply slide off
-
-
-
The small ribbon cable is easy to remove gently pull (see picture), the larger ribbon cable can be stubborn I tend to use two screwdrivers one to push in the release catch and the other flat bladed one to gently wiggle it out, same procedure for the other side, if you get image corruption after the repair this is the cable that is the culprit
-
-
-
-
4 screws one in each corner attaches the electronics cradle to the back of the LCD screen
-
-
-
remove the 4 screws one is bigger than the rest then undo the screws that hold the power cable socket in place, once the power socket screws and the top board screws are removed put your thumb over the power socket and pop the board out sideways you don't need a great deal of force to remove the PSU board just loosen gently
-
-
-
take note of the berg strip and make sure you don't damage the pins when removing flip the board over and you're ready to remove the capacitors, when re-assembling make sure the berg strip lines up correctly before pushing the boards together
-
-
-
After re-inserting the ribbon cables a small one for the buttons at the front of the bezel and the main one that carries the data to the display, once you have reconnected successfully you should get a clean bouncing screen saver moving around the screen, if there are any screen anomalies it is always the thicker data cable that needs reseating
-
-
-
it's best to test the monitor before you put the back cover on the screen, as invariably the larger of the two ribbon cables has not seated correctly, once you're happy your screen works put everything back together and you're good to go
-


Reassemble in reverse order taking time to re-fit the ribbon connector which can be a bit fiddly but you can test it
Reassemble in reverse order taking time to re-fit the ribbon connector which can be a bit fiddly but you can test it
Annulation : je n'ai pas terminé ce tutoriel.
15 autres ont terminé cette réparation.
11 commentaires
Thanks for this post! I am having an issue with the VGA input on this monitor. The monitor turns on no problem, but doesn’t get a signal from a VGA input. I have confirmed that this is an issue with the monitor and not the cable. Will this resolve the issue?
Yes this resolves the issue
This fix is specifically for the issue where the monitor switches on and has a green light on the front but there is a black display OR it can manifest as the display briefly coming on but then switching off and staying off after about 2 or 3 seconds
if it’s your vga logic board then see Step 7 that logic board is the one to the bottom left of the picture with the ribbon cable attached that is the board that deals with the signal coming from the computer VGA output, if you remove that board and heat an oven up to around 180C and put it in for no longer than 8 minutes with the components face up enough to reflow the solder then remove from the oven (carefully because any sudden movements could dislodge the components as the solder will be liquid)
that may fix the problem, no guarantees mind that’s a last ditch thing to try if all else has failed…
hope that helps :)
let me know how you get on :)
Derek
Fantastic really appreciate the reply! Will have a look at what you have said and keep you posted :)
I honestly don't know where the other editors of this guide sprang from, none of them contributed to it, most of them removed things that you'd need like two 470uf capacitors and they'd remove one capacitor, this circuit board always blows both capacitors, or very minor picky changes….
I wrote it as I intended it to be read….
So if you don't know what you're talking about don't edit my guide when I know its 100% correct
Thank you!!!
If you keep doing it, I'll just delete the whole thing