Aller au contenu principal
Pour réparer ensemble - Je crée un compte

Samsung Galaxy M31 Battery Replacement

Ce dont vous avez besoin

    1. Samsung Galaxy M31 Battery Replacement, Remove SIM Card Tray: étape 1, image 1 de 3 Samsung Galaxy M31 Battery Replacement, Remove SIM Card Tray: étape 1, image 2 de 3 Samsung Galaxy M31 Battery Replacement, Remove SIM Card Tray: étape 1, image 3 de 3
      • Insert a SIM card eject tool, a SIM eject bit or a straightened paper clip into the hole on the SIM tray located at the left side of the phone.

      • Press firmly to eject the tray.

      Demander à FixBot

      Ajouter un commentaire

    2. Samsung Galaxy M31 Battery Replacement: étape 2, image 1 de 3 Samsung Galaxy M31 Battery Replacement: étape 2, image 2 de 3 Samsung Galaxy M31 Battery Replacement: étape 2, image 3 de 3
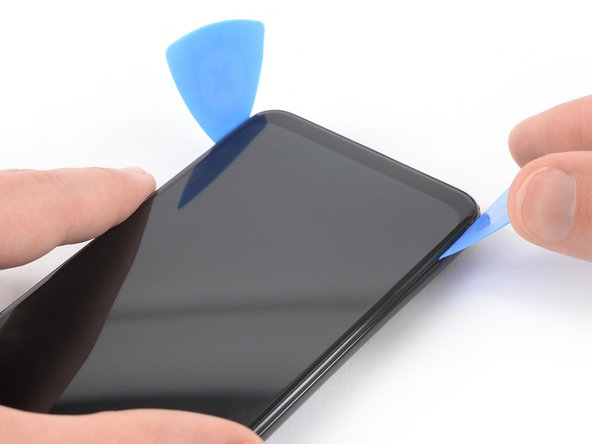
      • Insert an opening pick between the phone assembly and the back cover at the bottom edge of the phone.

      • Slide the opening pick around the bottom right corner to release the clips holding the back cover in place.

      Demander à FixBot

      Ajouter un commentaire

    3. Samsung Galaxy M31 Battery Replacement: étape 3, image 1 de 2 Samsung Galaxy M31 Battery Replacement: étape 3, image 2 de 2
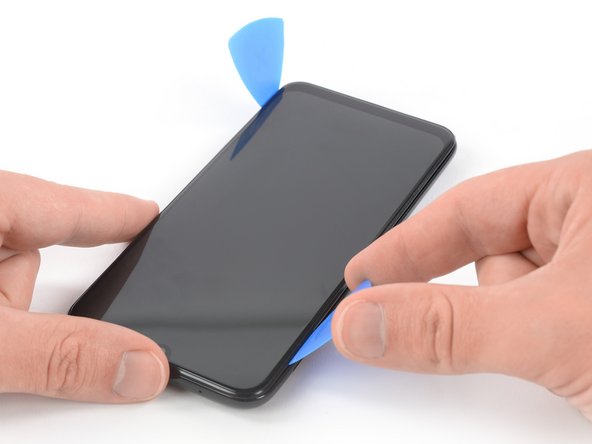
      • Insert a second opening pick between back cover and the phone assembly at the bottom edge of the phone.

      • Slide the opening pick around the bottom left corner to release the plastic clips holding the back cover in place.

      Demander à FixBot

      Ajouter un commentaire

    4. Samsung Galaxy M31 Battery Replacement: étape 4, image 1 de 2 Samsung Galaxy M31 Battery Replacement: étape 4, image 2 de 2
      • Slide the opening pick along the left side of the phone to release the plastic clips on the left side of the back cover.

      Demander à FixBot

      Ajouter un commentaire

    5. Samsung Galaxy M31 Battery Replacement: étape 5, image 1 de 2 Samsung Galaxy M31 Battery Replacement: étape 5, image 2 de 2
      • Slide the opening pick along the right side of the phone to release the plastic clips on the right side of the back cover.

      Demander à FixBot

      Ajouter un commentaire

    6. Samsung Galaxy M31 Battery Replacement, Remove Back Cover: étape 6, image 1 de 3 Samsung Galaxy M31 Battery Replacement, Remove Back Cover: étape 6, image 2 de 3 Samsung Galaxy M31 Battery Replacement, Remove Back Cover: étape 6, image 3 de 3
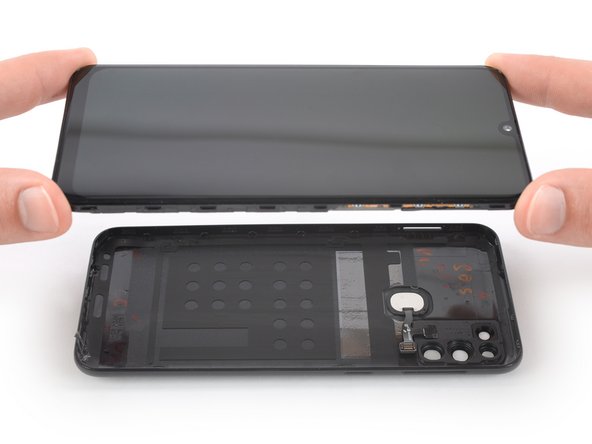
      • The flex cable of the fingerprint sensor is very short and the sensor is likely to disconnect itself during the following removal procedure. Avoid damaging the cable by removing the back cover too quickly.

      • Carefully lift the phone assembly out of the back cover.

      • During reassembly, this is a good point to power on your phone and test all functions before reinstalling the back cover. Be sure to power your phone back down completely before you continue working.

      Demander à FixBot

      Ajouter un commentaire

    1. Samsung Galaxy M31 Battery Replacement, Unfasten Motherboard Cover: étape 7, image 1 de 1
      • Remove the seven Phillips #00 screws (3.9 mm length).

      Demander à FixBot

      Ajouter un commentaire

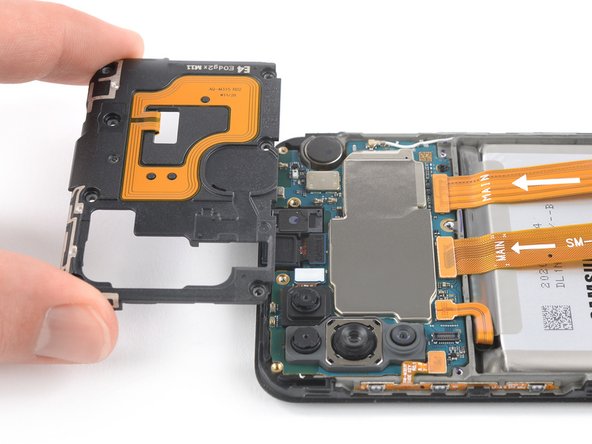
    2. Samsung Galaxy M31 Battery Replacement, Remove Motherboard Cover: étape 8, image 1 de 3 Samsung Galaxy M31 Battery Replacement, Remove Motherboard Cover: étape 8, image 2 de 3 Samsung Galaxy M31 Battery Replacement, Remove Motherboard Cover: étape 8, image 3 de 3
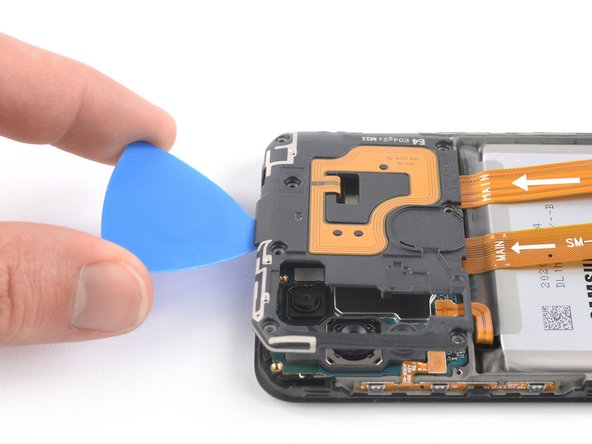
      • Insert the tip of an opening pick underneath the top edge of the motherboard cover.

      • Use the opening pick to pry up the motherboard cover.

      • Remove the motherboard cover.

      Demander à FixBot

      Ajouter un commentaire

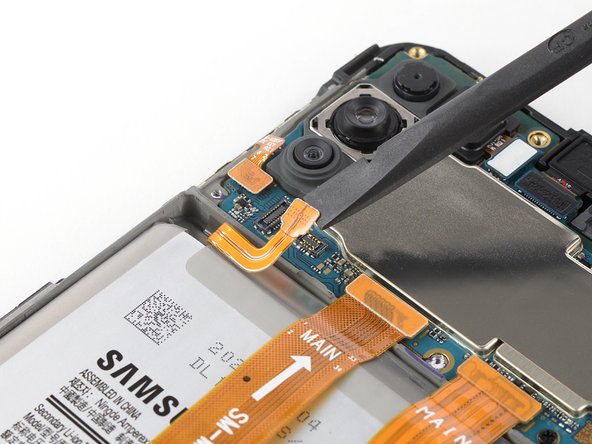
    1. Samsung Galaxy M31 Battery Replacement, Battery Disconnect: étape 9, image 1 de 2 Samsung Galaxy M31 Battery Replacement, Battery Disconnect: étape 9, image 2 de 2
      • Use the flat end of a spudger to pry up and disconnect the battery flex cable.

      Demander à FixBot

      Ajouter un commentaire

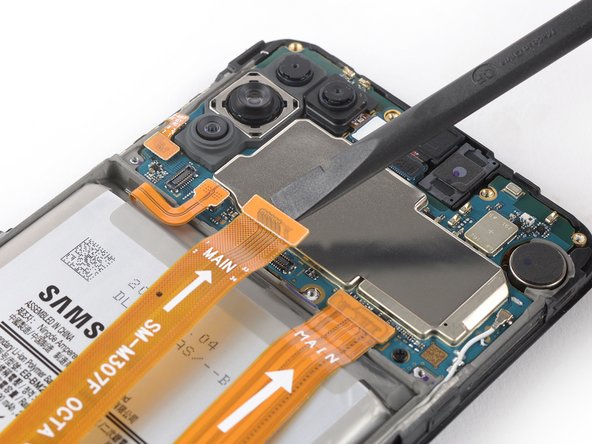
    1. Samsung Galaxy M31 Battery Replacement, Display Cable Disconnect: étape 10, image 1 de 2 Samsung Galaxy M31 Battery Replacement, Display Cable Disconnect: étape 10, image 2 de 2
      • Use the flat end of a spudger to pry up and disconnect the display flex cable.

      Demander à FixBot

      Ajouter un commentaire

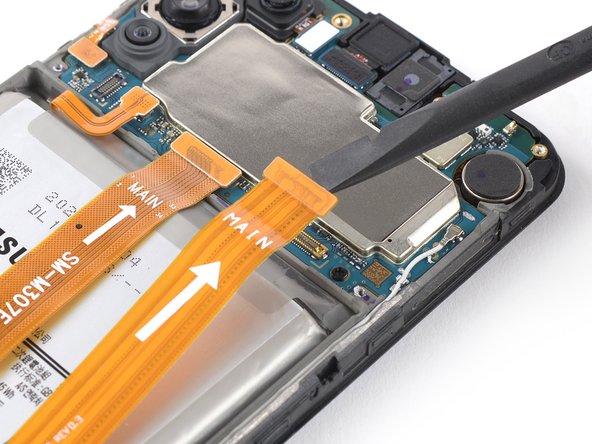
    2. Samsung Galaxy M31 Battery Replacement, Interconnect Cable Disconnect: étape 11, image 1 de 2 Samsung Galaxy M31 Battery Replacement, Interconnect Cable Disconnect: étape 11, image 2 de 2
      • Use the flat end of a spudger to pry up and disconnect the interconnect flex cable.

      • Fold both cables to the bottom edge of the phone in order to have free access to the battery.

      Demander à FixBot

      Ajouter un commentaire

    3. Samsung Galaxy M31 Battery Replacement, Soften Battery Adhesive: étape 12, image 1 de 1
      • Apply a heated iOpener to the screen to loosen the adhesive beneath the battery. Apply the iOpener for at least two minutes.

      Demander à FixBot

      Ajouter un commentaire

    4. Samsung Galaxy M31 Battery Replacement, Pry up the Battery: étape 13, image 1 de 3 Samsung Galaxy M31 Battery Replacement, Pry up the Battery: étape 13, image 2 de 3 Samsung Galaxy M31 Battery Replacement, Pry up the Battery: étape 13, image 3 de 3
      • Try your best not to deform the battery during the following removal process. Soft-shell lithium-ion batteries can leak dangerous chemicals, catch fire, or even explode if damaged. Do not use excessive force or pry at the battery with metal tools.

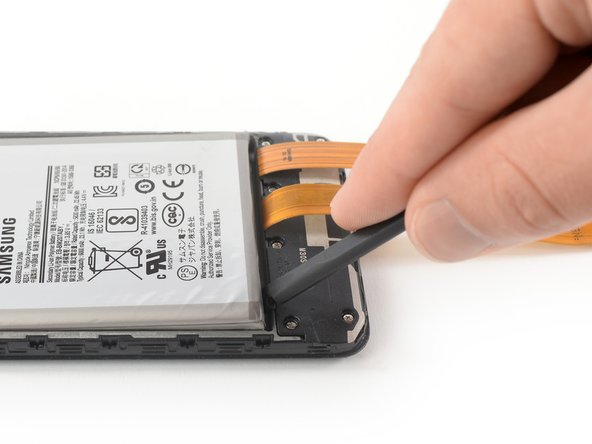
      • Insert a spudger into the gap between the daughterboard cover and the battery at the bottom left corner of the battery.

      • Use the spudger to pry up the battery until you created a small gap underneath.

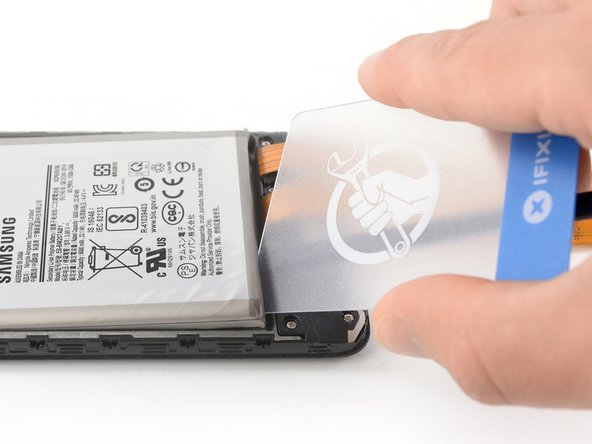
      • Slide a plastic or playing card into the gap you created with the spudger.

      Demander à FixBot

      Ajouter un commentaire

    5. Samsung Galaxy M31 Battery Replacement, Cut Battery Adhesive: étape 14, image 1 de 3 Samsung Galaxy M31 Battery Replacement, Cut Battery Adhesive: étape 14, image 2 de 3 Samsung Galaxy M31 Battery Replacement, Cut Battery Adhesive: étape 14, image 3 de 3
      Outil utilisé dans cette étape :
      Plastic Cards
      $2.99
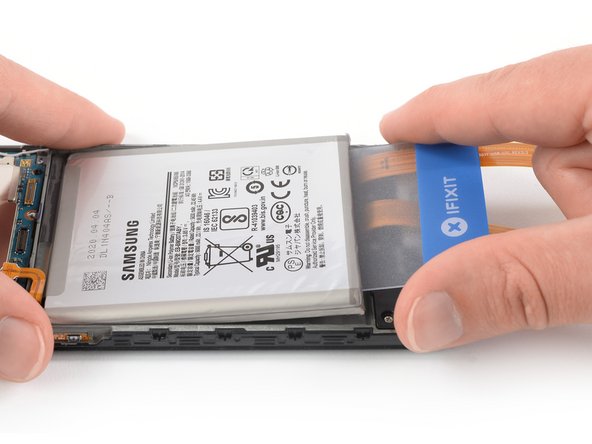
      • Slide the plastic card underneath the battery and use it to cut the adhesive.

      • Use the plastic card to pry up the battery.

      Demander à FixBot

      Ajouter un commentaire

    6. Samsung Galaxy M31 Battery Replacement, Remove Battery: étape 15, image 1 de 2 Samsung Galaxy M31 Battery Replacement, Remove Battery: étape 15, image 2 de 2
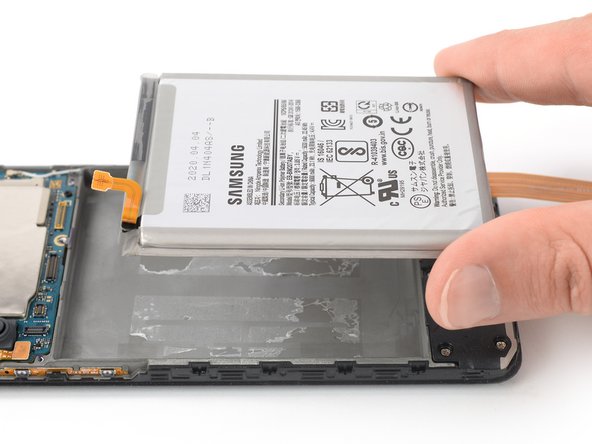
      • Remove the battery.

      • Do not reinstall a damaged or deformed battery, as doing so is a potential safety hazard.

      • Before adhering the battery, temporarily reconnect it to help align it correctly. Adhere the battery to the phone and then disconnect it and continue reassembling your phone.

      Demander à FixBot

      Ajouter un commentaire

Conclusion

If possible, turn on your device and test your repair before installing new adhesive and resealing.

Secure the new battery with pre-cut adhesive or double-sided adhesive tape. In order to position it correctly, apply the new adhesive into the device at the places where the old adhesive was located, not directly onto the battery. Press the new battery firmly into place.

To reassemble your device, follow these instructions in reverse order. Apply new adhesive where necessary after cleaning the relevant areas with isopropyl alcohol (>90%).

For optimal performance, calibrate your newly installed battery: Charge it to 100% and keep charging it for at least 2 more hours. Then use your device until it shuts off due to low battery. Finally, charge it uninterrupted to 100%.

Take your e-waste to an R2 or e-Stewards certified recycler.

Repair didn’t go as planned? Try some basic troubleshooting, or ask our Answers community for help.

Annulation : je n'ai pas terminé ce tutoriel.

11 autres ont terminé cette réparation.

Dominik Schnabelrauch

Membre depuis le 11/23/16

263 018 Réputation

682 tutoriels rédigés

Équipe

iFixit Membre de l'équipe iFixit

Staff

123 membres

64 580 tutoriels rédigés

7 commentaires de tutoriel

Nicely explained Excellent work…. Nice job guys…

venomavenger443 - Réponse Partager

Where can I purchase a genuine Samsung battery for the M32?

Mitch Paris - Réponse Partager

there's a gasket on the speaker connection to the back that's real easy to damage at step 2

oof - Réponse Partager

sound leaks into the case without it, if you don't have the exact battery from samsung down to the tenth of a mm thickness the back resonates, there are no replacements (and midframe replacements don't come with it)

oof - Réponse Partager

the battery i got didn't last long. now that i'm opening it again i see that if you go to the left corner instead of the right corner you avoid the damage that's possible with the speaker surround

oof - Réponse Partager

Ajouter un commentaire

Nombre de vues :

Dernières 24 heures : 9

7 derniers jours : 35

30 derniers jours : 127

Total : 13,756