Introduction
Follow this guide to replace a dead or low-capacity battery for the Samsung Galaxy S7 Edge.
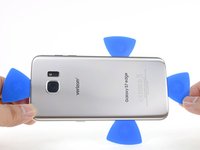
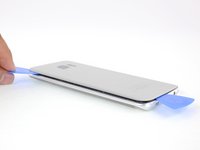
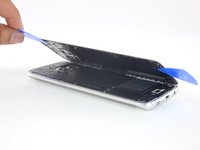
Note: The curved edge and strong adhesive make the initial opening procedure very challenging. Be patient, repeat multiple heat and pull cycles, and the adhesive will eventually loosen.
Before disassembling your phone, discharge the battery below 25%. A charged lithium-ion battery can catch fire and/or explode if accidentally punctured.
If your battery is swollen, take appropriate precautions. Do not heat your phone. If needed, you can use a dropper or syringe to inject isopropyl alcohol (90+%) around the edges of the back cover to weaken the adhesive. Swollen batteries can be very dangerous, so wear eye protection and exercise due caution, or take it to a professional if you're not sure how to proceed.
Ce dont vous avez besoin
-
-
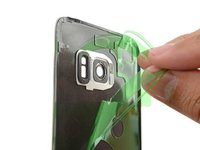
Heat an iOpener and apply it to a long edge of the phone for about two minutes.
-
-
-
Outil utilisé dans cette étape :Tweezers$4.99
-
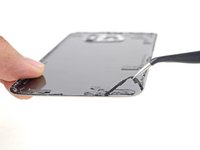
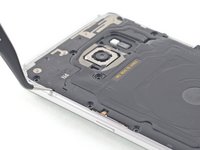
Use tweezers to peel away any remaining adhesive from the phone's chassis. Then clean the adhesion areas with high concentration isopropyl alcohol (at least 90%) and a lint-free cloth to prep the surface for the new adhesive.
-
Peel the adhesive backing off of the new rear glass, carefully line up one edge of the glass against the phone chassis, and firmly press the glass onto the phone.
-
-
-
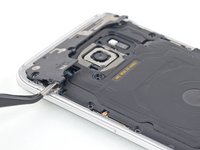
Use the flat end of a spudger to disconnect the battery connector.
-
-
-
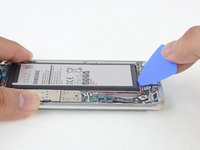
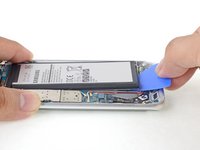
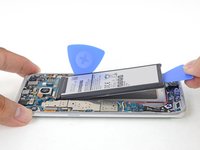
Prepare an iOpener and apply it directly to the battery.
-
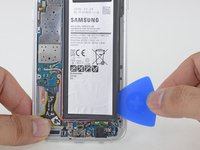
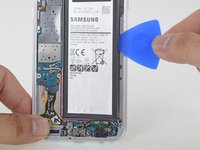
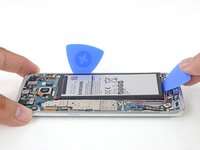
Alternatively, apply 1-2 drops of high-concentration (>90%) isopropyl alcohol under each corner of the battery and allow it to penetrate for several minutes to help weaken the adhesive.
-


To reassemble your device, follow these instructions in reverse order.
After completing this guide, calibrate your newly-installed battery.
To reassemble your device, follow these instructions in reverse order.
After completing this guide, calibrate your newly-installed battery.
Annulation : je n'ai pas terminé ce tutoriel.
133 autres ont terminé cette réparation.


12 commentaires
How.. in the bloody !&&*.. do you use the battery adhesive? Don’t just stop with the removal. Reapplication of the adhesive is an IMPORTANT STEP!
Hi Doug,
I’ve written up a short guide for the battery adhesive. You can find it here. It’s now added into the last step. Hope that helps!
1-2 hours…acturally about 30 mins! excellent tutorial