Aller au contenu principal
Pour réparer ensemble - Je crée un compte

Samsung Level Box Mini Buttons Replacement

Ce dont vous avez besoin

    1. Samsung Level Box Mini Buttons Replacement, Buttons: étape 1, image 1 de 2 Samsung Level Box Mini Buttons Replacement, Buttons: étape 1, image 2 de 2
      Outil utilisé dans cette étape :
      Tweezers
      $4.99
      • Using a plastic opening tool, go around the edges of the rubber bottom. Insert the same tool under the edge of the rubber and swivel side to side. Continue moving it forward while peeling the plastic off with the precision tweezers.

      Demander à FixBot

      Ajouter un commentaire

    2. Samsung Level Box Mini Buttons Replacement: étape 2, image 1 de 1
      • Remove the six 4.5 mm Philips #1 screws from the bottom plate using the Screwdriver J00 Philips Head. Take off the bottom plate.

      Demander à FixBot

      Ajouter un commentaire

    3. Samsung Level Box Mini Buttons Replacement: étape 3, image 1 de 1
      • Using the plastic opening tool, remove the batteries from the device.

      Demander à FixBot

      Ajouter un commentaire

    4. Samsung Level Box Mini Buttons Replacement: étape 4, image 1 de 3 Samsung Level Box Mini Buttons Replacement: étape 4, image 2 de 3 Samsung Level Box Mini Buttons Replacement: étape 4, image 3 de 3
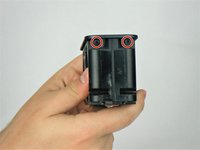
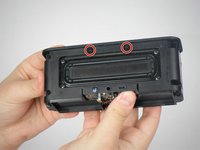
      • Remove the eight 1.6 mm Philips #1 screws from the sides, front, and back of the device using the Screwdriver J000 Philips Head.

      Demander à FixBot

      Ajouter un commentaire

    5. Samsung Level Box Mini Buttons Replacement: étape 5, image 1 de 1
      • Remove the top of the device using the metal spudger.

      Demander à FixBot

      Ajouter un commentaire

    6. Samsung Level Box Mini Buttons Replacement: étape 6, image 1 de 2 Samsung Level Box Mini Buttons Replacement: étape 6, image 2 de 2
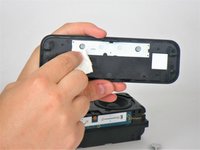
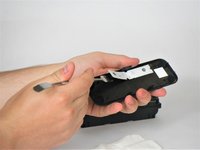
      • Clean the white plastic using a cloth. Remove the white plastic using the metal spudger.

      Demander à FixBot

      Ajouter un commentaire

    7. Samsung Level Box Mini Buttons Replacement: étape 7, image 1 de 1
      • Clean the top of the buttons using a cloth.

      Demander à FixBot

      Ajouter un commentaire

Conclusion

To reassemble your device, follow these instructions in reverse order.

Annulation : je n'ai pas terminé ce tutoriel.

2 autres ont terminé cette réparation.

Amanda Hymer

Membre depuis le 02/16/17

684 Réputation

2 tutoriels rédigés

Équipe

USF Tampa, Team 1-4, Kass Spring 2017 Membre de l'équipe USF Tampa, Team 1-4, Kass Spring 2017

USFT-KASS-S17S1G4

5 membres

10 tutoriels rédigés

0 commentaires de tutoriel

Ajouter un commentaire

Nombre de vues :

Dernières 24 heures : 0

7 derniers jours : 1

30 derniers jours : 10

Total : 1,966