Aller au contenu principal
Pour réparer ensemble - Je crée un compte

Samsung WB1100F Camera Lens Replacement

Ce dont vous avez besoin

    1. Samsung WB1100F Camera Lens Replacement, LCD Screen Cover: étape 1, image 1 de 2 Samsung WB1100F Camera Lens Replacement, LCD Screen Cover: étape 1, image 2 de 2
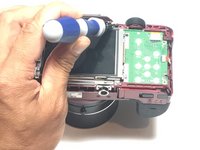
      • Remove six 1.2 mm Phillips #00 screws connected to the tripod dock and adjacent screws.

      • Remove six 1.2 mm Phillips #00 screws from the side of the camera.

      Demander à FixBot

      Ajouter un commentaire

    2. Samsung WB1100F Camera Lens Replacement: étape 2, image 1 de 2 Samsung WB1100F Camera Lens Replacement: étape 2, image 2 de 2
      • Use a plastic opening tool or spudger if available.

      • Using the flat end of a spudger, loosen the connection between the back panel and the device. Remove the back panel using your hands.

      Demander à FixBot

      Ajouter un commentaire

    1. Samsung WB1100F Camera Lens Replacement, LCD Screen: étape 3, image 1 de 2 Samsung WB1100F Camera Lens Replacement, LCD Screen: étape 3, image 2 de 2
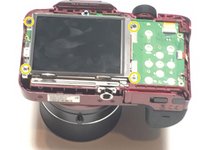
      • Remove four 1.2 mm Phillips #1 screws connected to the LCD screen.

      Demander à FixBot

      Ajouter un commentaire

    2. Samsung WB1100F Camera Lens Replacement: étape 4, image 1 de 3 Samsung WB1100F Camera Lens Replacement: étape 4, image 2 de 3 Samsung WB1100F Camera Lens Replacement: étape 4, image 3 de 3
      Outil utilisé dans cette étape :
      Tweezers
      $4.99
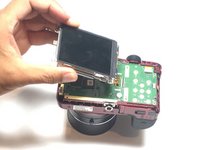
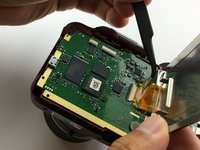
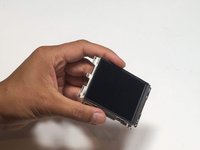
      • Flip the LCD screen over to reveal the display cable.

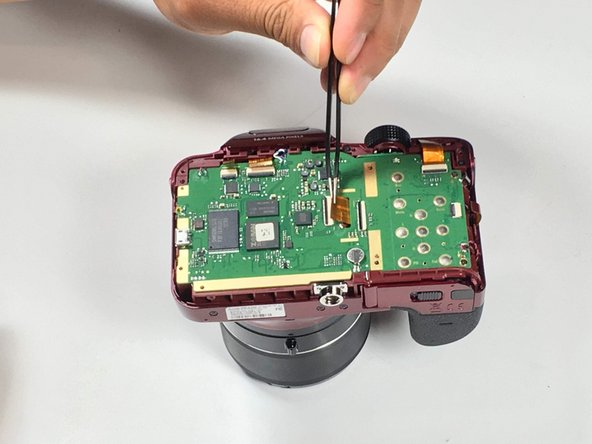
      • Use the tip of a spudger or your fingernail to flip up the small retaining flap on the display cable ZIF connector.

      • Be sure you are prying up on the hinged retaining flap, not the connector itself.

      • Using a pair of tweezers, remove the ribbon cable from its socket on the motherboard.

      • The white line on this ribbon cable marks the edge of the connection area. To reinstall, insert the cable into the connector up to this line, and then close the retaining flap. If the cable doesn’t insert easily up to (or very near to) this line, it’s probably misaligned and needs to be gently removed and repositioned.

      Demander à FixBot

      Ajouter un commentaire

    1. Samsung WB1100F Camera Lens Replacement, Motherboard: étape 5, image 1 de 1
      • Remove two 1.2 Phillips #00 screws connected to the motherboard.

      Demander à FixBot

      Ajouter un commentaire

    2. Samsung WB1100F Camera Lens Replacement: étape 6, image 1 de 1
      • Desolder five wires connected to the camera motherboard.

      Demander à FixBot

      Ajouter un commentaire

    3. Samsung WB1100F Camera Lens Replacement: étape 7, image 1 de 2 Samsung WB1100F Camera Lens Replacement: étape 7, image 2 de 2
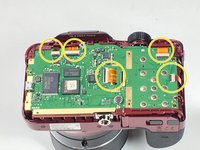
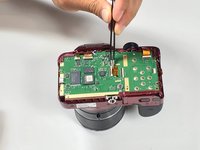
      • Use the tip of a spudger or your fingernail to flip up the small retaining flaps on the five ZIF connectors on the motherboard.

      • Be sure you are prying up on the hinged retaining flap, not the connector itself.

      • Detach the five ribbon cables from the camera motherboard.

      • The white line on the ribbon cables mark the edge of the connection area. To reinstall, insert the cables into the connector up to this line, and then close the retaining flap. If a cable doesn’t insert easily up to (or very near to) this line, it’s probably misaligned and needs to be gently removed and repositioned.

      Demander à FixBot

      Ajouter un commentaire

    4. Samsung WB1100F Camera Lens Replacement: étape 8, image 1 de 1
      • Gently remove the motherboard.

      Demander à FixBot

      Ajouter un commentaire

    1. Samsung WB1100F Camera Lens Replacement, Camera Lens: étape 9, image 1 de 1
      • Remove the three 1.5 mm Phillips #1 screws connected to the lens assembly.

      Demander à FixBot

      Ajouter un commentaire

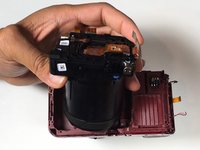
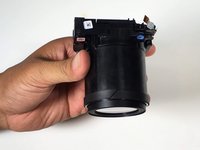
    2. Samsung WB1100F Camera Lens Replacement: étape 10, image 1 de 2 Samsung WB1100F Camera Lens Replacement: étape 10, image 2 de 2
      • Pull the lens assembly from main body of the camera, using a spudger to pry if necessary.

      Demander à FixBot

      Ajouter un commentaire

Conclusion

To reassemble your device, follow these instructions in reverse order.

Annulation : je n'ai pas terminé ce tutoriel.

Jesse Lindsey

Membre depuis le 05/13/16

581 Réputation

5 tutoriels rédigés

Équipe

Metro State, Team 1-1, Carpenter SU 2016 Membre de l'équipe Metro State, Team 1-1, Carpenter SU 2016

MSU-CARPENTER-SU16S1G1

3 membres

5 tutoriels rédigés

0 commentaires de tutoriel

Ajouter un commentaire

Nombre de vues :

Dernières 24 heures : 5

7 derniers jours : 18

30 derniers jours : 52

Total : 3,660