Aller au contenu principal
Pour réparer ensemble - Je crée un compte

Sony PlayStation 3D Display Control Buttons Replacement

Ce dont vous avez besoin

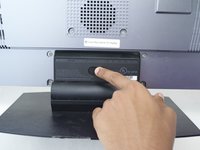
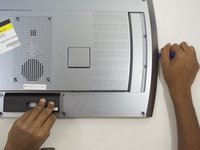
    1. Sony PlayStation 3D Display Control Buttons Replacement, Rear Case: étape 1, image 1 de 2 Sony PlayStation 3D Display Control Buttons Replacement, Rear Case: étape 1, image 2 de 2
      • Remove the base by pushing in the button and sliding out the unit.

      Demander à FixBot

      Ajouter un commentaire

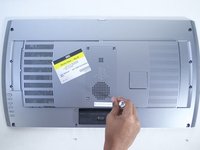
    2. Sony PlayStation 3D Display Control Buttons Replacement: étape 2, image 1 de 3 Sony PlayStation 3D Display Control Buttons Replacement: étape 2, image 2 de 3 Sony PlayStation 3D Display Control Buttons Replacement: étape 2, image 3 de 3
      • Remove USB port cover from back plate with a metal spudger.

      • This will prevent the cover from falling under the back plate once it is removed.

      Demander à FixBot

      Ajouter un commentaire

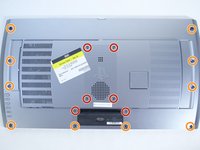
    3. Sony PlayStation 3D Display Control Buttons Replacement: étape 3, image 1 de 2 Sony PlayStation 3D Display Control Buttons Replacement: étape 3, image 2 de 2
      • With the Phillips #02 screwdriver, remove the six 6 mm length x 6 mm head screws from the back plate.

      • With the Phillips #02 screwdriver, remove the ten 6 mm length x 8 mm head screws from the back plate.

      • These screws have different threads and need to be kept separate.

      Demander à FixBot

      Ajouter un commentaire

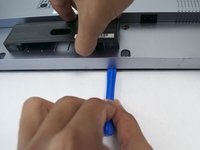
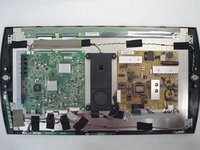
    4. Sony PlayStation 3D Display Control Buttons Replacement: étape 4, image 1 de 3 Sony PlayStation 3D Display Control Buttons Replacement: étape 4, image 2 de 3 Sony PlayStation 3D Display Control Buttons Replacement: étape 4, image 3 de 3
      • Remove back plate with a plastic opening tool by slowing prying around the entire plate.

      • Be gentle to avoid breaking the plastic clips which hold the plate.

      • Once separated the plate easily lifts off.

      Demander à FixBot

      Ajouter un commentaire

    1. Sony PlayStation 3D Display Control Buttons Replacement, Control Buttons: étape 5, image 1 de 1
      • With the Phillips #01 screwdriver, remove the two 5 mm length x 7 mm head screws from the top and bottom of the control button bar.

      Demander à FixBot

      Ajouter un commentaire

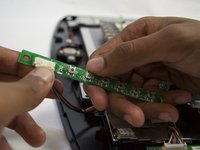
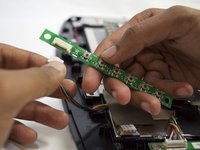
    2. Sony PlayStation 3D Display Control Buttons Replacement: étape 6, image 1 de 2 Sony PlayStation 3D Display Control Buttons Replacement: étape 6, image 2 de 2
      • Detach the control button bar by depressing the small white tab that connects the bar to its wires.

      Demander à FixBot

      Ajouter un commentaire

Conclusion

To reassemble your device, follow these instructions in reverse order.

Annulation : je n'ai pas terminé ce tutoriel.

Une autre personne a terminé cette réparation.

Tia McNaughton

Membre depuis le 10/01/15

379 Réputation

3 tutoriels rédigés

Équipe

Cal Poly, Team 12-16, Maness Fall 2015 Membre de l'équipe Cal Poly, Team 12-16, Maness Fall 2015

CPSU-MANESS-F15S12G16

4 membres

14 tutoriels rédigés

0 commentaires de tutoriel

Ajouter un commentaire

Nombre de vues :

Dernières 24 heures : 0

7 derniers jours : 2

30 derniers jours : 20

Total : 989