Aller au contenu principal
Pour réparer ensemble - Je crée un compte

Sony VAIO PCG-F360 Single Key Replacement

Ce dont vous avez besoin

    1. Sony VAIO PCG-F360 Single Key Replacement, Battery: étape 1, image 1 de 1
      • Position the laptop screen-side down as shown.

      • In this position the battery housing will be located on the right hand side.

      Demander à FixBot

      Ajouter un commentaire

    2. Sony VAIO PCG-F360 Single Key Replacement: étape 2, image 1 de 1
      • Lift the panel up and then out to gain access to the battery.

      Demander à FixBot

      Ajouter un commentaire

    3. Sony VAIO PCG-F360 Single Key Replacement: étape 3, image 1 de 1
      • Use the indentations to pull the old battery out.

      Demander à FixBot

      Ajouter un commentaire

    4. Sony VAIO PCG-F360 Single Key Replacement: étape 4, image 1 de 1
      • The battery is now removed and it is safe to move on to uninstalling other components.

      Demander à FixBot

      Ajouter un commentaire

    1. Sony VAIO PCG-F360 Single Key Replacement, Single Key: étape 5, image 1 de 3 Sony VAIO PCG-F360 Single Key Replacement, Single Key: étape 5, image 2 de 3 Sony VAIO PCG-F360 Single Key Replacement, Single Key: étape 5, image 3 de 3
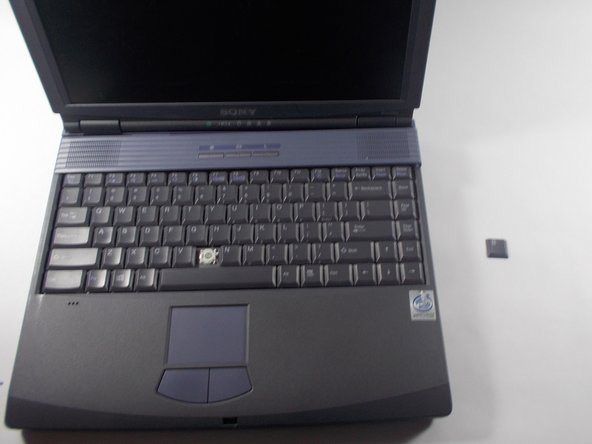
      • Use the pludger to pop off the key by prying under it.

      • You now can clean and replace the key.

      Demander à FixBot

      Ajouter un commentaire

Conclusion

To reassemble your device, follow these instructions in reverse order.

Annulation : je n'ai pas terminé ce tutoriel.

Hannah Millea

Membre depuis le 03/11/14

401 Réputation

4 tutoriels rédigés

Équipe

UMass Dartmouth, Team 3-5, Calaway Spring 2014 Membre de l'équipe UMass Dartmouth, Team 3-5, Calaway Spring 2014

UMASSD-CALAWAY-S14S3G5

2 membres

12 tutoriels rédigés

0 commentaires de tutoriel

Ajouter un commentaire

Nombre de vues :

Dernières 24 heures : 0

7 derniers jours : 2

30 derniers jours : 22

Total : 519