Ce dont vous avez besoin
-
-
Lay the phone down on a clean, smooth surface so the back glass is facing up.
-
Heat an iOpener and apply it to the bottom edge of the back glass for two minutes.
-
-
Outil utilisé dans cette étape :Clampy - Anti-Clamp$24.95
-
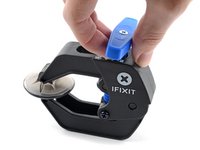
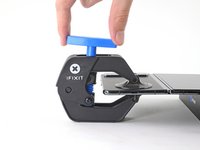
Pull the blue handle backwards to unlock the Anti-Clamp's arms.
-
Unfold your phone completely and slide the Anti-Clamp arms over the left edge of the back glass, below the Google "G" logo.
-
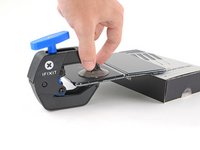
Position the suction cups near the bottom edge of the phone—one on the front, and one on the back.
-
Squeeze the cups together to apply suction to the desired area.
-
-
-
Place an object under your phone, like a box or a stack of books, so it rests level while between the Anti-Clamp's arms.
-
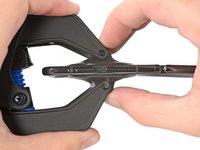
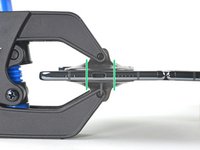
Pull the blue handle forward to lock the arms.
-
Turn the handle clockwise 360 degrees or until the cups start to stretch.
-
Make sure the suction cups remain aligned with each other. If they begin to slip out of alignment, detach the suction cups and realign the arms.
-
-
-
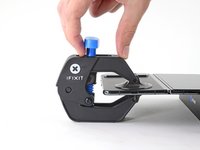
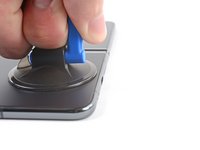
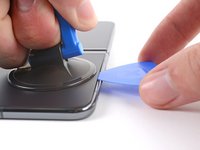
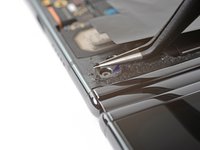
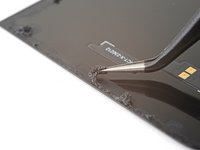
Apply a suction cup to the back glass, as close to the center of the bottom edge as possible.
-
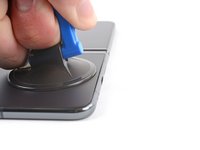
Pull up on the suction cup with strong, steady force to create a gap between the back glass and the frame.
-
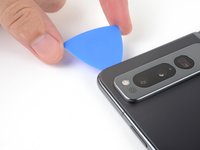
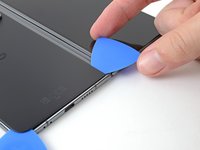
Insert an opening pick into the gap.
-
-
-
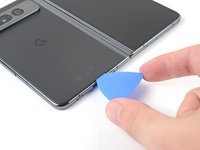
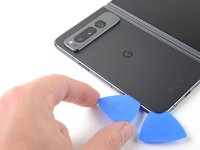
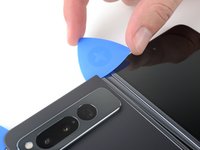
Slide the opening pick back and forth along the bottom edge to separate the adhesive.
-
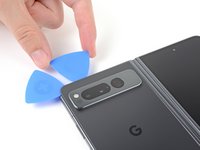
Leave the opening pick in the bottom left corner before continuing.
-
-
-
Apply a heated iOpener to the left edge of the back glass for two minutes.
-
-
-
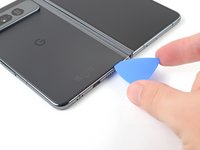
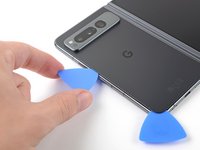
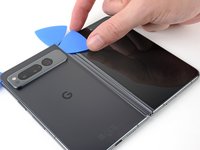
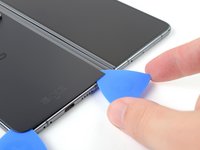
Rotate the opening pick around the bottom left corner to separate the adhesive.
-
-
-
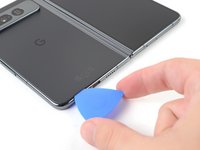
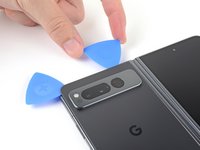
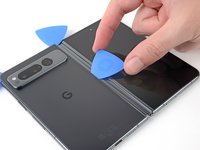
Insert a second opening pick at the bottom left corner.
-
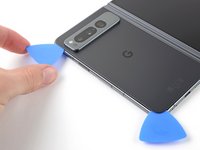
Slide the opening pick toward the top left corner to separate the adhesive.
-
Leave the opening pick in the top left corner before continuing.
-
-
-
Apply a heated iOpener to the top edge of the back glass for two minutes.
-
-
-
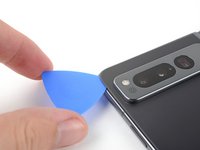
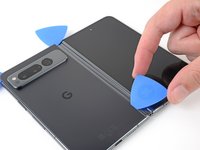
Rotate the opening pick around the top left corner to separate the adhesive.
-
-
-
-
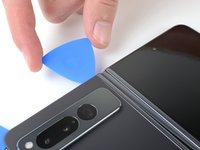
Insert a third opening pick in the top left corner.
-
Slide the opening pick toward the top right corner to separate the adhesive.
-
-
-
Apply a heated iOpener to the right edge of the back glass for two minutes.
-
-
-
Angle your pick so it's as flat as possible to the back glass.
-
Rotate the opening pick around the top right corner to separate the adhesive.
-
-
-
Insert a fourth opening pick in the top right corner.
-
Slide the opening pick toward the bottom right corner to separate the adhesive.
-
-
-
Angle your pick so it's as flat as possible to the back glass.
-
Rotate the opening pick around the bottom right corner to separate the adhesive.
-
-
-
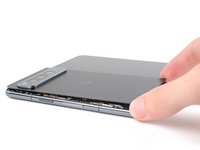
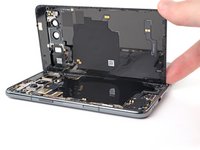
Swing the left edge of the back glass up and over the right edge of the phone.
-
Lay the back glass to the right side of the phone before continuing.
-
-
Outil utilisé dans cette étape :FixMat$36.95
-
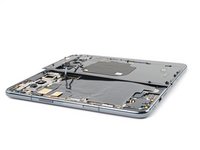
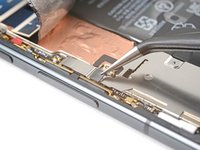
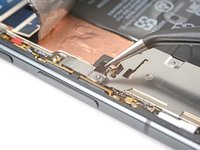
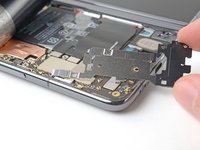
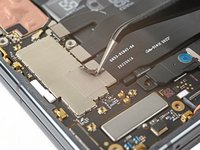
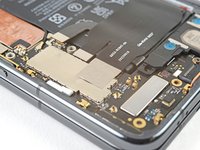
Use a Torx Plus 3IP driver to remove the two 2.8 mm‑long screws securing the middle bracket.
-
-
Outil utilisé dans cette étape :Tweezers$4.99
-
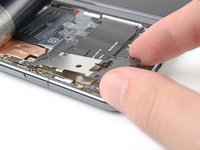
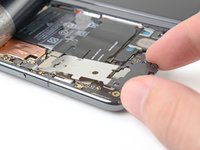
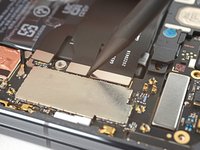
Use tweezers, or your fingers, to pull the middle bracket toward the left edge of the phone and release its clip.
-
Remove the middle bracket.
-
-
-
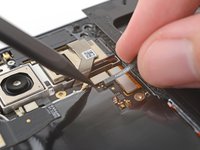
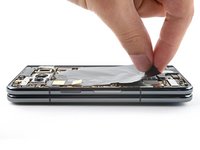
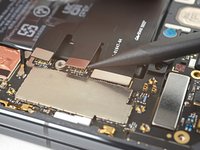
Use the point of a spudger to pry up and disconnect the back glass cable from the motherboard.
-
-
Outil utilisé dans cette étape :Tesa 61395 Tape$8.95
-
If you're reusing your back glass, use tweezers to remove big chunks of adhesive from the perimeter of the back glass.
-
Repeat for any adhesive on the frame.
-
Use isopropyl alcohol (>90%) and a lint-free cloth to remove any remaining adhesive residue.
-
Follow this guide to replace the back glass adhesive with custom cut strips.
-
-
Outil utilisé dans cette étape :Tesa 61395 Tape$8.95
-
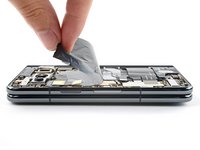
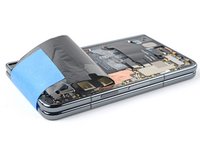
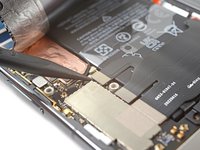
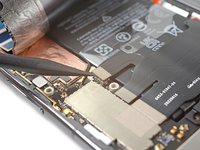
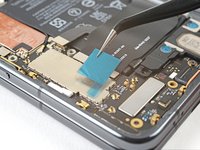
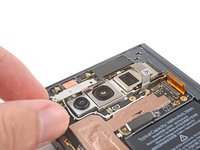
Peel the bottom of the graphite sheet toward the top of the phone until you can access the bottom bracket.
-
Use your hands, or tape with light adhesive, to keep the graphite sheet out of the way.
-
If you completely removed your graphite sheet, follow this guide to replace it.
-
If you don't have custom cut adhesive strips for the antenna, use double-sided tape, like Tesa Tape, to secure the graphite sheet to the logic board.
-
-
Outil utilisé dans cette étape :Tweezers$4.99
-
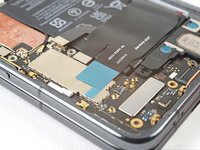
Use tweezers, or a clean fingernail, to pull the black screw cover off the top screw on the bottom bracket.
-
-
-
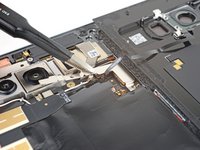
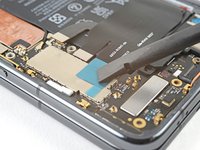
Use a Torx Plus 3IP driver to remove the five 3.1 mm‑long screws securing the bottom bracket.
-
-
-
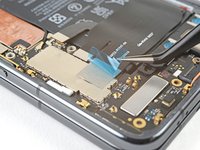
Use tweezers, or your fingers, to pull the bottom bracket toward the bottom edge of the phone and release its clip.
-
Remove the bottom bracket.
-
-
-
Use the point of a spudger to pry up and disconnect the base battery cable press connector.
-
-
-
Use a point of a spudger to pry up and disconnect the flip battery and bottom interconnect press connectors.
-
-
-
Peel off the new conductive tape from its liner and apply the sticky side to the bottom interconnect connector, making sure to bridge the logic board.
-
-
-
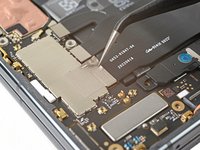
Use a Torx Plus 3IP screwdriver to remove the two 2.8 mm‑long screws securing the top bracket.
-
-
-
Pull the top bracket toward the left edge of the phone to release its clips.
-
Remove the top bracket.
-


To reassemble your device, follow these instructions in reverse order.

