Aller au contenu principal
Pour réparer ensemble - Je crée un compte

VTech Little Apps Tablet LED Replacement

Ce dont vous avez besoin

  1. VTech Little Apps Tablet LED Replacement, Battery: étape 1, image 1 de 1
    • Remove the 9.9 mm screw covering the batteries with a PH1 driver head.

    Demander à FixBot
  2. VTech Little Apps Tablet LED Replacement: étape 2, image 1 de 1
    • Use a plastic opening tool to pry the batteries out of their holding.

    • If replacing your batteries with new ones, be careful to insert them as indicated on the device.

    Demander à FixBot
  3. VTech Little Apps Tablet LED Replacement, Back Cover: étape 3, image 1 de 2 VTech Little Apps Tablet LED Replacement, Back Cover: étape 3, image 2 de 2
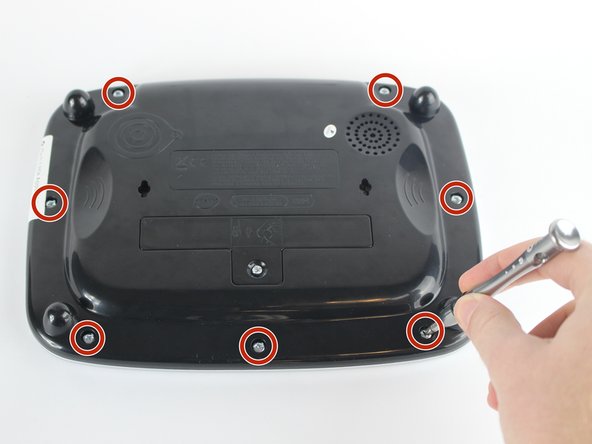
    • Position the VTech Little Apps Tablet face-down on a flat surface so that you can clearly see the back of the device.

    • Remove all seven 9.6 mm screws located around the perimeter of the back cover with a PH1 driver head.

    Demander à FixBot
  4. VTech Little Apps Tablet LED Replacement: étape 4, image 1 de 2 VTech Little Apps Tablet LED Replacement: étape 4, image 2 de 2
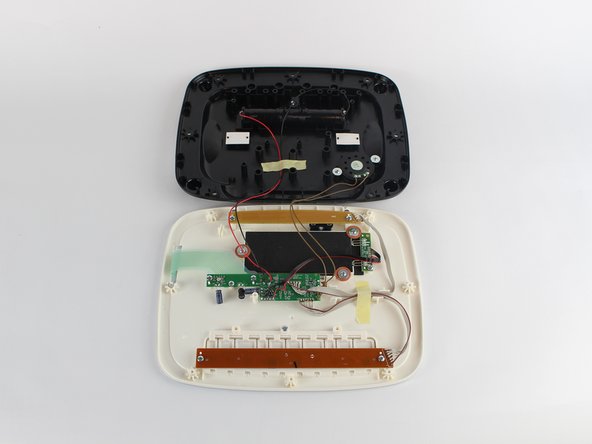
    • Gently remove the back cover then flip it 180 degrees so that the back cover of the device is now face-down.

    • Proceed with caution as there are wires attaching the back cover to the front cover of the device that could be easily detached.

    Demander à FixBot
  5. VTech Little Apps Tablet LED Replacement, LED: étape 5, image 1 de 1
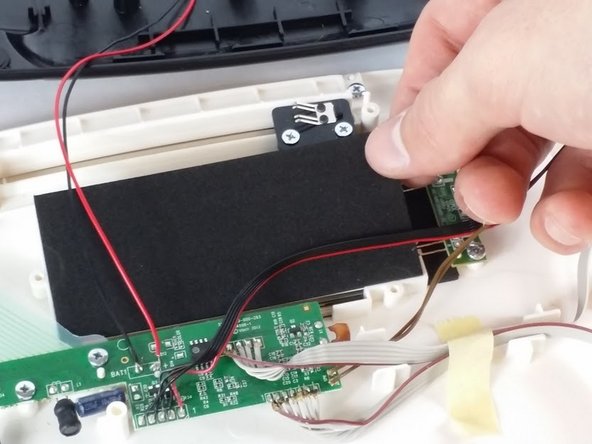
    • Unscrew the two 7.3 mm screws using a PH0 driver head.

    • Gently lift the beige circuit board and set aside.

    • Be sure to not damage the wires connecting the circuit board to the motherboard, you are only creating space to work in.

    Demander à FixBot
  6. VTech Little Apps Tablet LED Replacement: étape 6, image 1 de 2 VTech Little Apps Tablet LED Replacement: étape 6, image 2 de 2
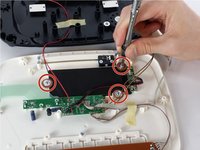
    • Unscrew three 7.3 mm panhead screws with the PH0 driver.

    • Remove the red-brown washer after removing the screws.

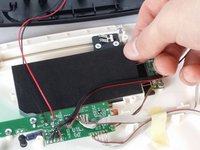
    • Remove the black foam insert and set aside.

    Demander à FixBot
  7. VTech Little Apps Tablet LED Replacement: étape 7, image 1 de 1
    • Unscrew the 7.3 mm screw fastening the LED circuit board to the device shell with a PH0 driver head.

    • Be careful when rescrewing circuit boards. Too much pressure or too tight of screws could damage them.

    Demander à FixBot
  8. VTech Little Apps Tablet LED Replacement: étape 8, image 1 de 2 VTech Little Apps Tablet LED Replacement: étape 8, image 2 de 2
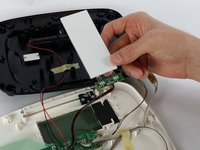
    • Gently lift both LED circuit board and the white glass light refractor panel away from the device.

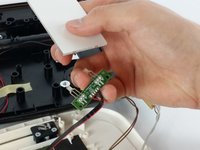
    • Separate the LED circuit board and light refractor panel by gently pulling apart. Place the light panel to the side.

    • Skip the next step if you are proceeding with this guide as a part of the Screen Replacement.

    Demander à FixBot
  9. VTech Little Apps Tablet LED Replacement: étape 9, image 1 de 1
    • Carefully desolder the LED leads (labeled "R", "+" and "B" on the circuit board) to disconnect the LED from the circuit board.

    • Replace the LED and solder the new connection to the LED circuit board.

    • Refer to the iFixit Soldering Guide for assistance.

    Demander à FixBot
Conclusion

To reassemble your device, follow these instructions in reverse order.

Une autre personne a terminé cette réparation.

Dakota Wiersma

Membre depuis le 02/10/16

241 Réputation

2 tutoriels rédigés

Équipe

USF Tampa, Team 2-6, Sullivan Spring 2016 Membre de l'équipe USF Tampa, Team 2-6, Sullivan Spring 2016

USFT-SULLIVAN-S16S2G6

3 membres

12 tutoriels rédigés

0 commentaires de tutoriel

Ajouter un commentaire

Nombre de vues :

Dernières 24 heures : 0

7 derniers jours : 6

30 derniers jours : 61

Total : 850