Introduction
Follow this guide to replace the fan on your Xbox One X model 1787. You may need to do this if the fan has stopped working.
Turn off your console and disconnect any cables before starting this guide. Follow general electrostatic discharge (ESD) safety procedures while repairing the console.
Ce dont vous avez besoin
Vidéo d'introduction
-
Outil utilisé dans cette étape :Tweezers$4.99
-
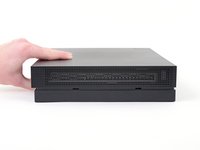
Use blunt tweezers to peel off the sticker covering the right-side screw on the back of the console.
-
-
-
Use a T10 Torx screwdriver to remove the two 12.6 mm–long screws located on the back of the console.
-
-
-
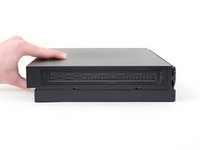
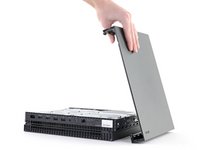
Rotate the console 90 degrees.
-
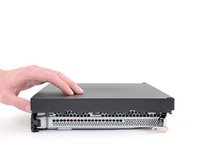
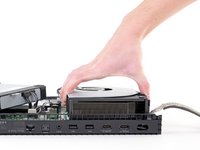
Pull the front of the upper plastic case horizontally toward the front of the console until it comes to a stop. This slides the clips out of the slots on the upper plastic case.
-
-
-
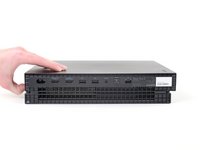
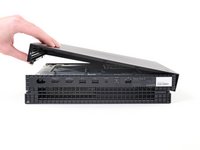
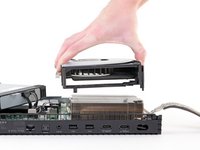
Rotate the console 90 degrees so that the back is facing you.
-
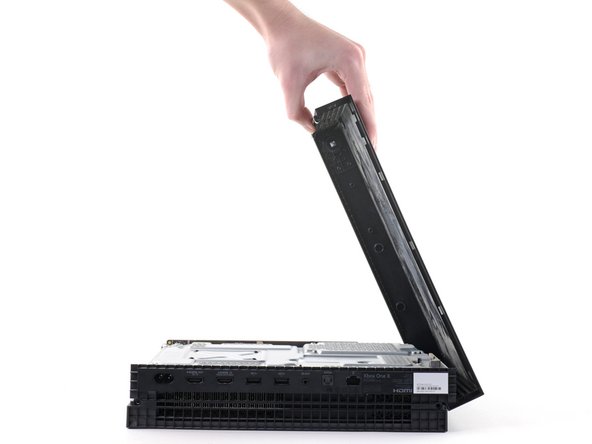
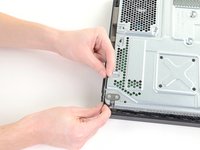
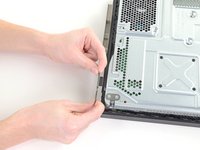
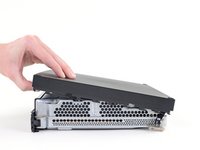
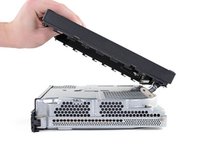
Lift up the left side of the upper plastic case (as viewed from the back of the console), stopping when it won’t lift any further.
-
-
-
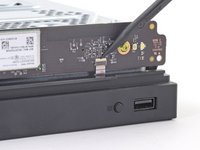
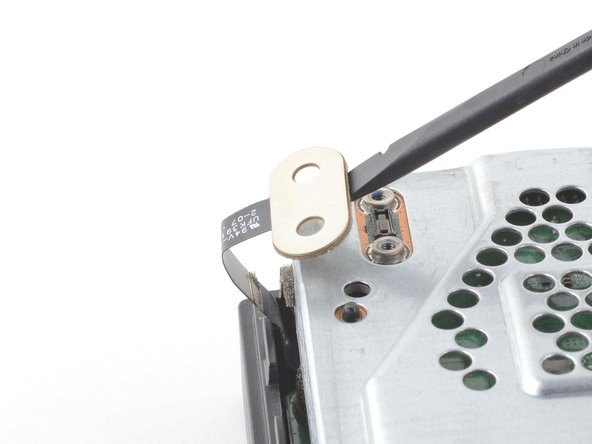
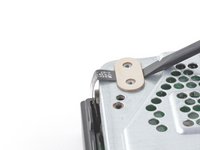
Use the pointed end of a spudger, an opening tool, or your fingernail to flip down the small, hinged locking flap on the ribbon cable ZIF connector on the front circuit board.
-
-
Outil utilisé dans cette étape :Tweezers$4.99
-
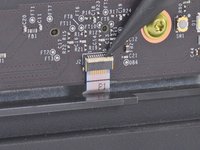
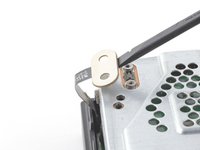
Use blunt tweezers to pull the ribbon cable down out of the connector.
What happens if I broke the connector to the ribbon cable ?
If you broke the cable, then one Wifi module would be broken.
Why we dont remove at first the 3 screws and lift the board a little bit, before removing the cable completely?
-
-
-
-
Use a T8 Torx screwdriver to remove the three 13.3 mm screws securing the front circuit board to the upper metal case.
How crucial and important is this step? I ovwrlooked it when doing this. Will this mess it all up?
-
-
-
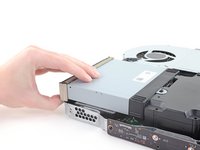
Pull the front circuit board straight out away from the upper metal case and set it aside.
During the reassembly process, I highly recommend that you reattach and lock the ribbon cable (steps 7 and 8) before you attach the circuit board. There is plenty of ribbon to work with, and once the circuit board is attached it is nearly impossible to get the ribbon flat and aligned and pushed up into the guide. Obviously be careful you don’t yank the ribbon as you maneuver the circuit board into place, but who’s not being careful while they are doing this?
-
-
-
Use a T10 Torx screwdriver to remove the six 47.7 mm screws securing the upper metal case to the lower plastic case.
-
Use a T8 Torx screwdriver to remove the two 7.5 mm screws securing the press connector to the upper metal case.
Must remove power supply screws as well
Hi, this step only includes the screws needed to remove the lower metal case. Guides that require removing the power supply screws will have a step later on with instructions on which screws to remove.
Why we dont't remove the hard drive screws in this step, please?
-
-
-
Insert the flat end of a spudger underneath the press connector on the side opposite of the ribbon cable.
-
Use the spudger to lift the press connector up and away from the upper metal case.
I need to know what it calls and I will purchase the one like press connector on the upper metal case.
-
-
-
Flip the console over.
-
Lift the lower plastic case up from the metal case and set it aside.
I had a hard time getting the bottom case back on by trying to slide it over the console. It was easier for me to place the case on the table and guide the hardware into it. There are four holes just above the disc drive that are tricky to line up if you try to slip the case back on.
-
-
-
Remove the two T10 Torx screws securing the lower metal case:
-
One 7.7 mm screw
-
One 11.4 mm screw
bei mir waren beide Schrauben identisch konnte sie auch komplett versenken
Evtl. fand vor mir schon ein Austausch statt
English translation:
In my case both screws were identical and I could also countersink them completely. An exchange may have already taken place before me -
-
-
Lift the lower metal case up off the upper metal case and internal components.
-
Set the lower metal case aside.
-
-
-
Flip the console over.
-
Use a T10 Torx screwdriver to remove the following screws securing the power supply and fan to the upper metal case:
-
Two 11.4 mm screws
-
Two 11.4 mm screws
-
One 11.4 mm screw
Die zwei orangen Schrauben müssen aus meiner Sicht nicht unbedingt gelöst werden. Hatte Probleme die zweite wieder reinzudrehen da sich der Anschluss verschoben hatte.
Habe Ihn daher vor Rücksetzung des Schritt 22 wieder angeschraubt. Ich konnte alle Schritte zum Rückbau Problemlos ausführen. Empfehle diesen Weg
Somewhat superfluous - all 5 screws are identical.
-
-
-
Flip the console over.
-
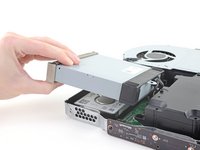
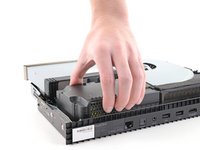
Lift the disc drive up so that its metal tab is unhooked from the power supply.
-
Place the disc drive on the upper metal case so that it sits over the hard drive. You'll need enough space to unplug the power supply from the motherboard.
-
-
-
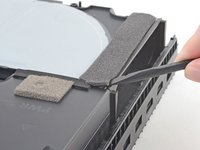
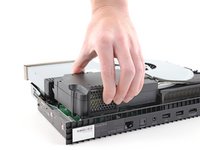
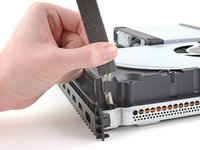
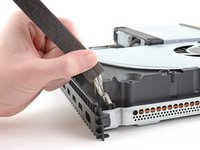
Insert the flat end of the spudger underneath the dark grey foam tape starting at the corner closest to the power supply and edge of the console.
-
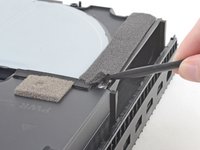
Lift up the corner.
-
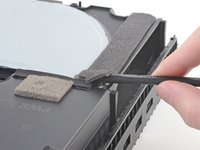
Slowly push the spudger through to the other side of the tape until you can see the flat end emerge.
-
-
-
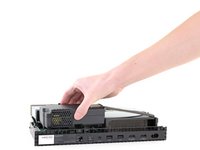
Lift the power supply directly upward to unplug it from the motherboard.
-
-
-
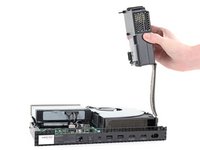
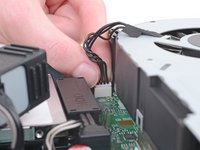
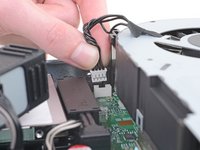
Unplug the bundled cable connector connecting the fan to the motherboard by pulling directly upward.
-


To reassemble your device, follow these instructions in reverse order.
Take your e-waste to an R2 or e-Stewards certified recycler.
Repair didn’t go as planned? Try some basic troubleshooting, or ask our Xbox One X Answers community for help.
To reassemble your device, follow these instructions in reverse order.
Take your e-waste to an R2 or e-Stewards certified recycler.
Repair didn’t go as planned? Try some basic troubleshooting, or ask our Xbox One X Answers community for help.
Annulation : je n'ai pas terminé ce tutoriel.
18 autres ont terminé cette réparation.

2 commentaires
Nice....danke....meine sah vom Rauchen aus wie Sau....Topp Erklärung....daaaanke
befürchte bei meiner series X wird's genau so sein.....😝