Aller au contenu principal
Pour réparer ensemble - Je crée un compte

iHome iAVS16 LCD (Display) Replacement

Ce dont vous avez besoin

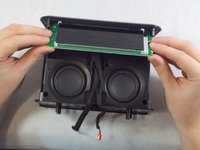
    1. iHome iAVS16 LCD (Display) Replacement, Power Board: étape 1, image 1 de 3 iHome iAVS16 LCD (Display) Replacement, Power Board: étape 1, image 2 de 3 iHome iAVS16 LCD (Display) Replacement, Power Board: étape 1, image 3 de 3
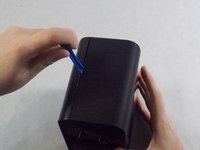
      • Remove the four 1.7 mm Phillips #0 screws located on the bottom of the device.

      • Lift up the bottom of the device.

      • Carefully lift the bottom of the device up as to not damage the ribbon cable connecting it.

      Demander à FixBot

      Ajouter un commentaire

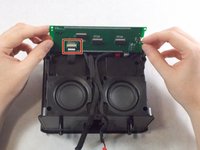
    2. iHome iAVS16 LCD (Display) Replacement: étape 2, image 1 de 3 iHome iAVS16 LCD (Display) Replacement: étape 2, image 2 de 3 iHome iAVS16 LCD (Display) Replacement: étape 2, image 3 de 3
      • Remove the two 1.7 mm Phillips #0 screws holding the white face place onto the inside of the device's bottom.

      • Using an iFixit opening tool on the side without the black adhesive, carefully lift up the white face plate.

      • Lifting too quickly could damage the ribbon cable still attached.

      Demander à FixBot

      Ajouter un commentaire

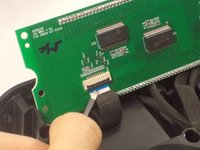
    3. iHome iAVS16 LCD (Display) Replacement: étape 3, image 1 de 2 iHome iAVS16 LCD (Display) Replacement: étape 3, image 2 de 2
      Outil utilisé dans cette étape :
      Tweezers
      $4.99
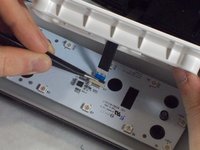
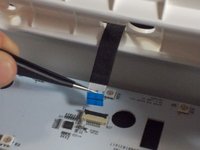
      • Using the tweezers, lift up on the black tab holding the ribbon cable down.

      • Carefully pull the ribbon cable back and out of the slot.

      Demander à FixBot

      Ajouter un commentaire

    4. iHome iAVS16 LCD (Display) Replacement: étape 4, image 1 de 3 iHome iAVS16 LCD (Display) Replacement: étape 4, image 2 de 3 iHome iAVS16 LCD (Display) Replacement: étape 4, image 3 de 3
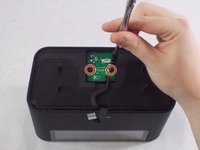
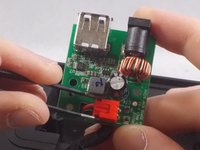
      • Remove the two 1.7 mm Phillips #0 screws holding the power board in.

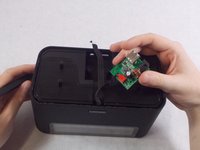
      • Carefully flip the board over.

      • Remove the red connector from its socket with a pair of tweezers.

      Demander à FixBot

      Ajouter un commentaire

    1. iHome iAVS16 LCD (Display) Replacement, LCD (Display): étape 5, image 1 de 3 iHome iAVS16 LCD (Display) Replacement, LCD (Display): étape 5, image 2 de 3 iHome iAVS16 LCD (Display) Replacement, LCD (Display): étape 5, image 3 de 3
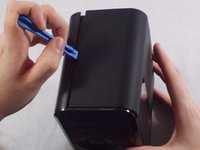
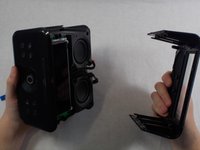
      • Insert an iFixit opening tool into the lining on the front casing and pry it apart. Do this for both sides.

      • Further remove the front casing off from the device manually with your hands.

      Demander à FixBot

      Ajouter un commentaire

    2. iHome iAVS16 LCD (Display) Replacement: étape 6, image 1 de 1
      • Remove the four 1.7 mm Phillips #0 screws holding the LCD onto the front of the device.

      Demander à FixBot

      Ajouter un commentaire

    3. iHome iAVS16 LCD (Display) Replacement: étape 7, image 1 de 3 iHome iAVS16 LCD (Display) Replacement: étape 7, image 2 de 3 iHome iAVS16 LCD (Display) Replacement: étape 7, image 3 de 3
      • Carefully flip the LCD display over to expose the ribbon cable connecting it.

      • Lift the black tab holding the cable down, and carefully put it out of the socket.

      Demander à FixBot

      Ajouter un commentaire

Conclusion

To reassemble your device, follow these instructions in reverse order.

Annulation : je n'ai pas terminé ce tutoriel.

Marco Sousa

Membre depuis le 10/25/19

293 Réputation

2 tutoriels rédigés

Équipe

UMass Dartmouth, Team S1-G7, O'Connell Fall 2019 Membre de l'équipe UMass Dartmouth, Team S1-G7, O'Connell Fall 2019

UMASSD-O'CONNELL-F19S1G7

4 membres

15 tutoriels rédigés

0 commentaires de tutoriel

Ajouter un commentaire

Nombre de vues :

Dernières 24 heures : 1

7 derniers jours : 3

30 derniers jours : 15

Total : 439