Ce tutoriel a des changements plus récents. Passer à la dernière version non vérifiée.
Introduction
Suivez ce tutoriel pour remplacer votre carte AirPort/Bluetooth/
Ce dont vous avez besoin
-
-
Si vous utilisez la cale de maintien en carton iFixit, vous pouvez utiliser ces instructions de montage pour l'assembler.
-
-
-
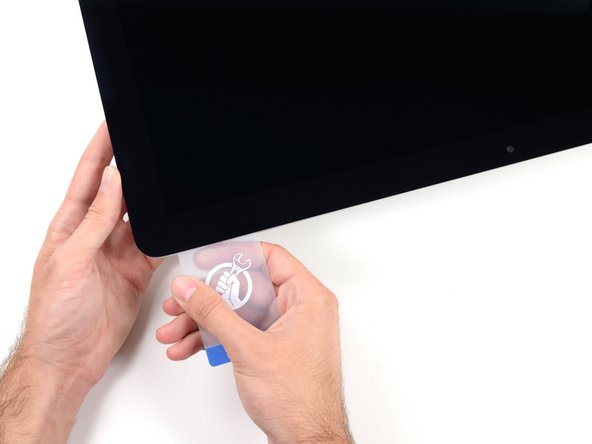
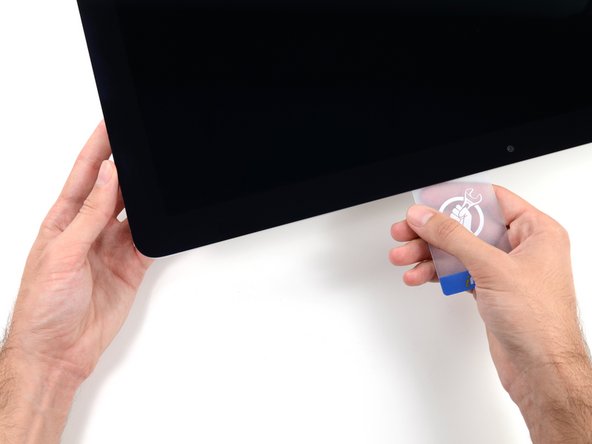
En partant de l'angle supérieur droit de l'iMac, insérez une carte en plastique entre l'écran et le cadre.
-
-
-
-
Attrapez la petite languette au bout de l'une des bandes adhésives du bord inférieur de l'écran, et tirez la bande vers le haut de l'iMac pour l'enlever.
-
Répétez cette étape pour l'autre bande adhésive et enlevez-la.
-
Si l'une des bandes adhésives casse avant d'être enlevée, utilisez une carte en plastique pour couper l'adhésif restant.
-
-
-
Soulevez l'écran pour le séparer du cadre et sortez-le de l'iMac.
-
Vous devrez peut-être soulever lentement l'écran d'un côté pour le décoller complètement.
-
Au moment de remonter l'écran, consultez ce tutoriel pour installer les nouvelles bandes adhésives.
-
-
-
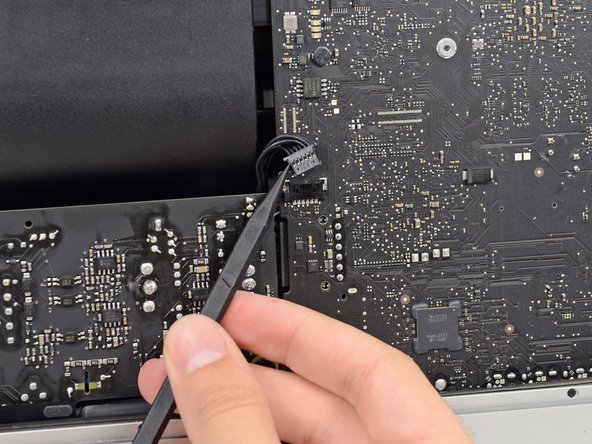
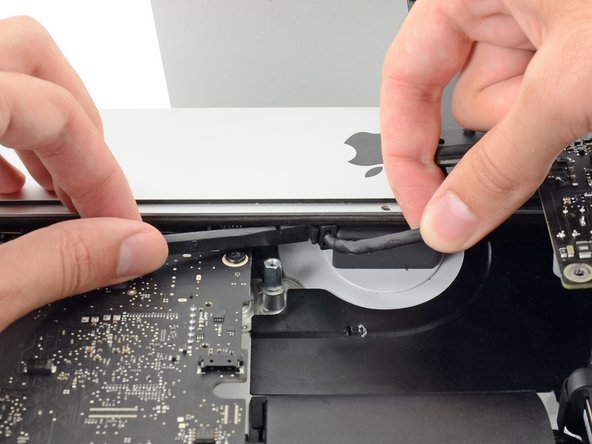
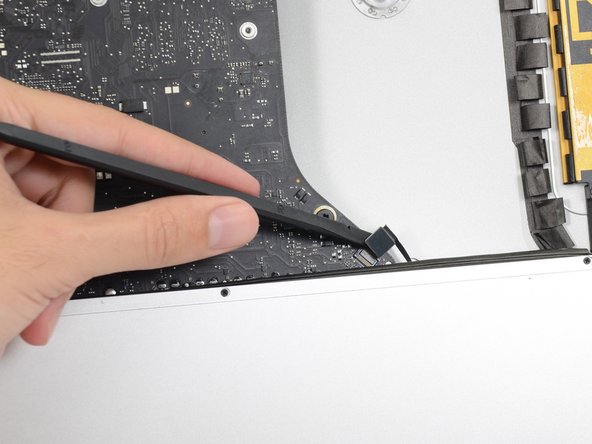
À l'aide d'une spatule, détachez le connecteur du câble du haut-parleur droit de sa prise sur la carte mère.
-
Tirez le connecteur vers le bas pour le débrancher de sa prise.
-
-
-
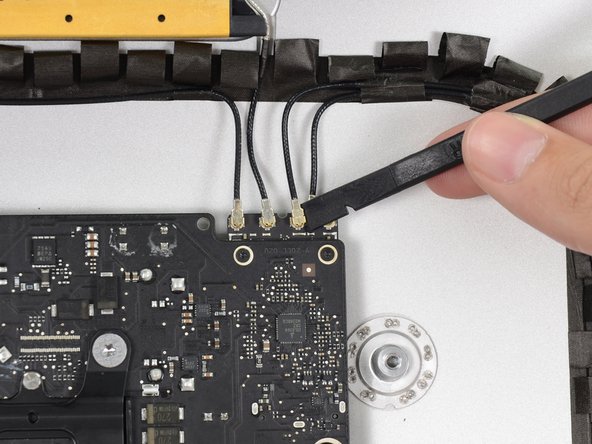
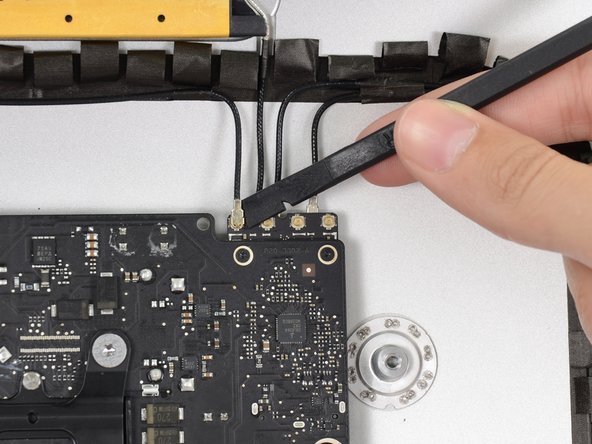
Insérez la pointe d'une spatule entre le haut-parleur droit et le câble d'antenne qui est encastré sur le côté droit du haut-parleur.
-
Déplacez la spatule vers le bas le long du côté droit du haut-parleur, afin de dégager le câble d'antenne de la rainure sur la droite du haut-parleur.
-
-
-
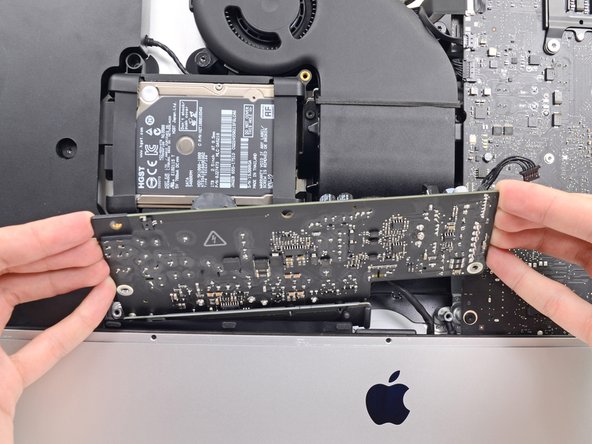
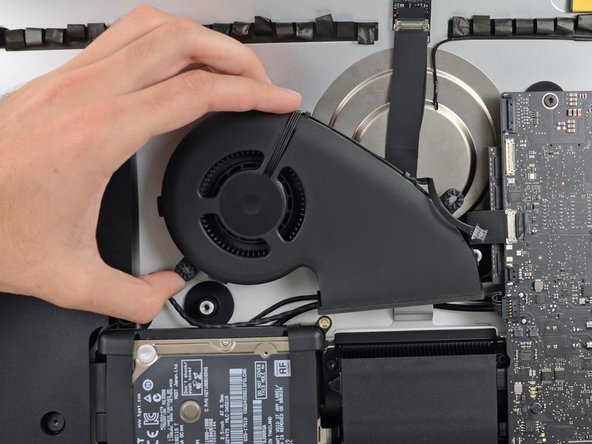
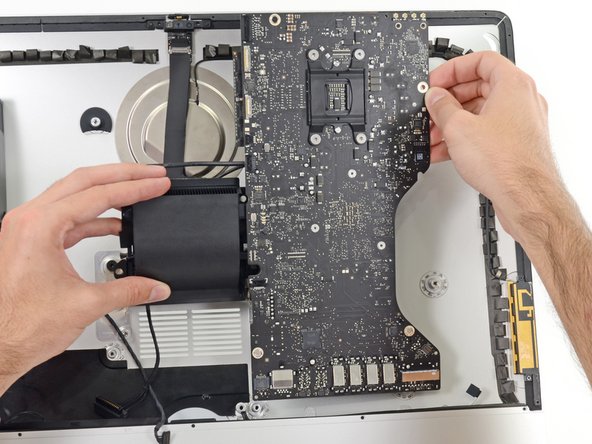
Retirez les vis suivantes par lesquelles le support du disque dur est fixé au boîtier arrière :
-
Deux vis Torx T10 21 mm du support gauche du disque dur.
-
Une vis Torx T10 9 mm.
-
Une vis Torx T10 27 mm.
-
-
-
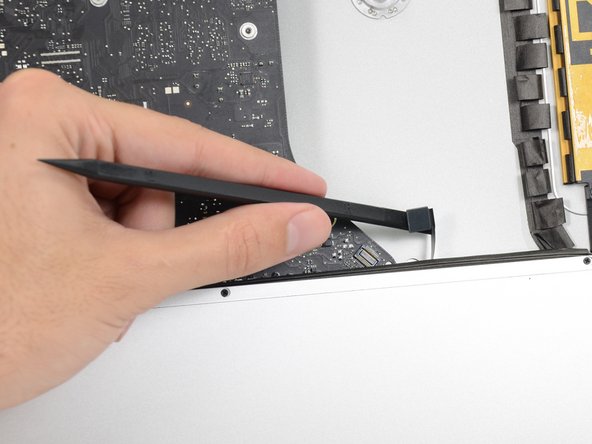
À l'aide de la pointe d'une spatule, poussez doucement chaque côté du connecteur du câble du bouton de marche, pour débrancher le connecteur de sa prise.
-
-
-
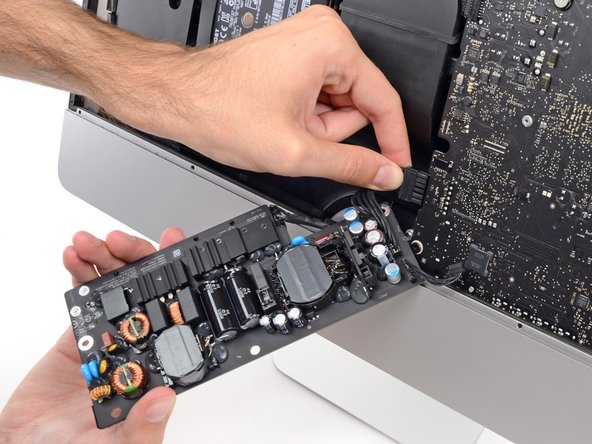
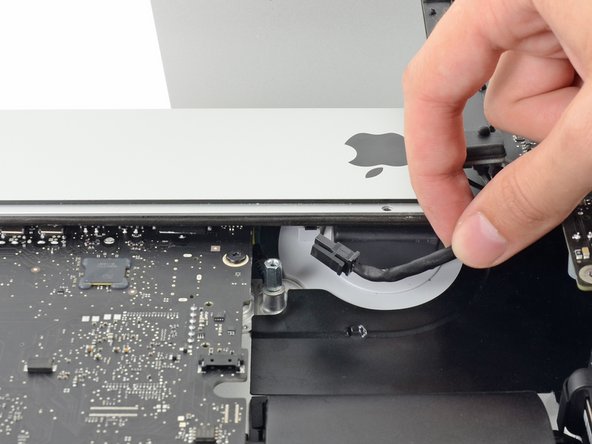
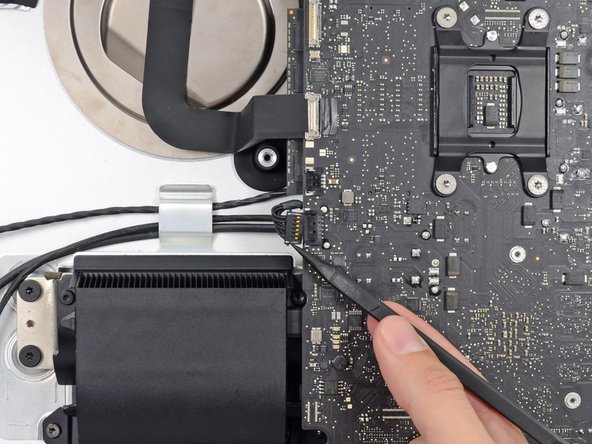
Tirez doucement sur le connecteur du câble du ventilateur pour le débrancher de sa prise sur la carte mère.
-
-
-
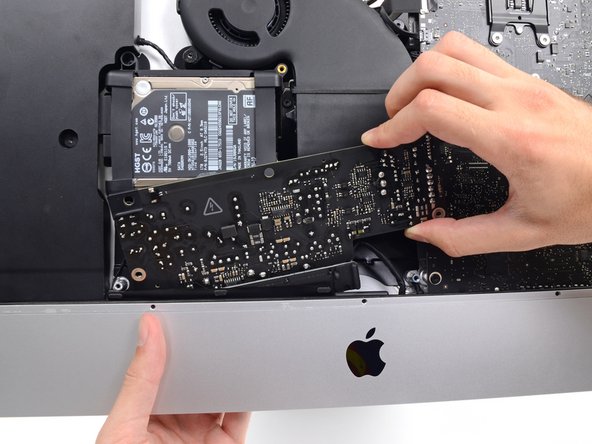
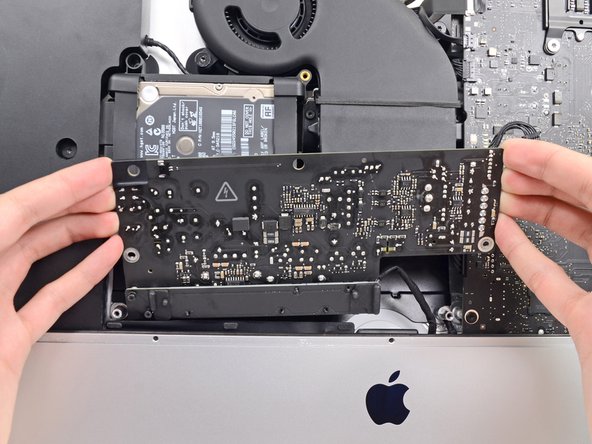
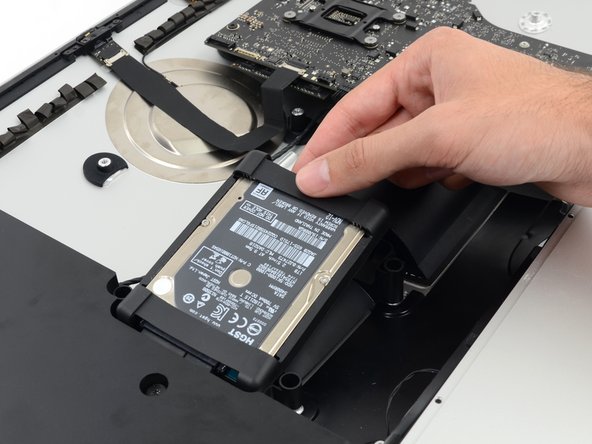
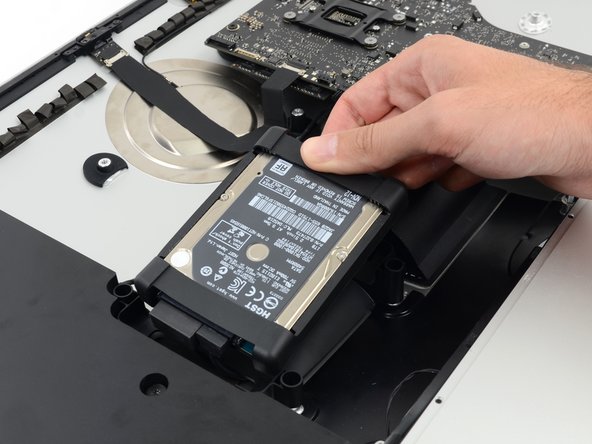
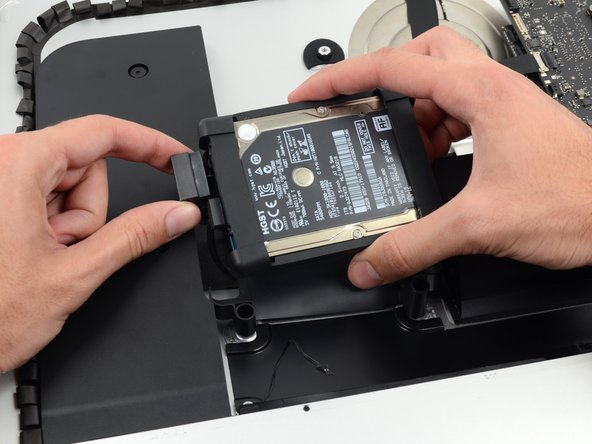
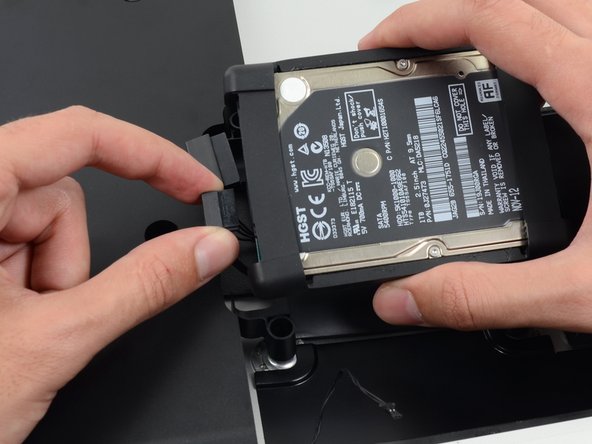
Soulevez le disque dur par le bord le plus proche de la carte mère et sortez-le doucement de son emplacement.
-
-
-
Retirez la vis Torx T10 7,2 mm par laquelle le plateau du disque dur est fixé au boîtier arrière.
-
-
-
À l'aide de la pointe d'une spatule, poussez doucement chaque côté du connecteur du câble du haut-parleur gauche, pour débrancher le connecteur de sa prise.
-
-
-
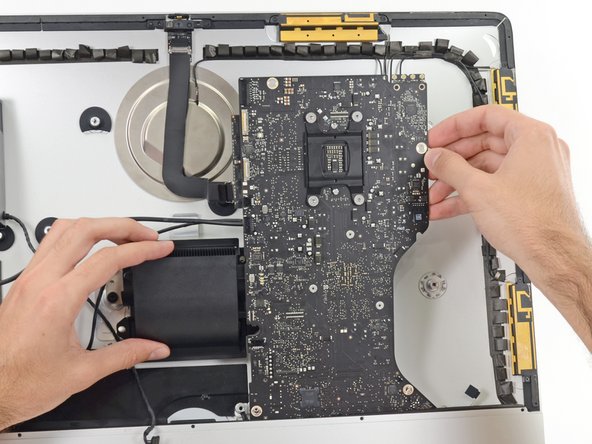
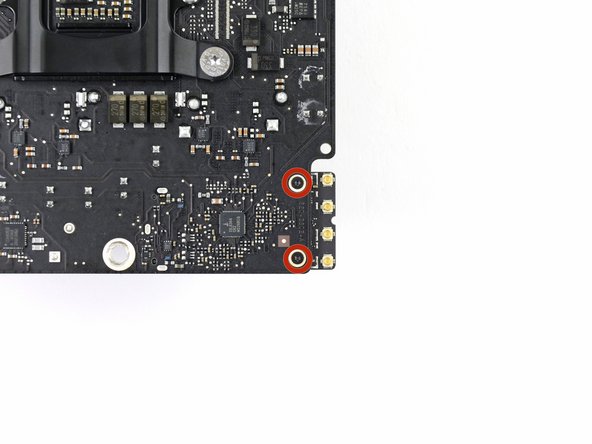
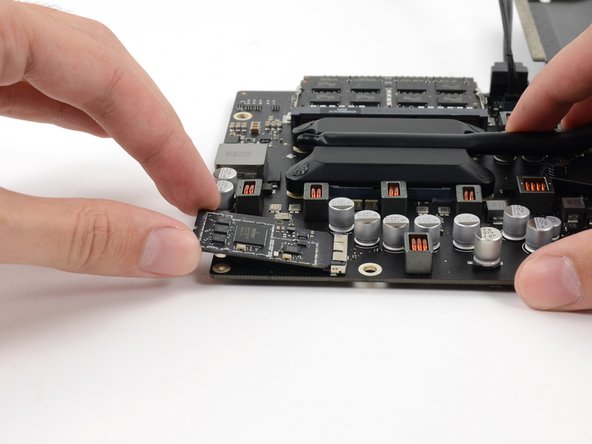
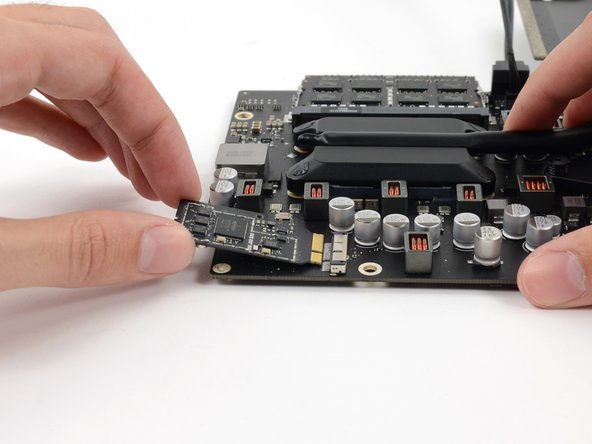
Retirez les deux vis T5 de 3,2 mm qui fixent la carte AirPort/Bluetooth à la carte mère.
-


Pour remonter votre appareil, suivez ces instructions en sens inverse et utilisez notre tutoriel bandes adhésives pour attacher la vitre d'écran
Pour remonter votre appareil, suivez ces instructions en sens inverse et utilisez notre tutoriel bandes adhésives pour attacher la vitre d'écran
Annulation : je n'ai pas terminé ce tutoriel.
5 autres ont terminé cette réparation.
Merci à ces traducteurs :
100%

Annika Faelker nous aide à réparer le monde ! Vous voulez contribuer ?
Commencez à traduire ›


3 commentaires
I successfully upgraded the Wi-Fi Bluetooth card in my late 2012 iMac to 802.11ac following this guide! The new card is now the same as what´s in the new 2013 iMacs, I used the 2013 iMac teardown to find the right part:)
I just bought a new BT card (a >2013 version!) and it works!!!! Just some advise before you start: follow the instructions above including step 28. At this point unscrew the big sized mainboard screws. This allows some movement so you can pull back the motherboard if needed and will avoid straining it to much. you can nog pull out the Bluetooth card without dismantling the whole computer! Putting the new card back also works fine this way. This Saves you massive time!