Introduction
Note: this is a complete guide for replacing a plain front panel. If you have a Front Panel Assembly replacement part, stop before removing the home button from your old front panel, and reverse the steps to install your new front panel assembly.
Parts of this guide were shot with a Wi-Fi model and as such the internals may look slightly different from the cellular model. The procedure is the same for both models except where noted.
Ce dont vous avez besoin
-
-
Place the iOpener in the center of the microwave.
 Demander à FixBot
-
-
-
Heat the iOpener for thirty seconds.
-
Throughout the repair procedure, as the iOpener cools, reheat it in the microwave for an additional thirty seconds at a time.
-
-
-
Remove the iOpener from the microwave, holding it by one of the two flat ends to avoid the hot center.
-
-
-
Fill a pot or pan with enough water to fully submerge an iOpener.
-
Heat the water to a boil. Turn off the heat.
-
Place an iOpener into the hot water for 2-3 minutes. Make sure the iOpener is fully submerged in the water.
-
Use tongs to extract the heated iOpener from the hot water.
-
Thoroughly dry the iOpener with a towel.
-
Your iOpener is ready for use! If you need to reheat the iOpener, heat the water to a boil, turn off the heat, and place the iOpener in the water for 2-3 minutes.
-
-
-
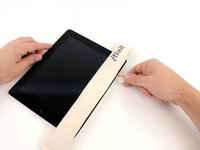
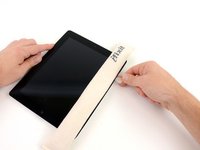
If your display glass is cracked, keep further breakage contained and prevent bodily harm during your repair by taping the glass.
-
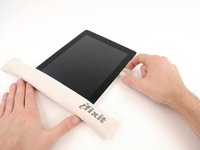
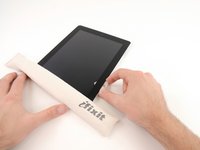
Lay overlapping strips of clear packing tape over the iPad's display until the whole face is covered.
-
Do your best to follow the rest of the guide as described. However, once the glass is broken, it will likely continue to crack as you work, and you may need to use a metal prying tool to scoop the glass out.
-
-
-
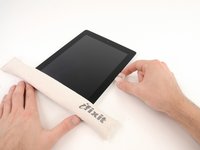
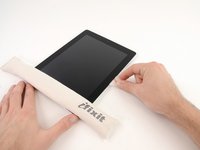
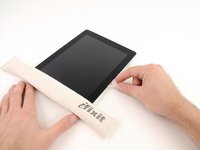
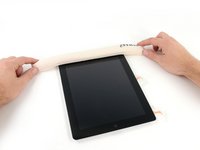
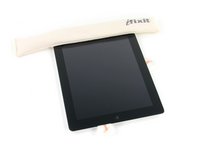
Lay the iOpener flat on the right edge of the iPad, smoothing it out so that there is good contact between the surface of the iPad and the iOpener.
-
Let the bag sit on the iPad for approximately 90 seconds before attempting to open the front panel.
-
-
-
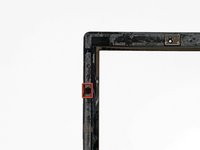
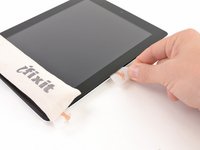
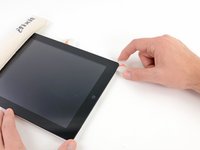
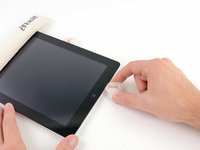
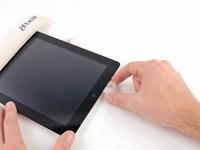
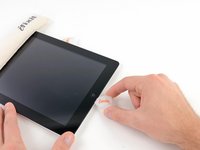
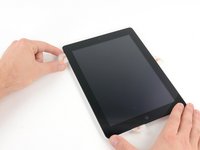
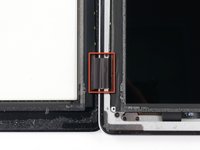
There is a small gap in the iPad's adhesive ring in the upper right corner of the iPad, approximately 2.0 inches (~5 cm) from the top of the iPad. You are going to exploit this weakness.
-
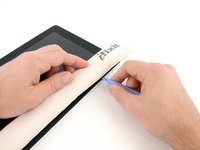
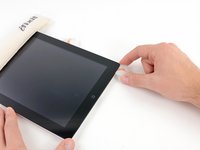
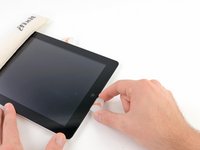
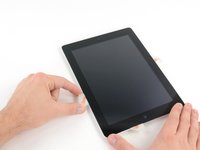
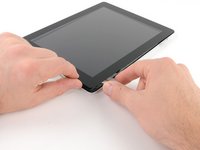
Align the tool with the mute button. Insert the tip of a plastic opening tool into the gap between the front glass and the plastic bezel. Just insert the very tip of the opening tool, just enough to widen the crack.
-
-
-
Make sure you place the tool in the proper spot—between the plastic display bezel and the front panel glass.
-
-
-
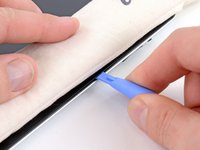
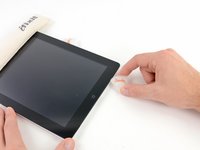
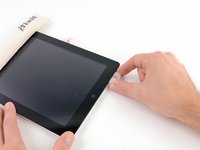
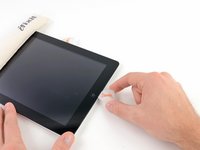
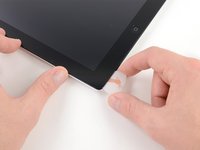
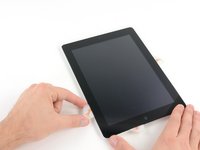
Keeping the tip of the plastic opening tool wedged between the front glass and plastic bezel, slide a plastic opening pick in the gap, right next to the plastic opening tool.
-
-
-
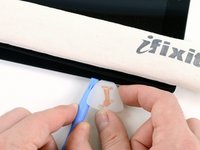
Remove the plastic opening tool from the iPad, and push the opening pick further underneath the front glass to a depth of ~0.5 inches.
-
-
-
While you work on releasing the adhesive on the right side of the iPad, reheat the iOpener, and replace it on the bottom edge of the iPad.
-
-
-
While the bottom edge is being heated by the iOpener, begin releasing the adhesive from the right edge of the iPad.
-
Slide the opening pick down along the edge of the iPad, releasing the adhesive as you go.
-
-
-
If the opening pick gets stuck in the adhesive, "roll" the pick along the side of the iPad, continuing to release the adhesive.
-
-
-
Before removing the first opening pick from the bottom corner of the iPad, insert a second pick under the right edge of the front glass to keep the adhesive from re-adhering.
-
Re-heat the iOpener, and move it to the top edge of the iPad.
-
-
-
-
You will have to release the adhesive securing the antenna to the front panel without damaging the delicate parts attaching the antenna to the bottom of the iPad. Follow the next steps carefully.
-
-
-
Slide the opening pick around the bottom right corner of the iPad, releasing the adhesive there.
-
-
-
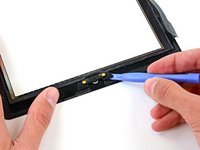
Slide the tip of the opening pick along the bottom edge of the iPad, releasing the adhesive over the Wi-Fi antenna.
-
-
-
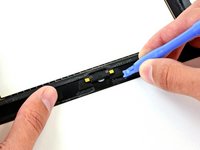
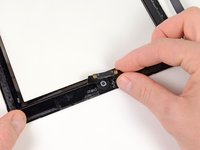
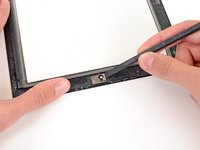
Once you have moved past the Wi-FI antenna (approximately 3" (75 mm) from the right edge, or right next to the home button) re-insert the opening pick to its full depth.
-
Slide the pick to the right, releasing the adhesive securing the Wi-Fi antenna to the front glass.
-
The antenna is attached to the bottom of the iPad via screws and a cable. This step detaches the antenna from the front panel, ensuring that when you remove the panel, the antenna will not be damaged.
-
-
-
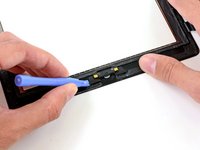
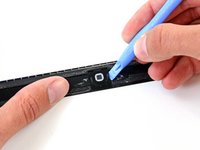
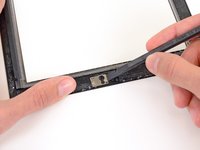
Continue releasing the adhesive along the bottom of the iPad, pulling the opening pick out far enough to go around the home button, and re-inserting it to a depth of 1/2 inch (10 mm) once the pick is past the home button.
-
-
-
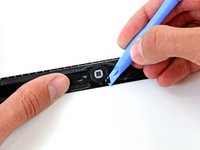
Continue releasing the adhesive all the way along the bottom edge of the iPad.
-
Leave the opening pick wedged underneath the front glass near the home button.
-
-
-
Reheat the iOpener in the microwave and set it on the left edge of the iPad to start warming the adhesive in that section.
-
-
-
Slide the opening pick along the top edge of the iPad, pulling it out slightly to go around the front-facing camera bracket.
-
The adhesive along this section is very thick, and a fair amount of force may be required. Work carefully and slowly, making sure to not slip and damage yourself or your iPad.
-
-
-
Continue releasing the adhesive along the top edge of the iPad, and slide the opening pick around the top left corner.
-
-
-
Slide the opening pick along the left edge of the iPad, releasing the adhesive as you go. The adhesive is thin here due to the digitizer along the whole left side. Make sure the pick is not too deep (max 1/2 inch) 10 mm to prevent damaging the digitizer.
-
-
-
Using the opening pick that is still underneath the bottom edge of the iPad, release the adhesive along the bottom left corner.
-
-
-
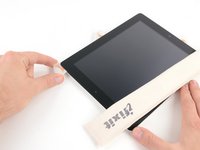
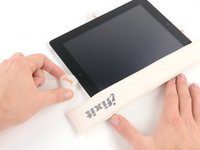
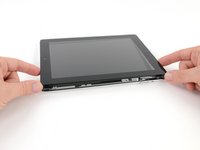
Using one of the opening picks, pry up the bottom right corner of the iPad and grab it with your fingers.
-
-
Outil utilisé dans cette étape :Microfiber Cleaning Cloths$3.99
-
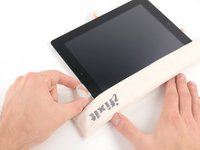
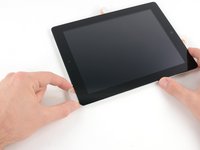
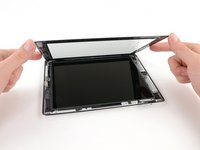
Holding the iPad by the top and bottom right corners, rotate the front glass away from the iPad.
-
-
-
Remove the four 2.0 mm Phillips #0 screws securing the LCD to the rear case.
-
-
-
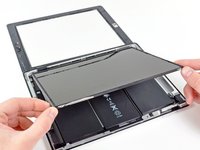
The front panel ribbon cables are connected beneath the LCD. To access them, you'll need to temporarily flip the LCD over and out of the way.
-
Lift the LCD from its long edge closest to the volume buttons and gently flip it out of the rear case—like turning the page in a book.
-
Set the LCD face down on the front panel.
-
-
-
Use the edge of a plastic opening tool to carefully flip up the retaining flaps on the two digitizer ribbon cable ZIF sockets.
-
-
-
Use the edge of a plastic opening tool to peel the digitizer cable off the shields on the logic board.
-
Carefully pull the digitizer cable off the adhesive securing it to the side of the rear case.
-
-
-
Pull the digitizer ribbon cable straight out of its two sockets on the logic board.
-
-
-
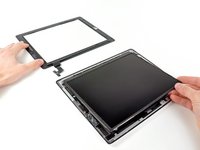
Lift the LCD from its long edge farthest from the digitizer cable and gently flip it toward the rear case—like closing a book.
-
While holding the LCD up, gently slide the front panel away from the iPad. Be careful not to snag the digitizer cable on the rear case or LCD.
-
Set the LCD back into the body for safekeeping.
-
-
-
Place the iOpener in the microwave and microwave it for thirty seconds on the highest power setting.
-
Place the iOpener over the home button on the front edge of the display.
-
-
-
Wedge the plastic opening tool under the right side of the home button assembly and pry upwards, releasing the adhesive on that side.
-
-
-
Using the technique above, release the adhesive on the left side of the home button.
-
Lift the home button mount off of the front panel.
-
-
-
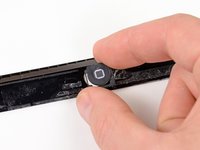
Insert the edge of plastic opening tool underneath the edge of the home button mounting bracket.
-
Slide the plastic opening tool along the retaining spring bracket, releasing the adhesive.
-
Remove the home button with mounting bracket from the front panel.
-
-
-
Follow the iOpener heating instructions described in the iOpener heating section at the beginning of this guide.
-
-
-
Use the flat end of a spudger to push the camera bracket off the adhesive securing it to the front panel.
-


To reassemble your device, follow these directions in reverse and use our iPad 2 CDMA Front Panel Adhesive strip guide to reattach the front panel.
Annulation : je n'ai pas terminé ce tutoriel.
95 autres ont terminé cette réparation.

10 commentaires de tutoriel
I would recommend that in cases of replacing shattered screens, that you tape the front panel glass with clear packing tape using overlapping strips, before you begin. This helps to ensure that the panel stays intact, and reduces the chances of puncturing the digitizing layer, and damaging the LCD upon removal.
You want to use clear tape so that you are able to see how any of the glass remnants are shifting during removal.
i used a hair drier instead of the microwave thing and it worked fine, also the replacement kit i bought on ebay for $22 did not come with the new adhesive, so be sure you get everything you need if not ordering from ifixit. I did get 2 small smudges on the LCD, these came off very easily with a q-tip and rubbing alcohol. My glass was shattered completely, so the guitar pick was of little use. I mostly had to scrape the tiny shards off with a 3/32" standard screwdriver. superb guide!!
Very good Guide, I wanted to thank you very much. I didn't have to buy a new iPad - saved a lot of money here!! Keep up the good work folks.
Note to self: Broken screens suck with these. Once you remove all the little pieces and get through that, it's very easy to pull apart from there. Like other people said, use tape to prevent glass pieces from flying at you and to keep the glass together during the prying process. Don't need to damage the product or your eyes.
this is a great guide !!! i just want to share a little trick with getting the glass off with the right temps. Heat guns are good but keep the temp no higher the the 150 to the 200 C mark max at about 3 to 6 inches away and never directly on the lcd as it might leave a patch. the iOpener is a great tool aswell. but the problem with both the heat gun and other heat type tool is that they tens not to be consistent through out, like one side is hot but the other has now gone cold. Try to find a sunny day, turn the iPad off and just leave the iPad in a window under the sunlight, it does get hot enough and not only that, the heat is uniform throughout the device so it easier to remove the glass. Good luck