Introduction
Retirez et remplacez la vitre incurvée de votre iPod Nano afin qu'il ait l'air tout neuf.
Ce dont vous avez besoin
-
-
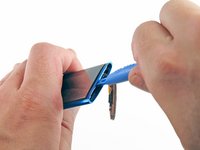
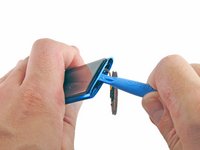
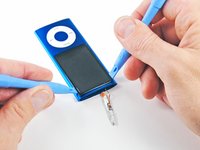
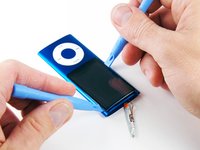
Insérez un outil d'ouverture pour iPod entre la coque extérieure et le cache supérieur près de l'écran.
-
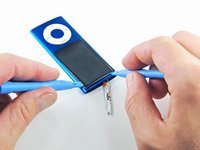
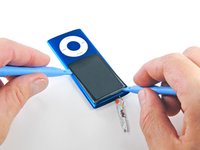
Soulevez l'outil d'ouverture pour iPod et retirez délicatement le panneau supérieur de l'appareil.
-
-


Pour remonter votre appareil, suivez les étapes dans l'ordre inverse.
Pour remonter votre appareil, suivez les étapes dans l'ordre inverse.
Annulation : je n'ai pas terminé ce tutoriel.
36 autres ont terminé cette réparation.
Merci à ces traducteurs :
100%


Ces traducteurs nous aident réparer le monde ! Vous voulez contribuer ?
Commencez à traduire ›

6 commentaires
This step by step guide is perfect for replacing the glass! There is no need to remove the click-wheel or the camera bezel - as seen in may other videos and guides. So stay away from the click wheel if you can - it's just glued in (there is no snap!) and it's really hard to put back in place again. And yes, ideally you can remove the glass without opening anything. It is just glued in and the new one will go in from the top. Good Luck!
I gave my homie my 8 gig when i bought my 16 gig. his girl dropped it and the glass screen cracked. took me no more then 5 minutes and i had it as good as new! Whoop Whoop, danke fo the instructions!
Dear Steven, To me exactly the same happened, although I was the person who got the Ipod and dropped it. So I do understand how to get the glass out, but how do I put a new one in? Just insert it and put everything back on? Should I use glue when I put the screen in? Or will it just stay there on its own? Thanks!
this was great and super easy! thanks so much