Traduction de l’étape 14
Étape 14

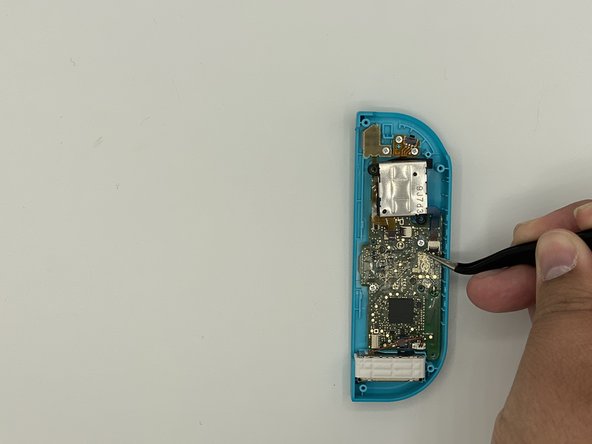


Removing the joystick 1/2
-
Remove the screws holding the joystick in place.
-
Unlock the ZIF connector and remove the ribbon cable using tweezers.
Vos contributions sont faites dans le cadre de la licence open source Creative Commons.