Info : Vous modifiez un tutoriel prérequis. Toutes les modifications apportées affecteront les 7 tutoriels qui comprennent cette étape.
Traduction de l’étape 6
Étape 6

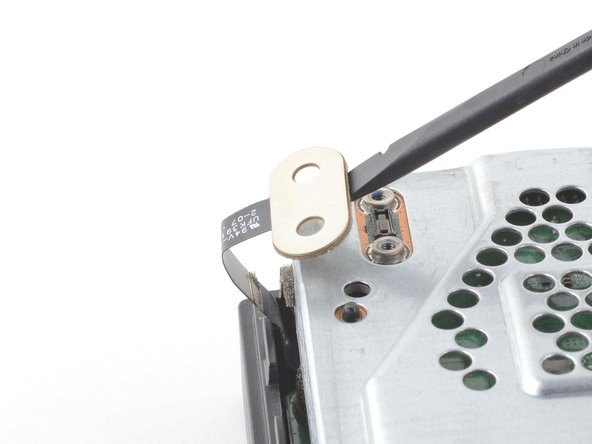


Detach the press connector
-
Insert the flat end of a spudger underneath the press connector on the side opposite of the ribbon cable.
-
Use the spudger to lift the press connector up and away from the upper metal case.
Vos contributions sont faites dans le cadre de la licence open source Creative Commons.