Traduction de l’étape 5
Étape 5
-
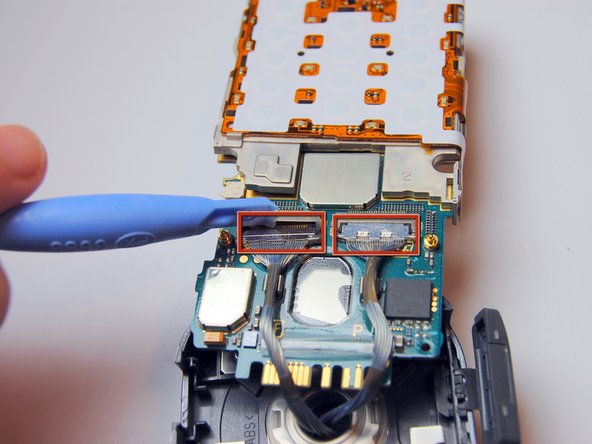
Remove the LCD cable connectors coming from through the hinge hole with a flathead screwdriver.
-
Now the two parts of the phone are separated.
| - | [* red] Remove the LCD cable connectors coming from through the hinge hole with a |
|---|---|
| - | [* icon_ |
| + | [* red] Remove the LCD cable connectors coming from through the hinge hole with a flathead screwdriver. |
| + | [* icon_reminder] Be sure to record which port each cable was in, including the orientation in which they were plugged into each socket. |
| [* black] Now the two parts of the phone are separated. |
Vos contributions sont faites dans le cadre de la licence open source Creative Commons.