Traduction de l’étape 3


-
Close off the water supply to the dwelling by turning the gate valve to the right side.
-
Next drain the tank and the supply line by opening the valve. Each installation could be different, depending on ow and where it is installed. Any installation should have a shut-off valve and a drain valve somewhere before entering the dwelling.
-
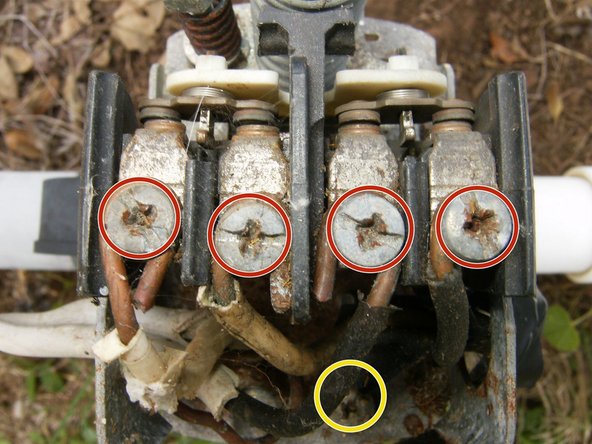
Loosen the 4 screws that hold the wires to the switch
-
The ground screw on the bottom of the switch shares the ground from the supply line and from the pump. Remove those as well.
-
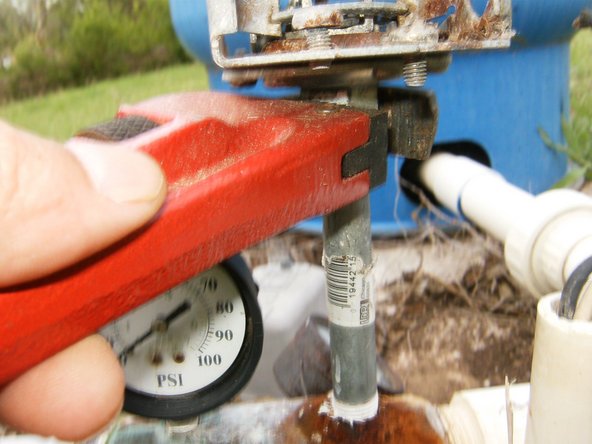
With the wires removed from the switch and the water line drained, remove the switch from the nipple attached to the check valve. Use a suitable wrench like an adjustable or in this case a pipe wrench
Vos contributions sont faites dans le cadre de la licence open source Creative Commons.