Introduction
The Google Pixel 3 XL is all dressed up in the latest flagship phone uniform: glass on the back and a notch on the front. But we’re headed past the shiny new facade, for a closer look at the insides. And there’s only one way to get there—with a teardown!
Looking for all the shiniest, newest teardown updates? Check out our Facebook, Instagram, or Twitter for all the latest. For teardowns delivered straight to your inbox, subscribe to our newsletter.
Ce dont vous avez besoin
-
-
Let's take a look at the tech that lies under the Pixel 3 XL's newly-notched exterior:
-
6.3" OLED display with QHD+ 1440 × 2960 resolution (523 ppi) and Gorilla Glass 5
-
Octa-core, 64-bit Qualcomm Snapdragon 845 processor (2.5 GHz + 1.6 GHz) with 4 GB LPDDR4x RAM
-
12.2 MP, ƒ/1.8, OIS main camera with dual-pixel phase detection autofocus; dual 8.1 MP selfie cameras
-
64 GB or 128 GB built-in storage
-
Qi wireless charging
-
IP68 water resistance
-
Android 9.0 Pie
-
-
-
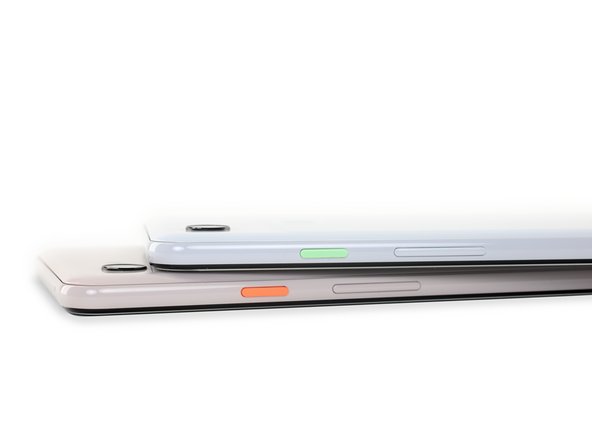
Before diving inside, lets take a look at the sleek exterior of the Pixel 3 XL alongside its smaller sibling.
-
The new backing on these phones looks a lot like the hybrid cover from the last two generations, but this time around it's all a single piece of glass (with a partial matte finish).
-
Turning to the front, we spy an extra camera sitting atop both displays.
-
That's right—while everyone else has been throwing more cameras on the back, Google turned around and added an ultrawide (19 mm equivalent) camera next to the existing wide angle (28 mm equivalent) camera.
-
Exclusive to the Pixel 3 XL is a trendy little
robotnotch that greets us as we turn on the phone.
-
-
-
The front-firing speakers on both Pixel 3's leave the aluminum frame devoid of any speaker grilles.
-
Stacked together, it's obvious that one of these phones is a little more XL than the other, but there's not much difference otherwise.
-
USB-C charging port, SIM card slot, and 80's themed power buttons are present and accounted for on both phones.
-
-
-
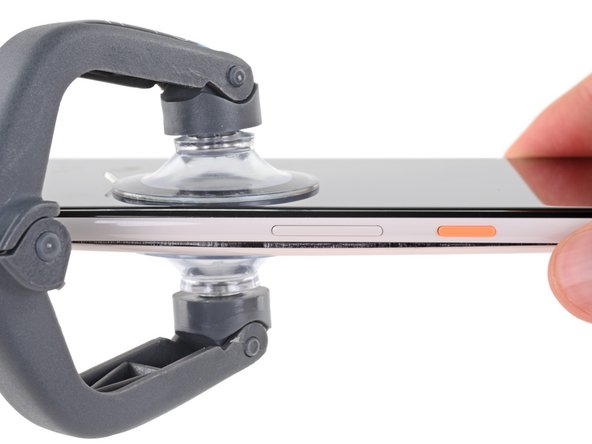
Now that we've worked our way around the exterior, it's time to head inside.
-
Experience tells us that a little suction and cutting is all that's required to coax the display open, but when that doesn't work we bring out the big (heat) guns.
-
It looks like the Pixel 3 XL still uses foam adhesive, but it's far more tenacious than the repair-friendly stuff we saw last year.
-
We pull out the trusty iSclack, expecting to separate the display assembly, but the rear cover yields first!
-
-
-
After struggling through quite a bit more adhesive than expected, we're in!
-
Thankfully, the fingerprint sensor cable is long enough to avoid being torn by over-zealous openers.
-
The view inside is pretty much what we expected: a shiny new wireless charging pad, a battery, a board, a couple cameras, and a fingerprint sensor living on the rear cover.
-
Slightly less expected are metal covers over the motherboard, and a SIM tray hidden somewhere underneath the speaker assembly.
-
Google thought they'd scare us off with a few screws? Well guess what: we came prepared with a Torx bit for these screws, and 111 other bits just in case.
-
-
-
The tough adhesive trend continues, holding the wireless charging coil to the Pixel's powerhouse. But we spy some respite!
-
The battery is secured with relatively repair-friendly stretch-release adhesive. So you get at least one chance at easy removal, if your technique is right!
-
We resort to flossing out the battery and accidentally cut a fragile ribbon cable hiding underneath! Forewarned is forearmed—a repair manual would have helped us in this arena.
-
Adhesive ordeals aside, the battery's out: the Pixel 3 XL is packing 13.2 Wh. That's actually down a smidge from the Pixel 2 XL's 13.6 Wh, and around the same as the original Pixel XL's 13.28 Wh.
-
The Pixel 3 XL still beats out the iPhone XS Max (12.08 Wh), and comes close to the Galaxy S9+ (13.48 Wh).
-
-
-
-
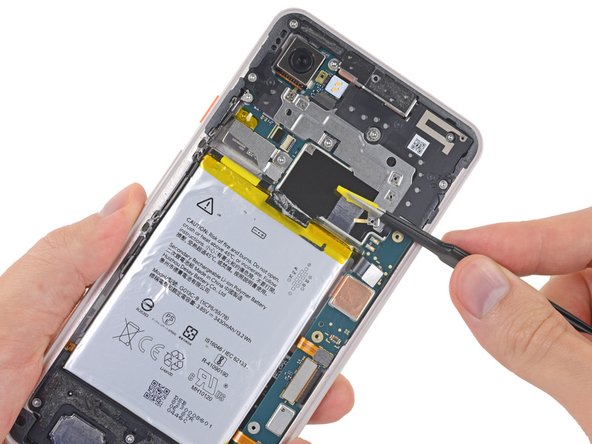
Above the crater where the battery once lay, we extract an antenna shielding the motherboard.
-
On the south end of the phone, we battle some more adhesive to release what seems like just another shield.
-
Another trap! This shield is actually the speaker housing, which we just split in half trying to access the components underneath.
-
-
-
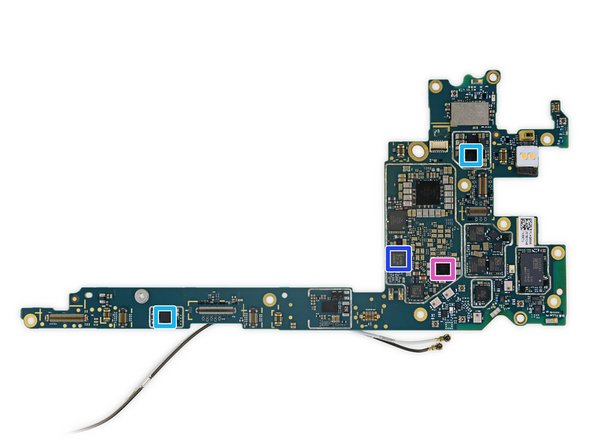
All this glue has us tired—let's sit down for some chips:
-
Micron MT53D1024M32D4DT-046 AIT:D 4 GB LPDDR4X DRAM layered over Qualcomm Snapdragon 845
-
Skhynix H28S7Q302BMR 64 GB NAND flash (universal flash storage)
-
Google SR3HX Pixel Visual Core (as seen in the Pixel 2 XL)
-
Qualcomm SDR845 RF Transceiver
-
Qualcomm QPM2622 and QPM2642 low and high band power amplifier module (PAMiD)
-
Qualcomm QET4100 40MHz envelope tracker
-
Qualcomm PMI8998 PMIC
-
-
-
Maybe just a couple more...
-
Google H1C2M Titan M security chip
-
IDT P9221 Qi wireless charging receiver
-
Qualcomm WCD9340 Aqstic audio codec
-
Qualcomm QDM3620, QDM3670, QDM3671 Diversity Receive Modules
-
Qualcomm PM845 power management IC
-
Murata 1QB SS8601001, likely a WiFi module
-
Qualcomm QPM2635, likely a mid-band power amplifier module
-
-
-
Okay just a little more, we can't help ourselves:
-
Cirrus Logic CS40L20 audio amplifier
-
Bosch Sensortec BMI160 16-Bit, 3-Axis accelerometer/gyroscope
-
Bosch Sensortec BMP388 pressure sensor
-
Maxim Integrated MAX11261 24-Bit, 6-Ch. delta-sigma analog-to-digital converter
-
Cirrus Logic CS35L36 audio amplifier
-
NXP Semiconductor PN81B NFC controller
-
Qualcomm PM8005 power management IC
-
-
-
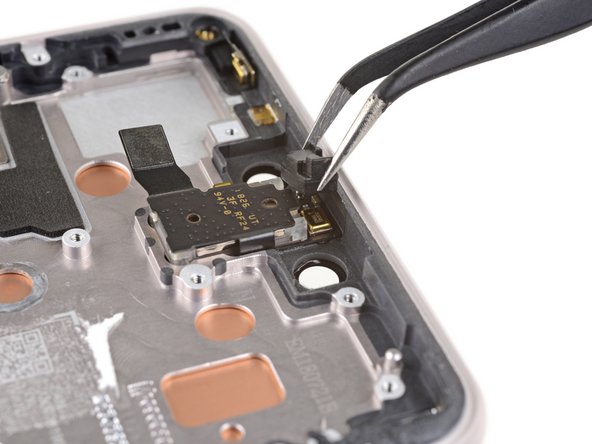
We carefully extract the
left eyeballwide angle camera, which is lightly adhered to the frame. -
On the back, Google is again betting that AI can help a single sensor to do the work of two.
-
Based on early reviews, they may be right. Word on the street is, this is a slightly upgraded Sony IMX363 sensor—the rest is up to the Pixel Visual Core.
-
A Knowles MEMS microphone is also seen in the top center of the case
-
-
-
The daughterboard comes out without any fuss, taking the USB-C port, SIM tray, and some antenna hardware along with it.
-
The vibration motor is a little more reluctant to leave its home, but our Halberd Spudger can be very persuasive.
-
The strain gauges come out looking just as huggable as ever.
-
-
-
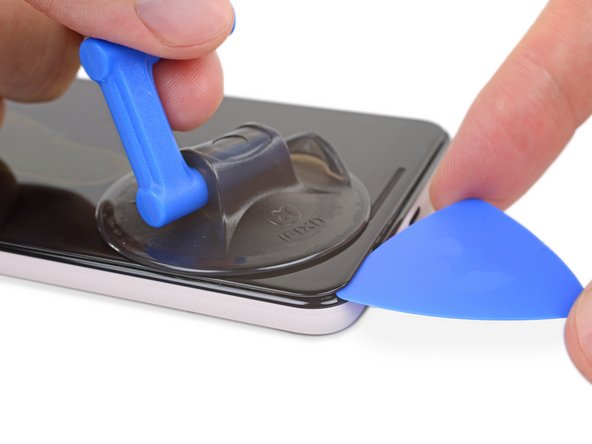
In the name of science, we opt to dismantle our display to learn from whence it came. Its defenses are strong, but no match for heat, patience, and a can-do attitude.
-
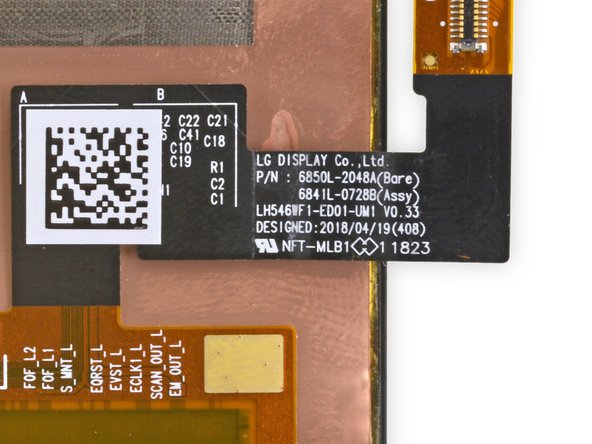
Drumroll please.... it's a Samsung! Rumors were all over the place, but it looks like Google is going with Samsung's trusty AMOLED panels this year.
-
Samsung's panels should be a little more reliable than last year's, but unfortunately this one comes with a Samsung-esque repair process as well.
-
Last, but not least, a display chip sitting alone on the display cable:
-
Samsung S6SY761X touch controller (as seen on the S9+)
-
GigaDevice GD25LQ80 8 Mb serial flash memory
-
-
-
Here are all the pretty parts that are packed into this
GalaxyPixel! -
Hungry for more teardown treats? The video team is here to please with the Pixel 3 video teardown!
-
It seems like the Pixel has been hanging out with the troublemaking Galaxy line, leaving it with familiar-looking antenna assemblies, a stubborn battery, and a tough-to-replace display—manufactured by Samsung itself!
-
Not only will swapping a cracked screen require a complete phone disassembly, but you've gotta think about the back now, too. The Pixel 2 XL rear glass covered 20% of the phone— the Pixel 3 XL’s rear panel is 100% crackable. That doesn't bode well for repairability...
-
- The only screws are standard T3 Torx fasteners.
- Repair-friendly stretch-release adhesive secures the battery.
- O-rings and adhesives for waterproofing complicate repairs, but make difficult liquid damage repairs less likely.
- Display repairs are much more difficult than previous models, requiring complete disassembly of the phone.
- To service any component, you'll have to painstakingly un-glue (and later re-glue) the glass rear panel.
- Front and back glass means increased vulnerability to drop damage.


Dernières pensées
Indice de réparabilité


(10 étant le plus facile à réparer)
43 commentaires
It’s been rumored that the front stereo speakers are louder and more crisp than the 2XL. Is there a visual size difference in the speakers themselves?
The new speaker housing looks a little bigger and might be sealed better than the old one. I’m no speaker expert though, so I’m not sure how much of a difference the new design makes, or if the driver is just better.
To be clear, are BOTH the Pixel 3 and 3XL using Samsung screens? Please say yes.
I came to ask the same question, so I'm subscribing to hear the answer!
Surprise: it’s a LG panel! We’ve added step 14 to reflect this. Thank you for all your patience!