Introduction
Since Apple's announcement day, we've been anxiously awaiting the chance to delve into their latest and greatest tech. Today, we're kicking off our teardown trifecta with the iDevice that boasts both the greatest surface area and the highest number of cameras: the iPhone 7 Plus.
Looking for even more teardown action? Check out our Apple Watch Series 2 teardown for the first look at the cutting edge of wearable tech.
Our teardown trio is just getting started. Follow along on Facebook, Instagram, or Twitter for the latest news from the repair world.
Ce dont vous avez besoin
Vidéo d'introduction
-
-
There's a lot to learn about what's hidden inside the "best, most advanced iPhone ever"—but first, let's take a moment to review what we already know:
-
Apple A10 Fusion processor with embedded M10 motion coprocessor
-
32, 128, and 256 GB onboard storage capacity (jet black model not available in 32 GB)
-
5.5-inch multitouch IPS Retina HD display with 1920 × 1080 pixels (401 ppi)
-
Dual 12 MP wide-angle and telephoto cameras with f/1.8 and f/2.8 apertures (respectively), 2x optical zoom, and 10x digital zoom
-
7 MP FaceTime HD camera with f/2.2 aperture and 1080p HD recording capability
-
Solid-state Home button with Touch ID, driven by new Taptic Engine
-
802.11a/b/g/n/ac Wi‑Fi + MIMO Bluetooth 4.2 + NFC
-
-
-
The dimensions of the iPhone 7 Plus are identical to those of its predecessor, at 158.2 mm × 77.9 mm × 7.3 mm—and yet it's slightly lighter, at 6.63 oz (vs. the 6s Plus at 6.77 oz). Hopefully Apple didn't remove anything important.
-
The 7 Plus is also stamped with a new model number: A1785.
-
For those more inclined to the dark side, Apple is now offering matte black and scratchable jet black versions of the iPhone 7 Plus, in addition to the already available silver, gold, and rose gold colors.
-
The 7 Plus also drops some of those unsightly antenna lines of old, in favor of a more subtle appearance.
-
Perhaps the most noticeable difference is the Lightning to 3.5 mm headphone jack adapter included in the box. It's going to take some courage for us to move on from the headphone jack. Sorry baby adapter. It's not you, it's us.
-
-
-
Before we dig into this three-eyed monster, we indulge ourselves with a sneak peek thanks to our friends at Creative Electron.
-
What advantage does the superpower of X-ray vision grant?
-
For starters, we can see that the headphone jack got kicked out to make space for more Taptic Engine.
-
Closer inspection shows a new, second lower speaker grille that leads... nowhere? Interesting.
-
We can also see the new third eye in the camera array of the iPhone 7 Plus. What wisdom and vision does it hold? Let's find out!
-
-
-
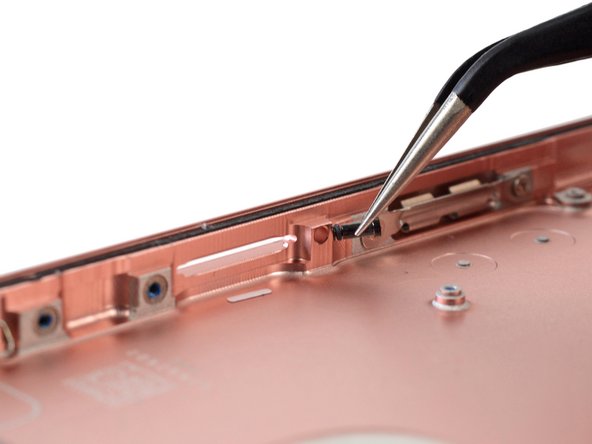
Apple may have gotten rid of the headphone jack, but clearly stays loyal to the Pentalobe. Two now-familiar screws guard each side of the Lightning connector.
-
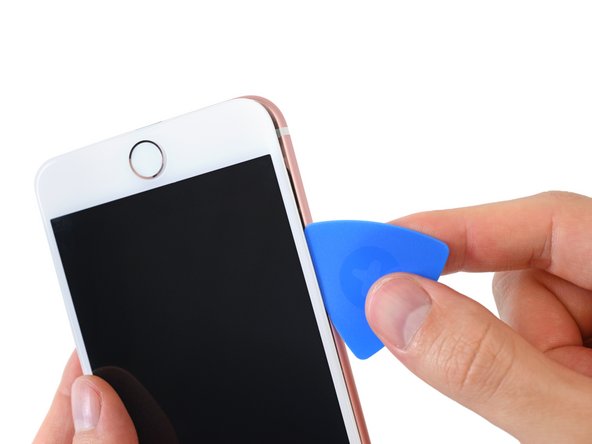
Eager to see past the rose gold exterior, we perform some forceful iSclack-ing and a great deal of prying to get past the intense adhesive.
-
-
-
What is this madness? The 7 Plus bizarrely opens to the side, despite the familiar clips at the top of the phone that help align the display as in previous models.
-
We got lucky and didn't rip the display cables along the middle-right side. Thankfully, the top cable has some slack.
-
Opening the 7 Plus reveals lots of black and white gooey adhesives running along the perimeter of the phone.
-
-
-
Inside we find an army of courageous tri-point screws guarding the cable bracket that covers the battery connector and two of the display cables.
-
A second platoon of tri-points secure the bracket for the long and springy upper component display cable.
-
We dispatch our own
weaponryscrewdriver and force the bracket to surrender so we can continue our mission into the heart of the iPhone 7 Plus.
-
-
-
In place of the headphone jack, we find a component that seems to channel sound from outside the phone into the microphone... or from the Taptic Engine out.
-
Teardown Update: According to Apple, this plastic component is a barometric vent. With the added ingress protection afforded by the watertight seal, the iPhone uses this baffle to equalize the internal and atmospheric pressures in order to have an accurate altimeter.
-
Mechanical buttons are a thing of the past when you have a Taptic Engine! This sleek engine uses haptic feedback to simulate the push of a button, without having a real button.
-
-
-
What do you do when things get shaky? You X-ray everything that moves. And that is exactly what we did with the Taptic Engine.
-
"Taptic Engine" sounds like something found on an intergalactic warship. In truth, we really are just working with a tiny linear actuator and some zig-zag springs that shake a weighted core.
-
To be fair, this is the largest piece of mechanical machinery that we've seen in a smartphone.
-
The Taptic Engine translates the pressure on the new solid state home button into finely controlled vibrations.
-
We all love the sensation of clicking a button. The Taptic Engine's precise oscillation is designed to provide many types of tactile feedback, including the sensation of pressing a mechanical button.
-
-
-
-
Apple's got us seeing double as we pull out the camera array with two separate sensors, two lenses, and two little connectors.
-
The two 12 MP cameras—one wide-angle with Optical Image Stabilization (OIS), just like in the iPhone 7, the second a telephoto—allow for optical zoom.
-
Both cameras also sport a new image sensor that Apple claims is 60% faster and 30% more energy efficient than previous iPhones.
-
We use our X-ray vision to initiate a staring contest with the camera array. Without blinking, we can see four metal pads around one camera. We're guessing these are the magnets that enable OIS.
-
Analog Devices AD5842 OIS driver
-
-
-
Plucking the logic board from the 7 Plus is much easier than with its predecessor. There's no need to flip over the logic board to remove the final connections.
-
Peeling up the EMI stickers, we spy what might be some additional heat management.
-
-
-
The shields are down! The logic board is clear and ready for inspection. Let's see what this puppy is packing!
-
Apple A10 Fusion APL1W24 SoC + Samsung 3 GB LPDDR4 RAM (as denoted by the markings K3RG4G40MM-YGCH)
-
Qualcomm MDM9645M LTE Cat. 12 Modem
-
Skyworks SKY78100-20 Power Amplifier Module
-
Avago AFEM-8065 Power Amplifier Module
-
Avago AFEM-8055 Power Amplifier Module
-
Universal Scientific Industrial O1 X4 (likely the M2800 "Trinity" SIP)
-
Bosch Sensortec BMP280 Barometric Pressure Sensor
-
-
-
-
But wait, there are even more ICs on the back!
-
Apple/Cirrus Logic 338S00105 Audio Codec
-
Cirrus Logic 338S00220 Audio Amplifier(x2)
-
Lattice Semiconductor iCE5LP4K iCE FPGA
-
Skyworks SKY13702-20 Diversity Receive Module
-
Skyworks SKY13703-21 Diversity Receive Module
-
Avago LFI630 183439
-
NXP Semiconductor CBTL1610A3 Display Port Multiplexer (likely)
-
-
-
Just a few last ICs on the back of the logic board:
-
TDK EPCOS D5315 Antenna Switch Module (likely)
-
Texas Instruments SN2400AB0 Battery Charger IC (likely)
-
Texas Instruments TPS65730A0P Power Management IC
-
Texas Instruments LM3539 Backlight Drivers
-
Texas Instruments SN61280 Power Management
-
ON Semiconductor DC-DC Converter (likely)
-
And as always, thanks to our silicon experts at Chipworks for helping identify the key ICs at play! Head over to their teardown page for an in-depth analysis of the iPhone 7 control hardware.
-
-
-
Tiny ribbon cables attach the Lightning connector assembly to the microphones, which are firmly adhered to the speaker grilles.
-
As predicted, the speaker grilles have ingress protection to keep the internals nice and dry.
-
This cable assembly also features the most substantial gasketing we've seen on a Lightning connector. While last year's models used foam adhesive to keep out water and dust, this one features a full-on rubber gasket, capable of holding back a 50 meter column of water.
-
-
-
Pausing our rear case excavation, we take a moment to examine the display assembly and its respective bits.
-
From the front face, it looks identical to the 1920-by-1080 displays we've popped off the iPhones 6 and 6s, but there are some notable changes: This guy supports a wider P3 color gamut than its older siblings, and is 25% brighter.
-
We also notice a water damage indicator hanging out on the left edge of the display EMI shield. This gadget may be water resistant, but it looks like Apple won't be on the hook when you take your phone for a swim.
-
-
-
After we free a few standard Phillips screws, the earpiece speaker practically falls out from under the front-facing camera.
-
The front-facing camera cable assembly is a little more of a handful. Normally when we're served something this tangled up, it comes with meatballs.
-
All told, the upper components number:
-
Front-facing camera
-
MEMS Microphone
-
Stereo-enabling speaker
-
Proximity sensor and ambient light sensor
-
-
-
Last to leave the display assembly: the home button.
-
It's more like the home touch sensor really. No buttons about it.
-
Analog Devices AD7149 Capacitance Sensor Controller
-
For those of you waiting with bated breath, it appears that the new solid state home button is removable. It won't be a simple procedure, with tiny tri-points and light adhesive on the cable—but there is no longer a delicate gasket to replace. Overall, it is a step in the right direction.
-
-
-
We're able to pull out the ring/silent switch, complete with gasket, and the rest of the button cable.
-
However, the volume and power buttons are nestled snugly in the case, defying conventional removal.
-
The design looks somewhat reminiscent of past Apple patent filings for waterproof buttons, and requires some deft disassembly technique.
-
- The battery is straightforward to access. Removing it requires specialty screwdrivers and knowledge of the adhesive removal technique, but is not difficult.
- The solid state home button eliminates a common point of failure.
- Improved water and dust protection greatly reduces the need for repairs associated with environmental damage and accidental spills (but also makes some repairs more difficult).
- The display assembly continues to be the first component out, simplifying screen repairs, but the procedure has grown more complicated with improved waterproofing measures.
- With the addition of tri-point screws, many iPhone 7 Plus repairs will require up to four different types of drivers.


Dernières pensées
Indice de réparabilité


(10 étant le plus facile à réparer)
153 commentaires
%#*@ i was so eagerly waiting for this ! I'm like ifixit hasn't uploaded the first set of teardown and here we go
Me too! Love their work.
Has anyone tried to remove the home "button" yet? Worried about being able to transfer touch id to replacement screens......
I think the home button is still transferrable to replacement screen based on the screws right under its plate, it should have a small connector to the LCD assembly itself.
That it what I am hoping based on the video that came out Wednesday, but then they did not remove it. I own a repair shop, I am sitting on the edge of my seat here ;)
rneeley -