Introduction
Suivez ce tutoriel pour remplacer un ventilateur gauche cassé ou défectueux dans votre Asus ROG Ally. Il s'agit du ventilateur situé sur le côté gauche lorsque vous utilisez votre appareil. Vous pouvez également utiliser ce tutoriel pour nettoyer le ventilateur.
Si votre ventilateur tourne lentement, fait du bruit ou ne tourne pas du tout, vous devrez peut-être le remplacer.
Avant d'acheter un nouveau ventilateur, il est conseillé de retirer votre ventilateur actuel et de nettoyer la poussière et la saleté qui pourraient s'y être accumulées ; c'est peut-être l'origine du problème. Si le ventilateur rencontre toujours des problèmes après le nettoyage, vous devrez le remplacer.
Ce dont vous avez besoin
-
-
-
Éteignez complètement votre appareil et débranchez tous les câbles.
 Demander à FixBot
-
-
-
-
Outil utilisé dans cette étape :FixMat$36.95
-
Utilisez un tournevis cruciforme #0 pour retirer les cinq vis de 17,2 mm de long, qui fixent le bord supérieur et les coins inférieurs de la coque arrière.
-
Utilisez un tournevis cruciforme #0 pour desserrer complètement la vis captive restante au centre du bord inférieur. Cela devrait créer un petit espace entre la coque arrière et le châssis.
-
-
-
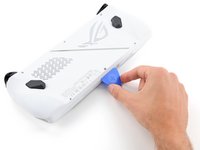
Insérez un côté plat d'un médiator entre le bord inférieur de la coque arrière et le châssis, près de la vis captive.
-
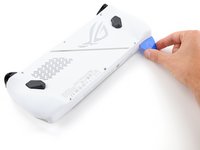
Inclinez le médiator vers le haut et glissez-le sous la coque arrière.
-
-
-
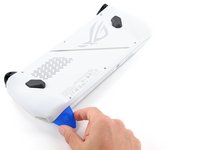
Faites glisser le médiator le long du bord inférieur et autour des coins de la coque arrière, pour détacher les clips qui la maintiennent en place.
-
-
-
Soulevez le bord inférieur de la coque arrière pour détacher les clips restants.
-
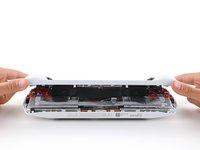
Retirez la coque arrière.
-
-
-
-
-
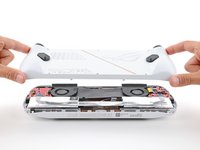
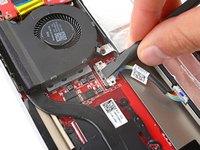
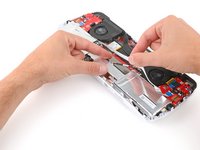
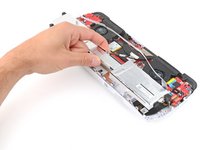
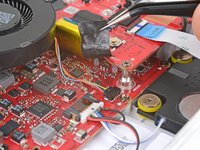
Utilisez vos doigts pour soulever et retirer le cache en plastique noir situé entre les ventilateurs.
-
-
-
-
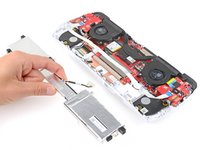
Utilisez l'extrémité plate d'une spatule (spudger) pour pousser délicatement la barre de verrouillage et la détacher du connecteur.
-
-
-
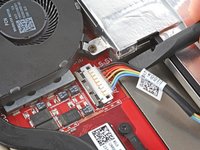
Insérez l'extrémité plate d'une spatule sous le centre du connecteur de batterie.
-
Soulevez le connecteur vers le haut et hors de sa prise, afin de déconnecter la batterie.
-
-
-
-
Outil utilisé dans cette étape :Tweezers$4.99
-
Utilisez un tournevis cruciforme #00 pour retirer les quatre vis qui maintiennent la batterie :
-
Deux vis de 9,6 mm de long, près du centre du bord supérieur.
-
Deux vis de 3,4 mm de long sur les bords gauche et droit.
-
-
-
Avec une main, retenez la nappe qui recouvre le haut de la batterie.
-
Avec votre main libre, faites glisser la batterie vers le haut et retirez-la.
-
-
-
-
-
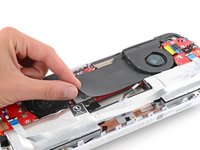
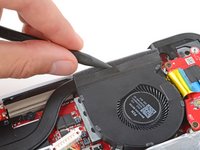
Insérez la pointe d'une spatule (spudger) entre l'adhésif situé sur le bord supérieur du ventilateur et la mousse du dissipateur thermique.
-
Faites glisser la spatule (spudger) le long de l'adhésif pour le séparer de la mousse.
-
-
-
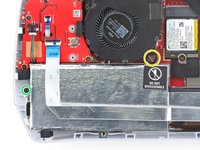
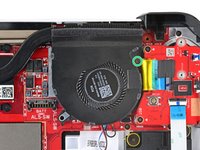
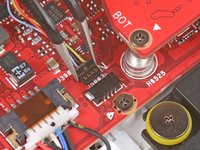
Avec un tournevis cruciforme #00, retirez la vis de 9,6 mm qui fixe le ventilateur gauche.
-
-
-
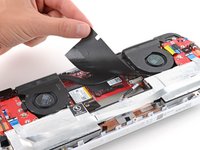
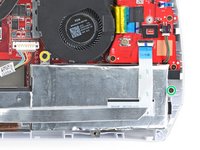
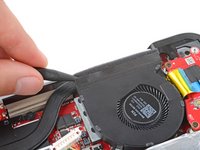
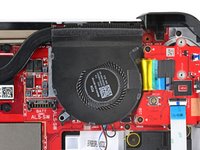
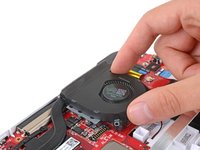
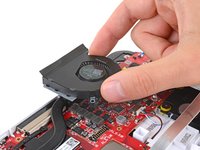
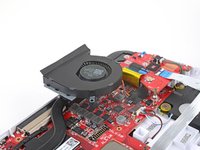
Soulevez délicatement le ventilateur et posez-le sur la mousse du dissipateur thermique afin d'accéder aux nappes du ventilateur.
-
-
Outil utilisé dans cette étape :Tweezers$4.99
-
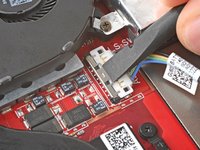
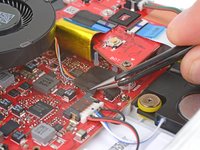
Avec une pincette, décollez et retirez l'adhésif qui maintient les câbles du ventilateur sur la carte mère.
-
-
-
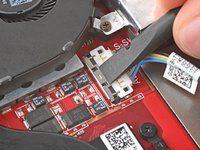
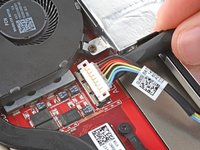
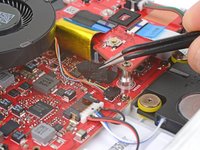
Avec une pincette courbée, tirez sur le connecteur du câble du ventilateur pour le sortir tout droit de sa prise.
-
-


Pour remonter votre appareil, suivez ces instructions en sens inverse.
Apportez vos e-déchets à un recycleur certifié R2 ou e-Stewards.
Votre réparation ne s’est pas déroulée comme prévu ? Consultez nos conseils basiques de diagnostic ou notre Forum pour obtenir de l’aide.
Annulation : je n'ai pas terminé ce tutoriel.
2 autres ont terminé cette réparation.
Merci à ces traducteurs :
100%

Translation Bot nous aide à réparer le monde ! Vous voulez contribuer ?
Commencez à traduire ›

