Cette traduction a été générée automatiquement et n’a pas encore fait l’objet d’une relecture humaine. Vous parlez cette langue ? Relisez-la.
Introduction
Ce tutoriel de réparation a été rédigé par l'équipe iFixit et n'a pas été approuvé par Google. Apprenez-en plus sur nos tutoriels de réparation ici.
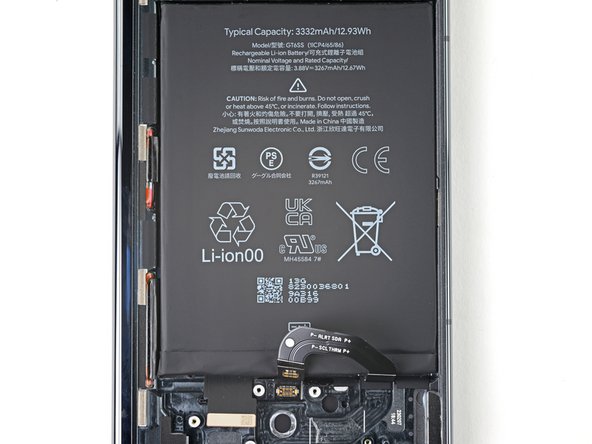
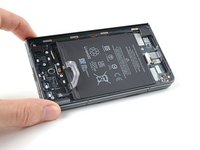
Utilisez ce tutoriel pour remplacer la batterie (clapet) de votre Google Pixel Fold.
Remarque : certaines photos de ce tutoriel ont été prises à différents stades du démontage. Les différences visuelles n'affecteront pas la procédure du tutoriel.
Ce dont vous avez besoin
-
-
-
Éteignez complètement votre téléphone et débranchez tous les câbles.
 Demander à FixBot
-
-
-
-
-
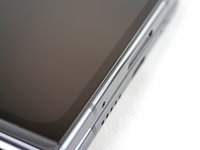
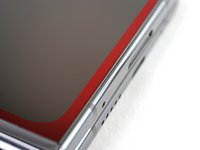
Insérez un outil d'éjection de carte SIM, un embout ou un trombone déplié dans l'orifice du tiroir de la carte SIM.
-
Appuyez fermement pour éjecter le tiroir de la carte SIM.
-
-
-
-
-
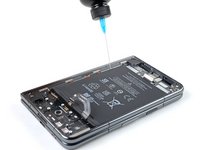
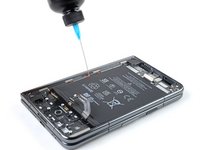
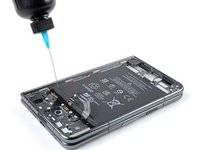
Chauffez un iOpener et appliquez-le sur le bord inférieur de l'écran pendant deux minutes.
-
-
-
Pendant que vous attendez que la colle ramollisse, notez les points suivants :
-
L'adhésif se trouve sous la bordure noir foncé qui entoure l'écran.
-
-
-
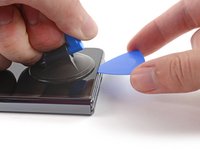
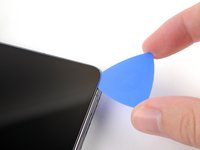
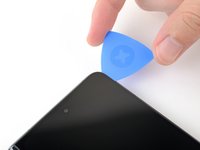
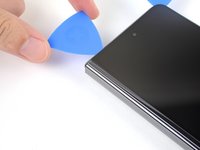
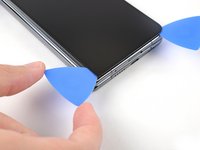
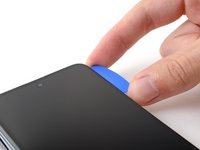
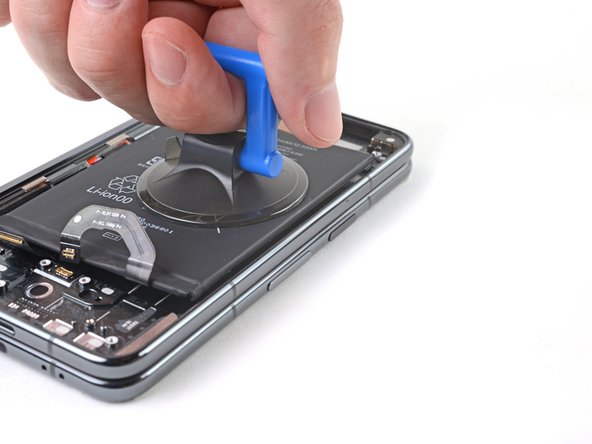
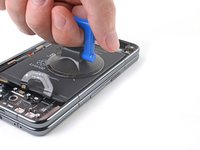
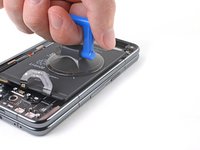
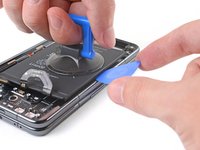
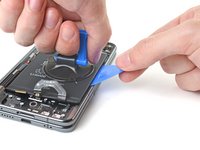
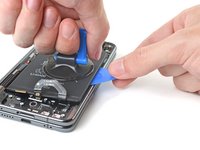
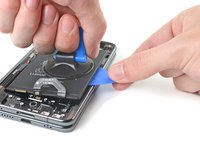
Appliquez une ventouse sur l'écran, aussi près que possible du milieu du bord inférieur.
-
Tirez fermement et régulièrement sur la ventouse, afin de créer un espace entre l'écran et le châssis.
-
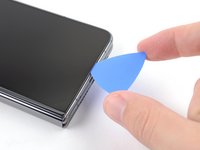
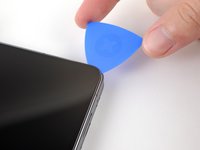
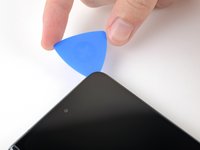
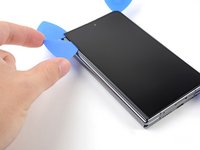
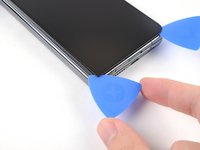
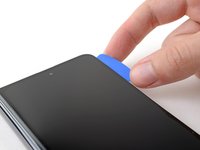
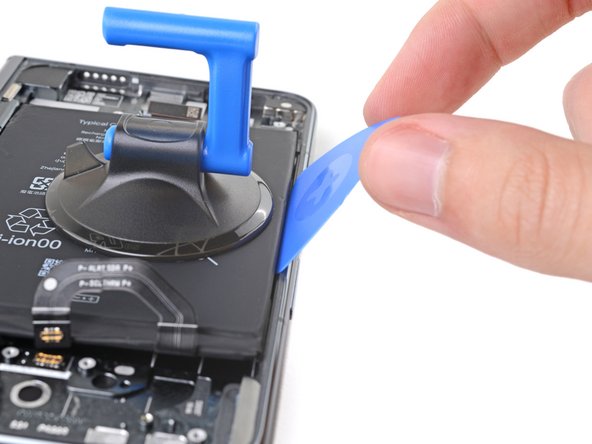
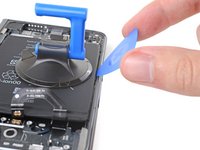
Insérez un médiator dans l'espace.
-
-
-
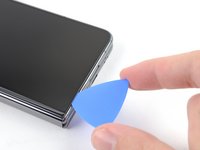
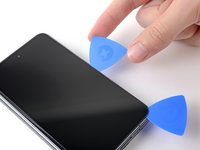
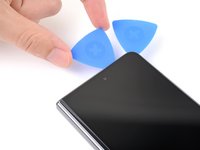
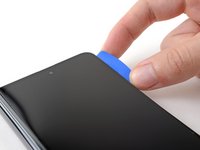
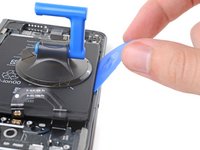
Faites glisser le médiator le long du bord inférieur pour séparer l'adhésif.
-
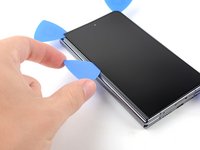
Laissez le médiator dans le coin inférieur droit avant de continuer.
-
-
-
Appliquez un iOpener chauffé sur le bord droit de l'écran pendant deux minutes.
-
-
-
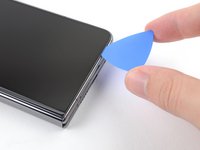
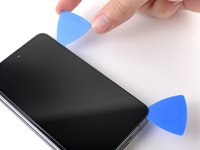
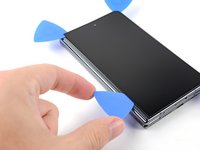
Faites tourner le médiator autour du coin inférieur droit pour séparer l'adhésif.
-
-
-
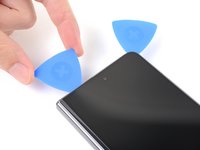
Insérez un nouveau médiator dans le coin inférieur droit.
-
Faites glisser le médiator vers le coin supérieur droit pour séparer l'adhésif.
-
Laissez le médiator dans le coin supérieur droit avant de continuer.
-
-
-
Appliquez un iOpener chauffé sur le bord supérieur de l'écran pendant deux minutes.
-
-
-
Faites tourner le médiator autour du coin supérieur droit pour le décoller.
-
-
-
Insérez un nouveau médiator dans le coin supérieur droit.
-
Faites glisser le médiator vers le coin supérieur gauche pour le décoller.
-
-
-
Appliquez un iOpener chauffé sur le bord gauche de l'écran pendant deux minutes.
-
-
-
Inclinez votre médiator, afin qu'il soit aussi plat que possible par rapport à l'écran.
-
Faites tourner le médiator autour du coin supérieur gauche pour séparer l'adhésif.
-
-
-
Insérez un nouveau médiator dans le coin supérieur gauche.
-
Faites glisser le médiator vers le coin inférieur gauche pour séparer l'adhésif.
-
-
-
-
Inclinez votre médiator, afin qu'il soit aussi plat que possible par rapport à l'écran.
-
Faites tourner le médiator autour du coin inférieur gauche pour séparer l'adhésif.
-
-
-
Une petite bande adhésive fixe l'écran près du coin supérieur droit du téléphone.
-
-
-
Chauffez un iOpener et appliquez-le dans le coin supérieur droit de l'écran pendant deux minutes.
-
-
-
Insérez un médiator sous le bord droit de l'écran, près du coin supérieur droit.
-
Enfoncez le médiator sous l’écran, aussi loin que vous le pouvez sans perdre votre prise.
-
-
-
Faites pivoter le médiator d'avant en arrière pour séparer l'adhésif.
-
-
-
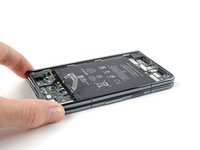
Faites pivoter le bord gauche de l'écran vers le haut et par-dessus le bord droit du téléphone.
-
Laissez l'écran posé à côté du téléphone avant de continuer.
-
-
Outil utilisé dans cette étape :FixMat$36.95
-
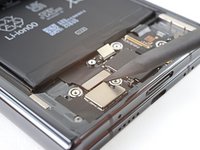
Utilisez un tournevis Torx Plus 3IP pour retirer les cinq vis de 2,5 mm de long, qui fixent le cache inférieur.
-
-
Outil utilisé dans cette étape :Tweezers$4.99
-
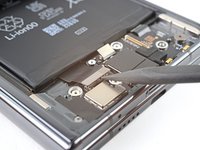
Utilisez une pincette ou vos doigts pour retirer le cache inférieur.
-
-
-
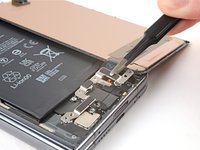
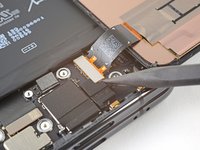
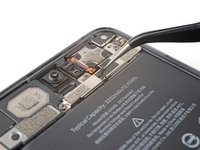
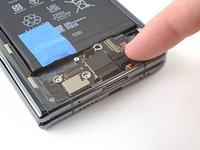
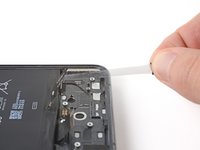
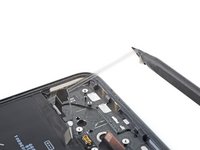
Utilisez l'extrémité plate d'une spatule pour soulever et déconnecter le connecteur à emboîter de la batterie.
-
-
-
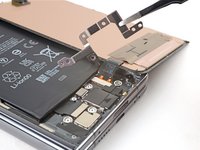
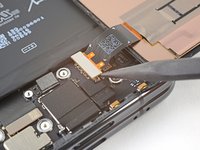
Insérez la pointe d'une spatule sous le bord court du connecteur à emboîter de l'écran, du côté du bas du téléphone.
-
Soulevez pour déconnecter le connecteur à emboîter de l'écran.
-
-
-
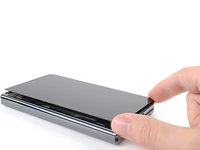
Retirez l'écran.
-
Saisissez votre écran par ses bords quand vous le manipulez.
-
Quand vous le posez sur votre plan de travail, assurez-vous que rien ne touche le bas de l'écran. Pensez à le poser sur un chiffon doux et non pelucheux.
-
-
Outil utilisé dans cette étape :Tesa 61395 Tape$8.95
-
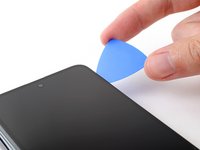
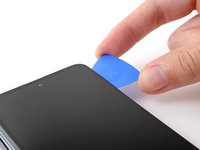
Si vous réutilisez votre écran, utilisez une pincette pour retirer les gros morceaux d'adhésif sur le pourtour de l'écran.
-
Faites de même pour enlever l'adhésif présent sur le châssis, y compris le petit adhésif situé en haut à droite du téléphone.
-
Utilisez de l'alcool isopropylique (> 90 %) et un chiffon non pelucheux pour retirer tous les résidus d'adhésif.
-
Consultez ce tutoriel pour (re)mettre de l'adhésif sur votre écran.
-
-
-
-
-
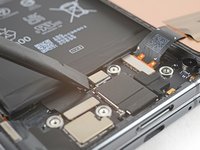
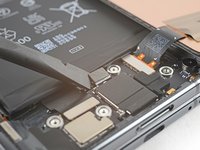
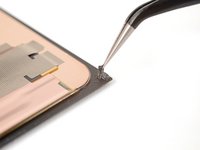
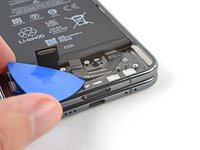
Avec une spatule (spudger), faites levier pour déconnecter le connecteur à emboîter de la nappe d’interconnexion inférieure.
-
-
Outil utilisé dans cette étape :Tweezers$4.99
-
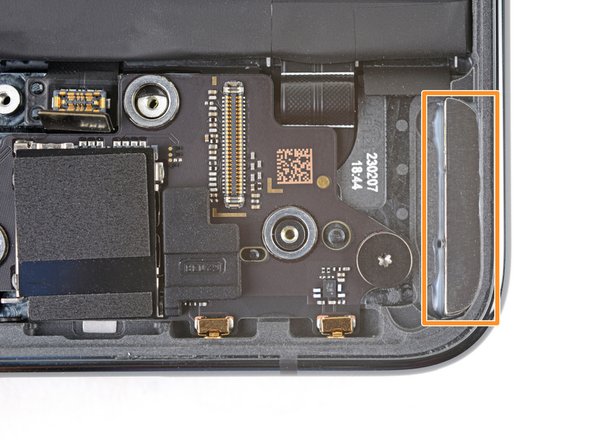
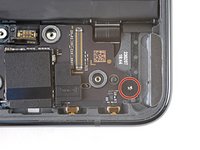
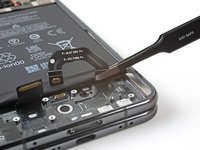
Avec un tournevis Torx Plus 3IP, retirez la vis de 2,2 mm de long qui fixe la carte inférieure.
-
Il y a un aimant dans le coin inférieur droit du téléphone. Lorsque vous retirez la vis à proximité, elle pourrait coller à l'aimant.
-
-
-
À l'étape suivante, maintenez la nappe d’interconnexion inférieure à l'écart avec vos mains ou en la fixant avec du ruban adhésif à faible adhérence.
-
-
-
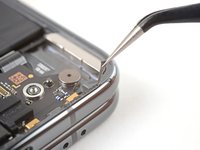
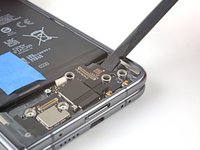
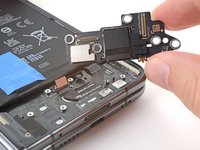
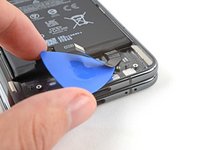
Avec une spatule (spudger), faites levier pour soulever la carte fille de son logement dans le châssis.
-
Retirez la carte fille.
-
-
-
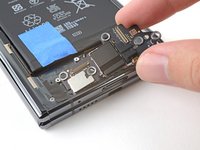
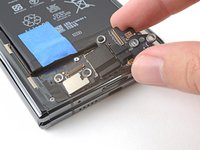
Faites glisser le bord gauche de la carte dans sa cheville d'alignement gauche.
-
Positionnez le bord droit de la carte au-dessus de sa cheville d'alignement droite.
-
Appuyez pour enclencher les connecteurs à ressort et fixer la carte inférieure.
-
-
-
-
-
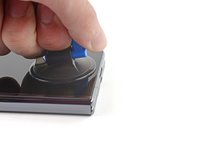
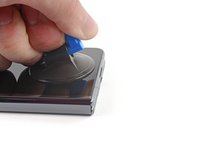
Chauffez un iOpener et appliquez-le sur la nappe de la batterie pendant deux minutes.
-
-
Outil utilisé dans cette étape :Tweezers$4.99
-
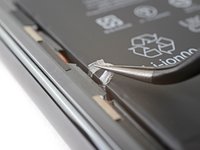
Glissez un médiator sous la nappe de la batterie pour détacher l'adhésif.
-
Avec une pincette ou vos doigts, déplacez la nappe de la batterie vers le haut pour exposer la languette de la bande adhésive étirable située en dessous.
-
-
-
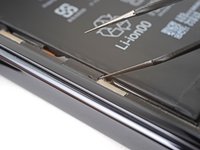
Les trois bandes situées le long du bord gauche sont très difficiles à détacher. Travaillez lentement et évitez de tirer sur les bandes avec des angles trop prononcés.
-
Les trois bandes situées le long du bord inférieur sont modérément difficiles à détacher.
-
-
-
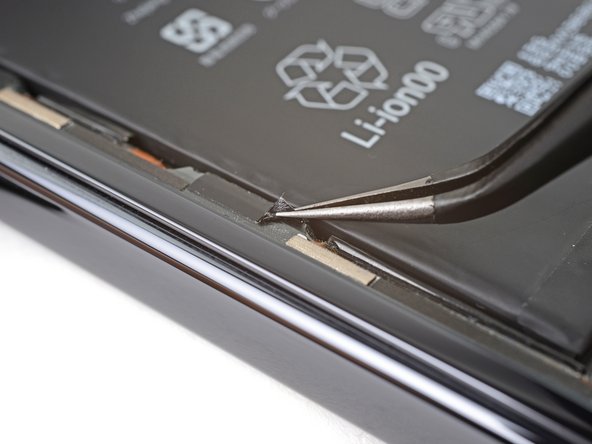
Avec une pincette, décollez les languettes d'extraction noires du châssis afin de pouvoir les saisir avec vos doigts.
-
-
-
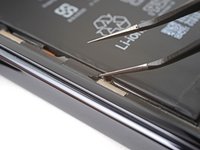
Tirez lentement et régulièrement sur chaque bande avec un angle faible. Laissez-leur le temps nécessaire pour s'étirer et se détacher de sous la batterie.
-
Si l'une des bandes adhésives casse, essayez de la récupérer avec vos doigts ou une pincette, puis continuez à tirer, mais ne faites pas levier sous la batterie.
-
Répétez l'opération pour les six bandes adhésives étirables.
-
-
-
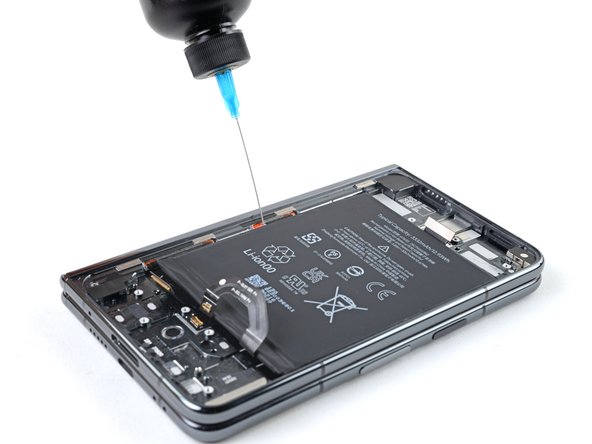
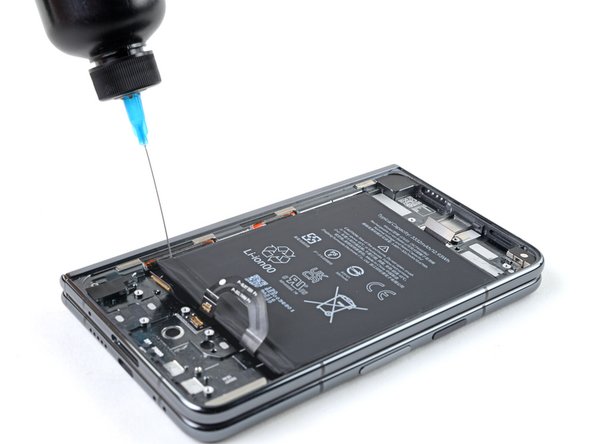
Appliquez quelques gouttes d'alcool isopropylique à haute concentration (>90 %) dans l'espace entre le châssis et le bord gauche de la batterie.
-
-
-
Inclinez le côté gauche du téléphone vers le haut pour laisser l'alcool isopropylique s'écouler sous la batterie.
-
Attendez une minute que l'alcool ramollisse l'adhésif.
-
-
-
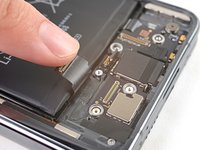
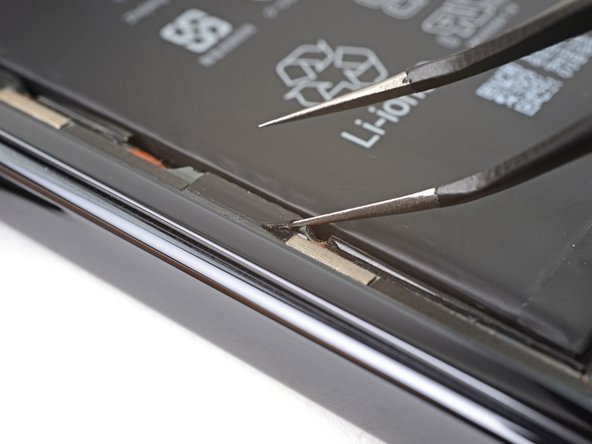
Fixez une ventouse sur la batterie, le plus près possible du centre du bord droit.
-
Tirez sur la ventouse avec une force ferme et constante pour créer un interstice entre la batterie et le châssis.
-
Insérez un médiator dans l'interstice.
-
-
-
Faites pivoter le médiator pour placer son bord long dans l'interstice.
-
-
-
Tirez sur la ventouse avec une force constante et soutenue, tout en faisant levier avec le médiator pour séparer la batterie du châssis.
-
Si vous ressentez une forte résistance, appliquez quelques gouttes supplémentaires d'alcool isopropylique et réessayez.
-
-
Outil utilisé dans cette étape :Tesa 61395 Tape$8.95
-
Si votre nappe d’interconnexion inférieure est toujours maintenue par du ruban adhésif, retirez-le maintenant.
-
Soulevez la batterie hors de son logement et retirez-la.
-
-


Pour des performances optimales, calibrez votre batterie de rechange après avoir terminé ce tutoriel.
Déposez vos e-déchets dans un centre de recyclage certifié R2 ou e-Stewards.
Comparez votre nouvelle pièce de rechange à la pièce d'origine ; vous devrez peut-être transférer les composants restants ou retirer les protections adhésives de la nouvelle pièce avant de l'installer.
Pour remonter votre appareil, suivez ces instructions en sens inverse.
Pour exécuter un test de diagnostic avec l'outil de diagnostic intégré du Pixel, cliquez ici.
Votre réparation Google Pixel Fold ne s’est pas déroulée comme prévu ? Consultez nos conseils basiques de diagnostic ou notre Forum pour obtenir de l’aide.
Annulation : je n'ai pas terminé ce tutoriel.
Une autre personne a terminé cette réparation.
Merci à ces traducteurs :
100%

Translation Bot nous aide à réparer le monde ! Vous voulez contribuer ?
Commencez à traduire ›

